Can You Clean a Roof Dryer Vent Yourself?
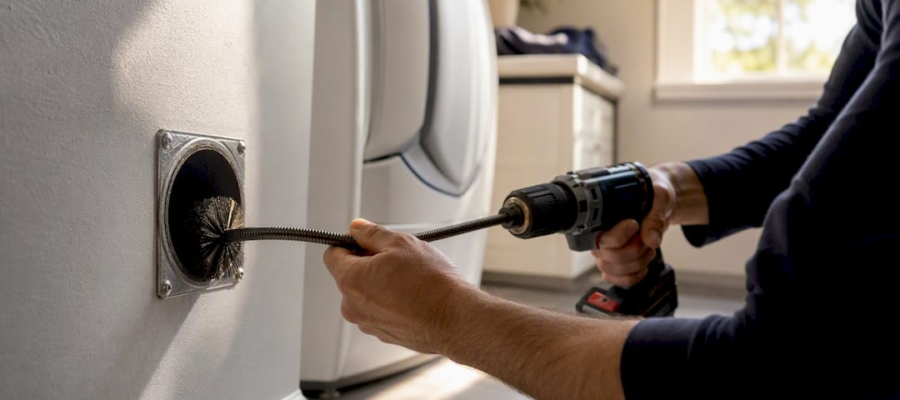
Most homeowners can clean a roof-terminated dryer vent safely from inside the house using a drill-powered flexible rod brush kit, no ladder required. This inside-out method works well for runs under about 20 feet with fewer than two 90-degree elbows, and it typically takes less than an hour.
DIY has real limits, though. Call a professional if:
- The vent run exceeds roughly 20 feet or has more than two tight elbows
- You can see a blocked cap, a stuck damper, or a nest from the ground
- The duct looks disconnected or crushed anywhere along its path
- You have any doubt about gas line safety near the dryer connection
Once you finish cleaning, run the dryer on an air-only cycle and check the cap from outside. Weak airflow after that test means something is still blocking the line.
Key Takeaways
Roof-terminated dryer vents can be cleaned safely from inside for most standard runs, but persistent weak airflow or roof access needs signal it’s time for professional help.
| Point | Details |
|---|---|
| DIY works for standard runs | Use a drill-powered flexible rod kit for vents under about 20 feet with fewer than two elbows. |
| Verify with an air-only test | Run the dryer empty, feel airflow at the connection, and check the cap from the ground. |
| Weak airflow means roof-cap blockage | If DIY cleaning doesn’t restore airflow, the clog is likely at the cap and needs pro access. |
| Clean at least once a year | Follow NFPA guidance, and clean every six months for heavy use or long vertical runs. |
| Roof-exit jobs cost more | Professional roof-exit cleaning typically runs $180 to $250 or more due to access and labor. |
| Amazon Air Duct Cleaning handles roof access | Their service includes camera inspection and documented before-and-after airflow proof for NY, NJ, and CT homeowners. |
Table of Contents
- Roof Dryer Vent Cleaning: Tools and Prep Before You Start
- How to Clean a Dryer Vent That Goes to the Roof
- When Should You Call a Professional for Dryer Vent Cleaning?
- How Do You Check the Roof Vent Cap Without Climbing Up?
- How Often Should You Clean a Dryer Vent That Exits Through the Roof?
- Sources
- FAQ
Roof Dryer Vent Cleaning: Tools and Prep Before You Start
Before you touch a single screw, gather the right kit. A rod-and-brush system rated for your vent’s length, a cordless drill with variable speed and clockwise rotation, a shop vac, a screwdriver or nut driver, a drop cloth, and a dust mask with eye protection cover nearly every standard job.
Prep takes five minutes but saves you a headache later:
- Unplug the dryer, or shut off the gas supply if it’s a gas unit
- Pull the dryer away from the wall enough to reach the vent connection
- Inspect the flexible hose and clamp for cracks, sagging, or crushed sections
- Estimate the total run length and count the elbows between the dryer and the roof cap
If you spot fragile or crumbling foil duct, signs of a disconnected joint, heavy compacted lint you can’t budge by hand, or water staining that suggests rot, stop here. Those conditions call for a professional, not a drill.
Pro Tip: Rigid metal duct handles a rotating brush far better than accordion-style foil duct, which can snag and tear. If you find foil duct during prep, plan on replacing it with rigid or semi-rigid metal duct before your next cleaning cycle.
How to Clean a Dryer Vent That Goes to the Roof
Once your vent qualifies for DIY work, follow this order. Skipping steps is how people end up with lint scattered across the laundry room or a brush stuck halfway up the wall.
- Cut power first. Unplug the dryer or shut off its gas valve, pull it away from the wall, and lay down a drop cloth to catch loose lint.
- Disconnect and vacuum. Remove the flexible hose from the back of the dryer and the wall port, then vacuum out any loose lint sitting in the dryer’s exhaust housing and the wall opening.
- Assemble the brush. Attach the drill adapter to the flexible rod kit, feed the brush head into the wall duct by hand first, then switch the drill to low speed with clockwise rotation.
- Work it through slowly. Feed rods in sections, spinning the brush as you go. At each elbow, ease the pressure and let the brush find its way through rather than forcing it. Low speed and progressive feeding dislodges lint without snapping a rod joint or punching through the duct wall.
- Pull back while spinning. Reverse the process slowly, still spinning, to drag loosened lint back toward you instead of packing it further up the line.
- Vacuum and reconnect. Clear the debris pile with the shop vac, reattach the flexible hose and clamp, then run the dryer on an air-only cycle.
- Verify from outside. Check the roof cap from the ground using binoculars or your phone’s zoom camera. You should see the damper flap open and steady airflow.
Run two to three passes through steps 3 through 5 if the first pass pulls out heavy lint. That’s normal for a vent that hasn’t been serviced in a year or more.
- If airflow still feels weak after multiple passes, stop
- Weak airflow after DIY cleaning usually means the blockage sits at the roof cap itself, out of reach of an interior rod kit
That’s your cue to move to professional service rather than keep feeding rods into a line that isn’t clearing.
When Should You Call a Professional for Dryer Vent Cleaning?
A few clear signals tell you it’s time to stop troubleshooting and pick up the phone. Vent runs longer than 20 feet, more than two tight elbows, persistent weak airflow after a full DIY cleaning, a visibly blocked cap, animal nests, or any uncertainty about gas line safety all point to professional work.
Roof access changes the entire calculation. A trained technician brings fall protection, proper ladder setup, rotary and reverse-air extraction tools that reach further than a household rod kit, and often a camera inspection to confirm the line is fully clear. Reputable companies also document the job with before-and-after airflow measurements and photos, which matters if you’re selling a home or filing an insurance claim later.
Cost snapshot: National averages for roof-exit dryer vent cleaning typically run $180 to $250 or more, compared to lower rates for straightforward wall-exit jobs. Some providers advertise flat roof-exit rates near $199 with airflow proof included.
What drives the price up:
- Roof access and vertical runs typically add $50 to $100 or more to the base price
- Heavy lint buildup or nest removal can add another $50 to $120
- Extra elbows and unusually long runs push jobs toward the higher end of the range
Ask for a flat rate up front. Pricing opacity is a common complaint in this industry, and a company that won’t quote a number before showing up is a red flag worth taking seriously.
How Do You Check the Roof Vent Cap Without Climbing Up?
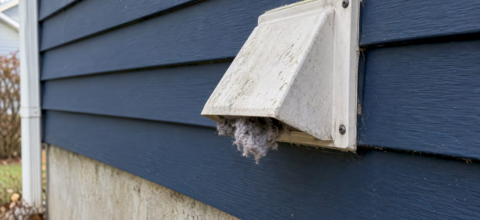
You don’t need to get on the roof to check whether the cap is working. Point binoculars or your phone’s zoom camera at the cap and look for lint clinging to the edges, a damper that won’t swing open, bird or squirrel nests, or ice buildup in cold months. Damaged flashing around the base is another warning sign, since it often means water is finding its way in around the vent penetration.

Roof access carries risk that interior cleaning doesn’t. Setting up a ladder safely, working on a pitched or slippery surface, and avoiding damage to flashing all require training most homeowners don’t have. A cracked shingle or disturbed flashing seal can turn into a roof leak that costs far more to fix than the vent cleaning itself.
Pro Tip: If your roof has any pitch steeper than a walk-up slope, or you see frost or moisture on the surface, don’t attempt to inspect the cap in person at all. A zoomed photo from the ground tells you almost everything you need to know.
A short list of things to never do yourself:
- Don’t climb onto a steep or icy roof to inspect or clean the cap
- Don’t remove flashing or attempt to reseal the roof penetration on your own
- Don’t try complex rooftop repairs without proper fall protection equipment
How Often Should You Clean a Dryer Vent That Exits Through the Roof?
The National Fire Protection Association recommends cleaning dryer vents at least once a year, and failure to clean is one of the leading contributors to dryer-related fires. Households with pets, heavy laundry use, or long vertical roof runs should shorten that to every six months.
- Run an air-only test cycle and feel for strong airflow at the interior connection.
- Check the roof cap from the ground for a fully open damper and no visible lint.
- Snap a photo and note the date, useful documentation for insurance or if you’re renting out the property.
Professionals can add a quantified airflow measurement if you want a precise number rather than a hand-check. Many technicians also suggest scheduling the annual cleaning in early autumn, since a lint-clogged cap is far more likely to freeze shut once winter arrives.
A Field Perspective on Roof-Exit Dryer Vents
After years of service calls across roof-exit systems, the pattern is consistent: interior brushes solve most jobs, but the surprises show up at the cap. Disconnected duct joints behind walls, brittle foil flex that should’ve been replaced with rigid metal years ago, and roof caps packed solid with lint and nesting material account for the calls where a rod kit alone won’t cut it.
Inside-out cleaning is the right first move for a standard, short run. But when airflow stays weak after a proper DIY attempt, that’s usually the roof cap talking, and it needs a camera and rooftop access to confirm.
Book a Roof-Exit Dryer Vent Cleaning With Amazon Air Duct Cleaning
If your vent run is long, has multiple elbows, or the cap is out of safe reach, Amazon Air Duct Cleaning handles the roof access, ladder safety, and reverse-air extraction that a household drill kit can’t match. Every job includes a camera inspection and documented before-and-after airflow proof, so you’re not left guessing whether the line is actually clear.

When you call, ask for a flat roof-exit rate, photo and airflow documentation, and a written receipt for your records. Homeowners across New York, New Jersey, and Connecticut can book a dryer vent cleaning appointment directly, and same-day availability is often on the table if your vent needs attention before winter sets in.
Sources
- Struggling with Roof Dryer Vent Cleaning? Here’s How To Do It – HVAC FilterBuy
- NADCA presentation: Dryer Vent Cleaning (2025)
- How much does dryer vent cleaning cost? — Angi
- How to clean dryer vent without moving dryer: drill attachment method — Hunker
FAQ
Can You Clean a Roof Dryer Vent Without Going on the Roof?
Yes. Most standard roof-exit vents can be cleaned entirely from inside using a drill-powered flexible rod brush, with roof access only needed to verify the cap or when interior cleaning doesn’t restore airflow.
How Often Should a Roof Dryer Vent Be Cleaned?
The NFPA recommends cleaning dryer vents at least once a year, with every six months recommended for households with pets, heavy laundry use, or long vertical roof runs.

My Roof Dryer Vent Is Clogged. How Can I Clean It?
Disconnect the hose at the dryer, feed a flexible rod brush through the duct using a drill on low speed, work through each elbow slowly, and vacuum out the loosened lint before reconnecting.

What Is the Typical Cost for Dryer Vent Cleaning?
Roof-exit jobs typically run $180 to $250 or more due to access and labor, while standard wall-exit cleaning usually costs less; Amazon Air Duct Cleaning provides documented airflow proof with roof-exit service.
Recommended
- Should you clean the dryer vent on your own or hire a pro? – Amazon Air Duct Cleaning
- How Often Should You Clean Your Dryer Vent – Amazon Air Duct Cleaning
- DIY vs. Professional Dryer Vent Cleaning: All You Need to Know
- Professional Dryer Vent Cleaning Services | Same-Day Available