Homeowners: 55% Fewer Coil Microbes When HVAC UV Is Placed Right
For most homes, the right place for an HVAC UV lamp is mounted to irradiate the evaporator coil and drain pan directly. That location targets the wet surfaces where mold and bacteria actually grow. In-duct, airborne-focused lamps are a different tool entirely, and they only work when the system is sized correctly for dose. Either way, the installation needs an interlock or enclosure so that nobody in the house is exposed to UV-C light.
TL;DR:
- Installing UV lamps to irradiate the evaporator coil face and drain pan provides the most effective mold and bacteria control on wet surfaces.
- Proper placement depends on coil accessibility, airflow direction, and whether the goal is surface sterilization or airborne disinfection, with each requiring different design considerations.
- In-duct systems need correctly calculated dose, which varies based on airflow speed, lamp output, distance, and duct conditions, leading to widely different performance results.
- UV lamps should be installed with safety enclosures, interlocks, and correct electrical grounding, while regular cleaning and scheduled replacements maintain long-term effectiveness.
- Before installation, thorough coil cleaning, system inspection, and clear documentation from contractors ensure the UV system is effective and safe for ongoing use.
Table of Contents
- Best HVAC UV Light Placement for Coil and Drain Pan Protection
- How Your Installation Objective Changes the Right Placement
- Installation Checklist: Safety, Access, and Red Flags to Watch For
- Understanding UV Dose So You Can Ask Better Questions
- Maintenance Schedule to Keep UV Effective Long-Term
- What Amazon Air Duct Cleaning Checks Before Recommending a Placement
- Why Placement Beats Product When It Comes to UV Performance
- Get Your HVAC UV Lights Installed and Positioned Correctly
- Sources
- FAQ
Best HVAC UV Light Placement for Coil and Drain Pan Protection
If you only remember one thing about HVAC UV light placement, make it this: the evaporator coil face and the drain pan beneath it are where almost every residential installation should start. That’s where condensation collects, and condensation is what feeds mold, algae, and bacterial slime inside your system. The Lawrence Berkeley National Laboratory’s review of UV germicidal lighting identifies coil and drain-pan irradiation as the primary application for residential and light commercial systems, precisely because those wet surfaces are where microbial growth is most likely to take hold.
The lamp gets mounted so it has a direct line of sight to the coil face, usually on the access panel or on a bracket positioned a few inches away, angled to bathe as much of the coil surface as possible. The goal isn’t to sterilize the passing air. It’s to keep the coil itself from turning into a breeding ground for the biofilm that clogs fins, cuts airflow, and pushes musty odors through your vents every time the blower kicks on.
- Evaporator coil face: Mount the lamp where it directly irradiates the coil surface, typically inside the air handler cabinet near the coil access panel.
- Drain pan: Position a second lamp or angle the primary lamp so light reaches the pan, since standing condensate is a common growth site.
- Return duct (in-duct placement): Chosen specifically for airborne disinfection, not coil maintenance. It requires a properly designed dose, which most single-lamp coil installations are not built to deliver.
- Upstream (mixed-air) vs. downstream (supply-side): Upstream placement sits before the coil, in warmer ambient air; downstream sits after, in cooled and often more humid air.
- Upper-room or standalone room UV units: Worth considering when ductwork access is poor or when a specific room, like a basement with chronic moisture, needs treatment HVAC placement can’t reach.
Return duct or supply duct installations aim at a completely different target: the air itself, as it moves past the lamp. This is where things get more technical, and where a lot of the confusion around HVAC UV light placement actually starts. A coil lamp doesn’t need to kill much of anything in the moving airstream to do its job. An in-duct lamp does, and that means the design has to account for how fast air is moving past the bulb and how long it stays in the light’s path.
Upstream placement, on the mixed-air side before the coil, tends to run in warmer ambient conditions, which keeps lamp output higher. Downstream placement, after the coil on the supply side, sits in cooler and more humid air, which can reduce a bulb’s germicidal output depending on the lamp technology. Neither position is universally correct. The AIVC’s life-cycle cost modeling of in-duct UVGI systems found that upstream placement can be more cost-effective in some modeled scenarios simply because the warmer ambient air lets lamps run closer to rated output, which affects both sizing and long-term operating cost.
Not every space is a good candidate for HVAC-mounted UV at all. If ductwork is inaccessible, heavily branched, or running through a crawlspace with no service clearance, a standalone upper-room UV fixture or portable unit aimed at a specific problem area, like a chronically damp basement, may do more for your air quality than trying to retrofit a duct that was never built with lamp access in mind. That’s a conversation worth having with whoever inspects your system before you commit to a specific placement.
How Your Installation Objective Changes the Right Placement
The question “where should the UV light go?” doesn’t have one answer, because it depends on what problem you’re actually solving. Coil and surface irradiation and in-duct airborne treatment are two different jobs with two different design requirements, and the LBNL indoor air science team is explicit that homeowners should choose placement based on the problem, not on marketing claims that treat all UV as interchangeable.
Coil and surface irradiation works on a simple principle: keep a wet surface bathed in UV-C long enough, continuously, and biofilm has a hard time establishing itself. There’s no “exposure time” variable to calculate in the traditional sense, because the lamp runs continuously and the coil isn’t moving. Airborne, in-duct treatment is a different calculation entirely. A single air molecule, and whatever microbe is riding on it, passes the lamp once, for a few tenths of a second, at whatever speed your blower is pushing air through the duct. That’s the entire dose window.
What actually determines whether in-duct UV works:
- Lamp output (irradiance), measured in microwatts per square centimeter, which degrades as the bulb ages and as dust or grime coats the lamp sleeve.
- Exposure time, set by duct geometry and airflow speed. Faster airflow means less contact time and lower delivered dose.
- Distance from lamp to airstream, since UV intensity falls off sharply the farther a surface or particle sits from the source.
- Temperature and humidity in the duct, which affect certain lamp types’ output and can shift germicidal efficiency.
- Duct reflectivity and layout, since bends, insulation, and duct liner material change how much light actually reaches the moving air versus getting absorbed.
Dose in a properly reviewed set of in-duct installations showed a very wide range of values reflecting different real-world disinfection performance, according to a peer-reviewed review of in-duct UVGI design factors, a spread wide enough that two systems marketed identically could deliver wildly different real-world disinfection performance.
That’s the number that should reframe how you think about in-duct UV. A 170x range between the low and high end of studied installations means the phrase “we install UV lights” tells you almost nothing about what you’re actually getting. Lifecycle cost matters here too. The AIVC modeling referenced above found upstream mixed-air placement often runs cheaper over the system’s life than downstream supply-side placement, driven by lamp output differences tied to ambient temperature. That’s a real factor to raise with a contractor, not just an academic footnote.
Installation Checklist: Safety, Access, and Red Flags to Watch For
Before you sign off on any HVAC UV light installation, a handful of safety and access questions separate a competent job from a liability. UV-C light doesn’t just kill microbes. It can injure human eyes and skin with even brief, unprotected exposure, which is why a 2025 review of UVGI installation safety practices emphasizes interlocks and enclosed placement as baseline requirements, not upgrades.
- Confirm the lamp is fully enclosed within the air handler cabinet where occupants can’t see or glimpse the bulb through a vent or gap.
- Ask whether the unit has a safety interlock that cuts power automatically when the access panel opens.
- Verify the lamp position doesn’t block coil removal or interfere with routine service panel access.
- Check that UV-sensitive materials nearby, such as certain plastics, foam insulation, and wire jacketing, are shielded or rated for UV exposure.
- Get the electrical scope in writing, including whether the installer is tapping into existing power or running a new dedicated circuit.
- Request a lamp replacement schedule as part of the quote, not as a surprise a year later.
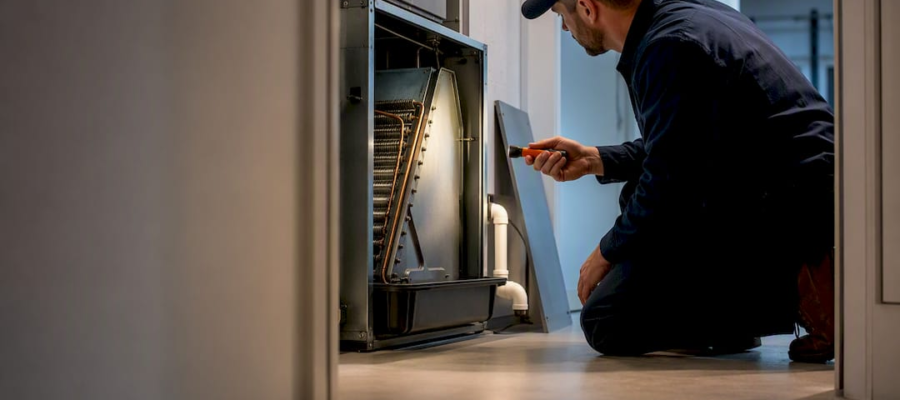
Pro Tip: Ask your contractor to show you exactly where the lamp will sit before installation day, using a flashlight aimed the same direction the UV light will point. If the beam doesn’t clearly hit the coil face or drain pan, the placement probably needs adjusting.
A quote that skips electrical scope, access modifications, and a testing or commissioning step is worth questioning. A one-line invoice item that just says “UV light install” gives you no way to verify the work matches what was promised. You should walk away from any proposal with documentation showing lamp wattage, mounting location, and expected service intervals.
Understanding UV Dose So You Can Ask Better Questions
Every UV performance claim comes down to one equation: dose equals irradiance multiplied by exposure time. Irradiance is how strong the lamp’s output is at a given distance. Exposure time is how long air, or a coil surface, sits in that light. Change either variable and the delivered dose changes with it, which is exactly why airflow speed and lamp distance matter as much as the bulb’s wattage rating.
This is also why a lamp glowing blue tells you almost nothing about whether it’s doing its job. Visible blue light from a UV bulb is a byproduct, not a performance indicator, and a lamp can glow normally while its actual germicidal output has dropped well below effective levels due to age or a dirty sleeve. The review of in-duct UVGI design factors is direct about this: judge performance by rated output and tested configuration data, not by whether the light appears to be on.
Questions worth asking any contractor before installation:
- What is the lamp’s rated microwatt output at installation, and at what distance was that rating measured?
- What airflow range (cubic feet per minute) is this specific installation designed around?
- What single-pass dose does the manufacturer or the installer’s own testing estimate for this duct configuration?
- How does dust accumulation on the lamp sleeve affect output over time, and how often should it be wiped down?
- Does this system rely on UV alone, or is it paired with filtration and regular coil cleaning?
A controlled coil-cleaning study found UV treatment reduced surface microbial loading by an average of 55% at roughly 200 microwatts per square centimeter under condensing conditions. The same study also found UV exposure can detach microbial clusters from the coil surface, sending them airborne downstream, which is a reminder that UV works best as part of a broader maintenance approach rather than a standalone fix.
That combined approach isn’t a marketing suggestion. A systematic review of UVGI applications in HVAC systems concludes that UV does not replace filtration or physical coil cleaning. It works as a supplement, and pairing it with regular filtration and cleaning consistently outperforms UV alone. Humidity and dust load both affect how much of that dose ever reaches its target, since a humid coil surface behaves differently under UV than a dry one, and a dust-coated lamp sleeve can lose meaningful output before anyone notices the bulb needs replacing.
Maintenance Schedule to Keep UV Effective Long-Term
UV lamps degrade whether or not anyone notices. Output drops steadily over a lamp’s rated life, and dust or grime on the bulb sleeve accelerates that decline well before the “burned out” point most homeowners watch for. A maintenance rhythm built around inspection, not just replacement, is what keeps a UV installation doing real work months after the shine of a new install has worn off.
- Clean the coil before commissioning any UV light. Installing a lamp over an already-fouled coil means the UV is fighting an uphill battle from day one; a proper coil cleaning sequence should always come first.
- Inspect the lamp sleeve every three to six months for dust buildup, and wipe it down per the manufacturer’s guidance since even a thin film can meaningfully cut output.
- Replace lamps on the manufacturer’s rated schedule, typically annually for many residential bulbs, regardless of whether the bulb still visibly glows.
- Document each inspection and replacement date, especially for property managers who need a maintenance trail for budgeting and tenant or insurance inquiries.
- Recheck coil condition annually alongside lamp service, since a properly functioning UV light should keep visible growth to a minimum between full cleanings.
Budgeting matters here too. Lamp replacement is a recurring cost, not a one-time purchase, and property managers overseeing multiple units should plan for it the same way they plan for filter changes: on a calendar, not on a “when it stops working” basis.
What Amazon Air Duct Cleaning Checks Before Recommending a Placement
Our technicians have significant experience inspecting HVAC systems across New York, New Jersey, and Connecticut homes and commercial properties, and coil condition rarely tells the same story twice. Before recommending any UV placement, our technicians check coil shape and accessibility, airflow direction, where condensate actually pools in the drain pan, whether service panels leave room for a lamp bracket, and what lamp type suits the specific air handler.

Corrective work often starts before UV even enters the conversation. A coil coated in years of dust and biofilm needs cleaning first, since irradiating a fouled surface wastes lamp output on grime instead of active growth. We document what we find, so property managers and homeowners get a clear picture of coil condition, drain pan status, and airflow characteristics before any lamp goes in.
Why Placement Beats Product When It Comes to UV Performance
Most of the advice out there treats HVAC UV lights like a single product decision: buy a good lamp, screw it in, done. That framing misses what actually determines results. A premium lamp mounted where it can’t fully irradiate the coil face does less than a modest lamp positioned correctly, and no amount of wattage fixes a placement that leaves the drain pan in shadow.
The conventional advice to “just put it above the coil” isn’t wrong, but it’s incomplete in a way that matters. Dose, airflow speed, and duct geometry decide whether an in-duct installation actually disinfects air or just runs a light that looks impressive on an inspection report. Homeowners should prioritize asking about airflow design and rated output over comparing lamp brands. If a contractor can’t explain how your specific duct layout affects exposure time, that’s a bigger red flag than any bulb spec sheet.
Get the coil clean first, get the placement right for your actual goal, and treat the lamp as one layer in a maintenance system rather than a fix that runs on autopilot.
— Victor
Get Your HVAC UV Lights Installed and Positioned Correctly
Getting UV placement right takes more than mounting a bulb near the coil and hoping for the best. Reliable installers provide HVAC UV light systems in New York, New Jersey, and Connecticut, and installations are typically paired with proper coil cleaning first, since a lamp irradiating a dirty coil is fighting a losing battle from day one.

Our technicians assess your coil geometry, drain pan location, and airflow before recommending where a lamp goes, and we document that assessment in a written commissioning report so you know exactly what was installed and why. If you’re weighing coil-focused placement against an in-duct airborne setup, that’s a conversation worth having with someone who’s inspected hundreds of air handlers, not a guess based on a product listing. Ask us for scope details, electrical requirements, and a lamp replacement timeline up front. Book an inspection or quote for UV light installation and get a placement plan built around your actual system, not a generic recommendation.
Sources
This guide draws on Lawrence Berkeley National Laboratory’s indoor air UVGI research, a peer-reviewed review of in-duct UVGI design factors, NIST/ASHRAE technical presentations on UV applications, and an EPA-referenced coil-cleaning study.
- Using UV Germicidal Lights for Air Cleaning | Indoor Air (Lawrence Berkeley National Laboratory)
- Ultraviolet germicidal irradiation (UVGI) for in-duct airborne bioaerosol disinfection: Review and analysis of design factors
- Life-cycle cost simulation of in-duct ultraviolet germicidal irradiation systems (AIVC)
- Ultraviolet germicidal coil cleaning: Decreased surface microbial loading and resuspension of cell clusters
FAQ
Do UV Lights in HVAC Systems Really Work?
Yes, but effectiveness depends entirely on placement and design. Coil-mounted UV lights reliably reduce surface microbial growth, with one controlled study showing an average 55% reduction under condensing conditions, while in-duct airborne systems need a properly calculated dose to work at all.
Should HVAC UV Lights Stay on All the Time?
Coil and drain-pan UV lights are designed to run continuously, since their job is to prevent biofilm from ever establishing on wet surfaces. In-duct airborne lamps typically run whenever the blower operates, since they only work while air is actively passing the lamp.
Does Consumer Reports Recommend HVAC UV Lights?
Independent testing organizations have generally been cautious rather than enthusiastic, noting that real-world performance varies widely by installation quality. Research from LBNL similarly notes that field studies outside healthcare settings show promising but inconsistent results, which is why placement and dose matter more than the general concept.
How Much Does It Cost to Install a UV Light in a Residential HVAC System?
Cost varies based on lamp type, placement, and electrical scope, and Amazonairpro’s UV light installation page has current pricing details for New York, New Jersey, and Connecticut service areas. Ask any contractor for a written quote that separates lamp cost, electrical work, and access modifications.
What Is the Best HVAC UV Light Placement for Mold Control?
Mounting the lamp to directly irradiate the evaporator coil face and drain pan is the standard approach for mold and bacterial growth control, since those wet surfaces are where microbial colonies form. This differs from in-duct airborne placement, which targets moving air rather than fixed surfaces.
Recommended
- 10x More Power for Air UV vs Coil: HVAC UV Light Types for NY/NJ/CT
- HVAC Contaminants: Protect Your Indoor Air Quality
- NY/NJ/CT Homeowners: Clean Coils When Delta T Falls or Pressure Rises
- HVAC Maintenance Guide: Boost Air Quality & Efficiency