Inspect Chimney Caps Yearly: Safety Steps for Homeowners
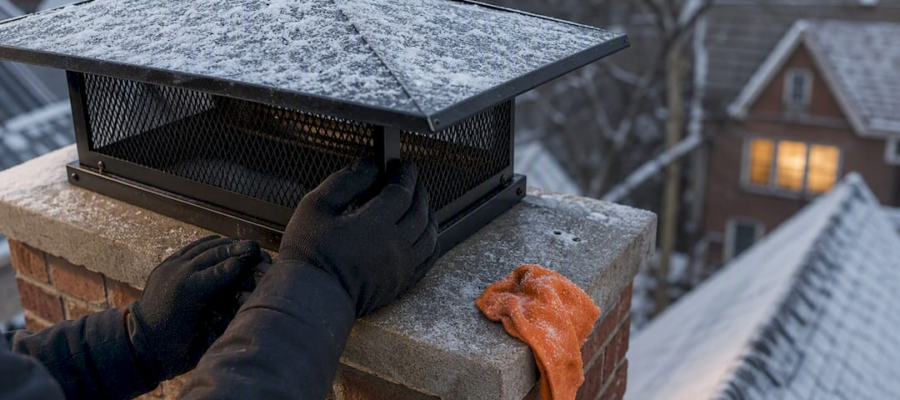
Inspect your chimney cap at least once a year and clean the mesh whenever it’s clogged with leaves, soot, or nesting material. If you spot rust holes, a bent frame, or heavy creosote buildup you can’t wipe away safely, stop and call a certified technician rather than climbing onto the roof yourself.
TL;DR:
- Most chimney cap issues, like rust, holes, or loose hardware, can be identified during quick visual ground inspections with binoculars before attempting any cleaning.
- Cleaning the mesh with a soft wire brush and washing with mild soap are safe DIY steps, but creosote removal requires professional tools and expertise.
- Material choice, environment, and age determine how long a cap lasts, with stainless steel and copper offering the longest resilience against weathering and corrosion.
- Experts recommend annual inspections, especially in spring or early summer, to catch problems early and avoid costly repairs during peak heating season.
- Combining a cap check with a professional chimney sweep saves money and ensures that hidden issues like cracks or obstructions are addressed early.
Table of Contents
- Chimney Cap Maintenance: How to Clean It Safely
- What Should You Check During a Chimney Cap Inspection?
- Repair or Replace: How Long Should a Chimney Cap Last?
- Should You Hire a Chimney Sweep or Do It Yourself?
- When Is the Best Time for Seasonal Chimney Maintenance?
- Common Chimney Cap Problems and Safe Quick Fixes
- Tips for Preventing Debris Buildup on Your Chimney Cap
- How Do You Choose the Right Chimney Cap for Your Climate?
- Safety Precautions Before You Touch a Chimney Cap
- How to Remove and Reinstall a Chimney Cap the Right Way
- Author Perspective: Why Combined Cap Checks and Sweeping Save Money
- A Straightforward Option for New York, New Jersey, and Connecticut Homeowners
- Sources
- FAQ
Chimney Cap Maintenance: How to Clean It Safely
Most chimney cap maintenance starts on the ground, not the roof. Walk your property line and look up at the cap with binoculars first. If you see daylight through the mesh, rust streaks running down the flue, or a cap sitting at an odd angle, you already have enough information to schedule a cleaning without setting foot on a ladder.
When the cap is reachable safely (a single-story ranch with a stable ladder setup, for example), here’s the process most technicians follow:
- Set up an extension ladder on firm, level ground and have a second person spot you.
- Remove loose debris by hand or with a shop vacuum before touching the mesh.
- Scrub the screen with a soft wire brush, working in one direction to avoid bending the wire.
- Wash the cap with mild soap and water, following manufacturer guidance that specifically warns against abrasive cleaners and harsh tools that strip protective coatings.
- Rinse thoroughly and let the cap air dry before re-seating it on the flue.
- Check that mounting screws or clamps are snug before you climb down.
Creosote is where DIY cleaning stops. It’s sticky, flammable, and clings to mesh in a way that soap and water won’t touch. Chemical creosote removers exist, but they’re an adjunct at best. Mechanical sweeping paired with a professional inspection remains the standard for actually removing it.
Pro Tip: Never use a pressure washer on a chimney cap. The force can bend mesh screens and drive water into seams that were never designed to handle it, which creates the rust problems you’re trying to prevent.
What Should You Check During a Chimney Cap Inspection?
A five-minute visual inspection catches most problems before they turn into repair bills. Work through the cap and its mounting hardware the same way every time, so you notice changes year over year.
- Rust stains or flaking metal on galvanized or painted surfaces.
- Holes or thin spots in the mesh screen where wire has corroded through.
- A bent or dented frame that no longer sits flush on the flue.
- Loose, missing, or corroded mounting screws and clamps.
- Leaves, twigs, or a visible nest packed against the screen.
- Dark, tar-like residue that suggests creosote rather than ordinary soot.
CSIA’s Level 1 inspection standard specifically calls for checking the cap, crown, and flashing for obstructions, and reporting anything restricting airflow. A blocked screen isn’t cosmetic. Once mesh clogs with debris and creosote, draft weakens and smoke can back up into the living space instead of venting outside.
Photograph anything questionable from a few angles and note the date. That record speeds up your conversation with a technician and helps you track whether a small rust spot is spreading year to year.
Repair or Replace: How Long Should a Chimney Cap Last?
Material choice decides how many seasons you get before rust wins. Stainless steel and copper caps resist weathering and typically outlast galvanized or painted versions by years, which tend to show rust stains earlier and need replacement sooner.
Environment matters too. Coastal salt air, heavy snow load, and constant freeze thaw cycles all shorten a cap’s working life regardless of material.
Certain signs mean repair isn’t worth attempting:
- Rust has eaten through the metal rather than just staining the surface.
- Water is entering the flue around the cap’s seams.
- The mesh has multiple holes or has separated from the frame.
- The mounting base is corroded to the point where screws no longer hold.
Should You Hire a Chimney Sweep or Do It Yourself?
Ground-level checks and clearing light surface debris are reasonable DIY tasks for most homeowners. Anything involving rooftop access, creosote removal, flashing repair, or a cap that’s actually loose on the flue belongs to a professional.
NFPA 211 recommends an annual inspection of chimneys, fireplaces, and vents for soundness and freedom from deposits, with cleaning and repairs handled as needed. A CSIA Level 1 inspection is the practical baseline most homeowners should ask for: a visual check of the readily accessible parts of the chimney, including the cap.
When you book a visit, ask three questions:
- Does the inspection include the cap, crown, and flashing, or just the interior flue?
- Will you get photos or a written report of any damage found?
- Is the sweep certified through CSIA or an equivalent credentialing body?
Pro Tip: A technician who’s already on your roof for a sweep can check the cap, crown, and flashing in the same visit. That single trip often catches problems a homeowner’s ground-level check would miss entirely.
When Is the Best Time for Seasonal Chimney Maintenance?
Spring and early summer are the best windows for chimney maintenance, and the reasoning is practical rather than arbitrary. Technicians have more open scheduling before the fall rush, and any repairs a visit uncovers have months to get done before heating season starts.
Between scheduled inspections, a quick check after any major storm protects the work you’ve already had done:
- Confirm the cap is still seated and mounting hardware hasn’t loosened.
- Look for bent or torn mesh from wind-driven debris.
- Check for new rust spots where paint or coating may have chipped.
Owners who want a predictable annual rhythm can pair a spring flue check with the cap inspection so both happen on the same visit.
Common Chimney Cap Problems and Safe Quick Fixes
Most chimney cap complaints trace back to one of three things: animals, clogged mesh, or loose hardware. None of them are emergencies, but none of them fix themselves either.
- If you hear scratching or see nesting material, don’t light a fire. Call a professional if the nest appears to be inside the flue rather than just on top of the cap.
- A lightly clogged screen can often be cleared with a soft brush from the ground using an extendable pole, without climbing up.
- Loose screws you can reach safely from a stable ladder can be re-tightened as a temporary fix.
- Bent frames, torn mesh, or hardware you can’t reach without climbing higher than a single story are not a DIY job.
Pro Tip: If your temporary fix requires balancing on a steep roof pitch or reaching past the edge of a ladder, it’s not a temporary fix. It’s a fall risk. Wait for a technician instead.
Tips for Preventing Debris Buildup on Your Chimney Cap
Prevention is cheaper than repair, and most of it comes down to what’s growing or hanging near the chimney rather than the cap itself. Overhanging tree branches drop leaves and twigs directly onto the mesh, and squirrels use those same branches as a bridge to the roof. Trimming branches back several feet from the chimney removes both problems at once.
Mesh opening size matters more than most homeowners realize. A cap with openings that are too wide lets small debris and even birds through; openings that are too tight clog faster with soot and creosote. If you’re replacing a cap, ask your installer about mesh sized for your specific fuel type, since wood-burning fireplaces produce more particulate than gas inserts.
Roof debris matters too. Gutters and roof valleys near the chimney that stay packed with leaves create a constant source of material that wind can lift onto the cap. Clearing those areas during your regular gutter cleaning cuts down on repeat buildup.
Seasonal timing helps here as well. A fall check, even a quick visual one, catches the leaf litter that accumulates before winter storms compact it against the mesh. That’s on top of the spring inspection you’d schedule for cleaning and repairs, not a replacement for it.
Homeowners near wooded lots or with a lot of overhead tree cover should expect to clear debris more often than a home in an open yard. There’s no fixed schedule that fits every property. Watch what actually accumulates on yours and adjust from there.
How Do You Choose the Right Chimney Cap for Your Climate?
The right cap depends more on your local weather pattern than on style preference. Homes across New York, New Jersey, and Connecticut deal with a real mix of conditions: humid summers, freeze thaw winters, and coastal moisture closer to the shoreline, and each of those stresses a cap differently.

Heavy snow load calls for a sturdy frame and secure mounting hardware, since ice buildup adds real weight and wind can catch a loose cap and tear it off entirely. Areas with frequent freeze thaw cycles benefit from stainless steel or copper over galvanized steel, since repeated freezing water finds weak points in a coating faster than steady dry weather ever would.
Homes closer to the coast face a different enemy: salt air accelerates corrosion on almost any metal, which is part of why copper and stainless caps hold up longer than painted galvanized ones in those areas. If you’re near the water, that material upgrade often pays for itself in avoided replacements.
Mesh style matters for wooded properties. A finer mesh keeps more debris out but needs more frequent cleaning; a coarser mesh clogs less but lets more small material through. There’s a genuine tradeoff, and the right answer depends on how much tree cover surrounds your chimney.
If you’re unsure what fits your specific roofline and exposure, a technician who inspects the chimney in person can recommend a cap style suited to your home rather than a generic best seller.
Safety Precautions Before You Touch a Chimney Cap
Chimney work is roof work, and roof work is where most home maintenance injuries happen. Before you climb anywhere, check that the ladder is rated for your weight plus tools, set on firm and level ground, and extended at least three feet above the roofline if you’re stepping onto the roof itself.

Wear closed-toe shoes with real traction, not sneakers with worn soles. Work gloves protect your hands from sharp mesh edges and rusted metal, and safety glasses matter more than people expect. Debris falls, and soot and creosote dust can irritate eyes fast.
Never do this work alone. Have someone on the ground who can steady the ladder and call for help if something goes wrong. Skip the whole job entirely if the roof is wet, icy, or steeply pitched, or if wind conditions are anything beyond calm. None of that is worth a cleaning you can schedule for a drier, calmer day instead.
If your chimney sits above a second story or the roof pitch is steep, ground-level tools like an extendable brush or binoculars for inspection are the safer ceiling for DIY work. Everything past that belongs to someone with fall protection equipment and training.
How to Remove and Reinstall a Chimney Cap the Right Way
Most caps mount with either a clamp system that grips the flue tile or screws that anchor into the crown. Before removing anything, note how the current cap sits, since reinstalling it slightly off angle can leave gaps that let water in.
Loosen clamp screws evenly rather than fully tightening one side before touching the other, which can warp the mounting band. Lift the cap straight up and off the flue rather than tilting it, since tilting can bend the mesh against the flue opening.

Once it’s off, this is your chance to clean both the cap and the top of the flue tile itself, an area that rarely gets attention otherwise. Check the crown for cracks while you’re up there, since a damaged crown is a separate repair issue that a cap alone can’t fix.
Reinstallation reverses the process: seat the cap fully before tightening clamps, and tighten gradually and evenly rather than cranking one screw down first. Give the cap a gentle push test in a few directions once it’s secured. If it shifts at all, it’s not seated correctly, and continuing to build a fire underneath a loose cap risks it being torn off in the next storm.
If your flue has an irregular shape or the existing mounting hardware is corroded beyond reuse, this is a job to hand to a technician rather than force with a workaround.
Author Perspective: Why Combined Cap Checks and Sweeping Save Money
After years in this field, the pattern is consistent: caps rarely fail in isolation. A combined visit that checks the cap alongside a full sweep tends to catch flashing leaks, crown cracks, and flue obstructions that a cap-only inspection misses entirely. Bundling those checks costs less than separate repeat visits.
— Victor
A Straightforward Option for New York, New Jersey, and Connecticut Homeowners
If the ladder, the mesh, and the creosote sound like more than you want to handle solo, homeowners in New York, New Jersey, and Connecticut can book a visit where a technician handles the cap, the mesh, and the flue in one appointment instead of you piecing it together yourself.

A typical visit covers the chimney cap, the crown, flashing, and the flue itself, so any rust, blockage, or loose hardware gets caught before it becomes a bigger repair. Because the technician is already on the roof, problems that a ground-level check would miss (a hairline crack in the crown, a flashing seam starting to lift) get flagged while they’re still small. That’s an advantage of a professional chimney cleaning and inspection over a piecemeal DIY approach: one visit, one report, and no guessing about what’s happening above the roofline.
If you’re overdue for an inspection or noticed something questionable on your last walk around the yard, book a chimney inspection and get it checked before the next storm rolls through.
Sources
- CSIA Level 1 Masonry Chimney inspection guidance
- Homeowner Resources | Ensure Safety Now – Get Expert Tips — The Chimney Safety Institute of America
- Everything To Know About Chimney Caps | The Family Handyman
- How to Maintain and Extend the Life of Metal Chimney Caps — Cypress Metals
FAQ
How Often Does a Chimney Cap Need to Be Replaced?
There’s no fixed replacement schedule. Stainless steel and copper caps often last many years longer than galvanized or painted versions, which tend to show rust stains and need replacement sooner depending on your local weather exposure.
What Are the Most Common Chimney Cap Problems?
The most frequent issues are rust and corrosion on galvanized metal, clogged mesh from leaves and creosote, loose or corroded mounting hardware, and animal nests blocking the screen or flue opening.
Should You Seal a Chimney Cap?
The cap itself doesn’t get sealed the way masonry does. What matters is that the mounting base sits flush against the flue tile or crown so water can’t work its way in around the edges.
What Does It Typically Cost to Replace a Chimney Cap?
Pricing varies by material, size, and whether rooftop access complicates installation, and a technician can give you an accurate figure after seeing your specific chimney and flue dimensions in person.
How Often Should a Chimney Cap Be Inspected?
At least once a year, ideally in spring or early summer, following the annual inspection rhythm CSIA and NFPA 211 both recommend for chimneys, caps, and flues.
Recommended
- When to Clean Your Chimney Flue for Safety and Efficiency
- Avoid Chimney Fire: NFPA Backed Wood Stove Chimney Cleaning for Homeowners
- Top Reasons to Schedule Chimney Sweeps for Homeowners
- Chimney Odor Elimination Steps for Homeowners