Know When to Stop DIY: Chimney Liner Cleaning for NY/NJ/CT Homeowners
Yes, chimney liners need regular cleaning and at least one annual inspection under NFPA 211. Light soot brushing is a reasonable do-it-yourself job for many homeowners. But cracked tile, glazed creosote, or anything a CSIA-certified technician would flag on a camera scan means it’s time to call a pro. Professional companies handle that second scenario across New York, New Jersey, and Connecticut.
TL;DR:
- DIY cleaning is suitable only for light, powdery soot in straight, accessible flues without visible cracks, glazing, or water stains.
- Matching cleaning tools to liner material is crucial; nylon brushes for stainless steel and wire brushes for clay tile to prevent damage.
- Heavy creosote buildup, glazed deposits, or structural damage require professional inspection, camera scans, or specialized rotary equipment.
- Regular maintenance includes using seasoned wood, inspecting caps, and monitoring buildup to prevent fire hazards and ensure proper draft.
- Professionals provide comprehensive service, including full cleaning, detailed inspections, and repair estimates, especially when structural damage or heavy deposits are present.
Table of Contents
- How Do You Know If You Can Clean a Chimney Liner Yourself?
- Which Tools and Brushes Match Your Liner Type?
- How Do You Clean a Chimney Liner Step by Step?
- What Do Chimney Inspections Check, and What Do They Cost?
- How Often Should You Clean and Replace a Chimney Liner?
- What Does a Professional Chimney Sweep Appointment Include?
- What Exactly Is a Chimney Liner, and Why Does It Need Cleaning?
- Which Liner Material Do You Have, and Does It Change Anything?
- How Do You Keep a Liner Clean Between Full Sweeps?
- What Should You Do About Stubborn Soot or Heavy Creosote?
- How Should You Dispose of Chimney Soot and Creosote Safely?
- What Should Homeowners Actually Take Away From This?
- Book a Professional Sweep and Inspection
- Where Can You Verify These Standards Yourself?
- Sources
- FAQ
How Do You Know If You Can Clean a Chimney Liner Yourself?
Not every liner cleaning job belongs to a homeowner with a brush and a ladder. Some do. The difference usually comes down to how much creosote has built up, how the flue is shaped, and whether you’re comfortable working at height.
Run through this before you touch a rod:
- Go: Light, powdery soot; a straight flue you can reach safely from the roof or firebox; no visible cracks or water stains on the liner.
- No-go: Any hardened, tar-like, or glazed creosote — that’s Stage 2 or Stage 3, and Stage 3 typically requires professional intervention because it fuels chimney fires.
- No-go: Cracks, gaps at the liner joints, water stains, or a carbon monoxide alarm that has ever triggered near the appliance.
- Minimum PPE: N95 respirator, safety goggles, leather gloves, and a drop cloth sealing the hearth opening so soot doesn’t spread through the house.
If you see glazing, hairline cracks, or signs of water intrusion, stop. These point to structural or moisture problems that a brush won’t fix and that a homeowner shouldn’t try to diagnose from the ground.
Which Tools and Brushes Match Your Liner Type?
Brush choice depends on what the liner is made of, not just how dirty it looks. A wire brush that’s perfect for a clay tile flue can scratch and eventually weaken a stainless steel liner, so matching tool to material matters more than most DIY guides admit.
- Poly or nylon brushes: Use these on stainless steel liners to avoid scoring the metal.
- Wire brushes: Reserve these for clay tile or masonry flues, where the harder bristles knock loose baked-on soot without damaging the surface.
- Flexible rod-mounted brushes: Needed for stainless flex liners with bends or offsets.
- Rigid brushes: Work fine for short, straight stovepipe runs.
Before you start, remove the chimney cap if it’s safely reachable, lay drop cloths over furniture and flooring near the hearth, disconnect the stove pipe from the flue collar, and seal the firebox opening with plastic sheeting and tape. University extension guidance backs this same logic: match the brush to the flue material, and treat cleaning as separate from inspection.
Pro Tip: Buy a brush one size larger in diameter than your flue’s stated measurement. A snug fit scrubs deposits loose; a loose-fitting brush just rattles around and misses the corners.
How Do You Clean a Chimney Liner Step by Step?
Two methods exist, and the right one depends on your flue’s shape and where you can safely access it.
Before you start either method, check that your carbon monoxide alarm is functioning, set up ladder stabilizers if working from the roof, and never do rooftop work alone. A second person on the ground, holding the ladder and staying in earshot, isn’t optional.
Top-down method (preferred for long, straight flues):
- Access the chimney from the roof and remove the cap.
- Feed the brush and extension rods down the flue in short strokes, adding rod sections as you go.
- Work the brush the full length of the liner, focusing on any visible soot buildup near joints or offsets.
- Pull the brush back up in the same short strokes, letting debris fall to the smoke shelf or firebox below.
- Remove debris from the firebox with a shop vacuum rated for fine ash.
Bottom-up method (better for flues accessed from a cleanout or firebox):
- Seal the firebox opening except for the working gap where the brush enters.
- Push the brush upward from the firebox or cleanout door, again in short controlled strokes.
- Extend rods gradually as the brush travels higher into the flue.
- Vacuum collected debris from the cleanout or firebox once the brush has covered the full length.
If you encounter Stage 2 tar-like deposits or Stage 3 glazing at any point in either method, stop. Heavy glaze removal calls for a chimney fire retardant treatment and specialized rotary equipment that belongs in a professional’s hands, not a homeowner’s toolkit.
What Do Chimney Inspections Check, and What Do They Cost?
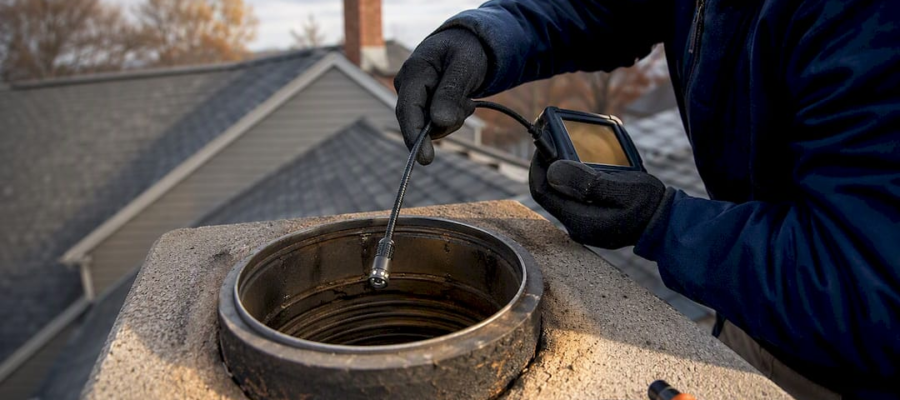
NFPA 211 sets one inspection per year as the baseline for any chimney in active use, but not all inspections look the same. A Level 1 inspection covers accessible, visible areas. A Level 2 adds a video camera scan of the entire flue interior and is required after a chimney fire, an appliance change, a property sale, or when damage is suspected.
| Inspection type | What it covers | Typical cost |
|---|---|---|
| Level 1 | Visual check of readily accessible portions of the flue, chimney exterior, and connections | moderate cost range |
| Level 2 | Everything in Level 1 plus a full video scan of the flue interior | moderate cost range |
| Level 3 | Includes removal of components (masonry, walls) to access concealed areas when serious hazards are suspected | higher cost range |
These figures come from industry pricing guidance on chimney pipe inspection frequency. Common problems a Level 2 scan catches that a homeowner’s flashlight often misses include hairline cracks, corrosion pitting on stainless liners, moisture staining that signals a leaking cap or flashing, and joint separation on clay tile sections. A video inspection is genuinely the most reliable way to confirm this kind of hidden damage.
If you spot any of these signs during your own cleaning, stop using the fireplace or stove, crack a window for ventilation, and schedule a Level 2 scan before your next fire.
How Often Should You Clean and Replace a Chimney Liner?
Annual inspection is the floor, not the ceiling. Heavy burners, anyone using unseasoned or wet wood, and households running a wood stove daily through winter should plan on cleaning more than once a season, since wet wood alone can push creosote to Stage 2 within a single season of heavy use.
Lifespan varies by material:
- Clay tile: tends to last around two decades under normal conditions, potentially less with repeated chimney fires or acidic flue gas exposure.
- Stainless steel: commonly lasts one to two and a half decades, depending on alloy grade and fuel type.
- Cast-in-place: generally has a lifespan exceeding two decades as it bonds directly to the existing masonry.
When relining does become necessary, installed cost ranges vary widely by method and complexity, often running from the low thousands up to $4,000 to $7,000 for more complex jobs involving offsets, insulation wrap, or masonry repair. Flue length, number of bends, and alloy choice all move that number. You can check your own chimney sweeping schedule against how often you actually burn to see if you’re due.
What Does a Professional Chimney Sweep Appointment Include?
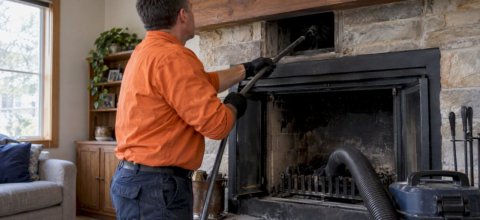
A proper sweep and inspection appointment covers a full brush cleaning, a Level 1 visual check, and a Level 2 camera scan if warranted, followed by a written estimate for any repairs. Experienced companies bring years of service to homeowners across New York, New Jersey, and Connecticut.
Before hiring anyone, ask three questions: Do they carry a camera for interior scans? Are technicians CSIA or NFI certified? Will you get a written estimate and warranty before work begins? Those three answers separate a legitimate technician from a truck-and-ladder outfit.
What Exactly Is a Chimney Liner, and Why Does It Need Cleaning?
A chimney liner is the passage inside a masonry or metal chimney that channels smoke, gas, and heat safely from the firebox to the outside air. Without one, hot flue gases would contact masonry directly, and over time that heat and acidic exhaust would crack mortar joints and let heat transfer into nearby framing, a genuine fire risk.
Every time you burn wood, gas, or oil, the exhaust deposits fine particles of unburned fuel byproduct onto the liner walls. That residue is creosote, and it doesn’t stay put. It builds layer over layer, narrowing the effective diameter of the flue and reducing draft. Reduced draft means smoke and carbon monoxide are more likely to linger or backdraft into the living space instead of venting outside.
Cleaning matters for two separate reasons. First, it removes fuel for a chimney fire. Creosote is combustible, and enough of it ignited by a stray spark can produce temperatures that damage even a sound liner. Second, a clean liner lets your appliance draft properly, which affects both efficiency and indoor air safety. A liner clogged with soot forces your stove or furnace to work harder and can push exhaust back into the room instead of up the flue.
This is also why cleaning and inspection aren’t interchangeable. Cleaning removes what’s inside the flue. Inspection, especially a camera-based Level 2 scan, documents the physical condition of the liner itself, cracks, gaps, corrosion, none of which a brush will reveal.
Which Liner Material Do You Have, and Does It Change Anything?
Three materials dominate American chimneys: clay tile, stainless steel, and cast-in-place. Knowing which one you have changes both your cleaning technique and your long-term maintenance expectations.

Clay tile liners are the traditional choice in older masonry chimneys, installed as stacked segmented tiles mortared together inside the flue. They handle heat well but are vulnerable to cracking from thermal shock, sudden temperature swings, or a chimney fire. Because clay is brittle, aggressive wire brushing on a tile flue that’s already showing hairline cracks can make things worse, which is one reason a Level 2 scan before heavy cleaning on an older tile liner is worth the cost.
Stainless steel liners, usually installed as flexible or rigid tubing, are the standard reline choice when the surrounding masonry is otherwise sound. They install without rebuilding the chimney structure and, when the alloy is matched to the fuel type and insulation is used, they suit wood, gas, and oil appliances alike. Alloy grade matters here. A proper relining job specifies 304 or 316Ti stainless based on what you’re burning, since acidic exhaust from certain fuels corrodes lower-grade steel faster.
Cast-in-place liners are poured directly into the existing masonry chimney, bonding to and reinforcing the structure as they cure. They’re the go-to option when the masonry itself needs structural reinforcement rather than just a new interior surface, and they tend to outlast tile and stainless once installed correctly.
How Do You Keep a Liner Clean Between Full Sweeps?
Maintenance between professional or DIY sweeps isn’t complicated, but it’s the part homeowners skip most often. A few consistent habits keep creosote from building past Stage 1 in the first place.
Burn only seasoned hardwood with a moisture content below 20%. Wet or unseasoned wood burns cooler and produces far more creosote per fire than properly dried wood, which is the single biggest lever most wood stove users have over how fast their liner gets dirty. Keep fires hot enough to maintain good draft rather than smoldering low overnight, since a slow, smoky burn deposits creosote faster than a brisk, well-ventilated one.
Check the chimney cap and spark arrestor screen at the start of every burning season. A damaged cap lets rain into the flue, and moisture reacting with creosote accelerates corrosion, especially on stainless liners. Glance up the flue with a flashlight from the firebox every few weeks during heavy use. You’re not doing a full inspection, just watching for obvious buildup that would tell you to move up your next cleaning date.
Keep a simple log of burn frequency and wood type each season. It sounds like overkill, but it’s the easiest way to know if you’re on pace for annual cleaning or if a heavy winter means you need a mid-season sweep. If you use a wood stove specifically, wood stove chimney cleaning guidance differs slightly from open fireplace maintenance because stove flues run hotter and narrower, concentrating creosote faster in a smaller space.
What Should You Do About Stubborn Soot or Heavy Creosote?
Most cleaning problems fall into a handful of predictable categories, and each has a specific fix rather than a one-size-fits-all answer.
Powdery soot that won’t fully clear: This usually means the brush size doesn’t match the flue diameter closely enough. Size up one increment and use short, overlapping strokes rather than long sweeps, which tend to just redistribute loose soot instead of pulling it down.
Tar-like Stage 2 creosote: Brushing alone often can’t fully remove this. Some homeowners use a chimney cleaning log or creosote-reducing additive between full sweeps to help loosen it, but heavy Stage 2 buildup on a liner you clean yourself should still get a follow-up professional sweep before the next heavy-use season.
Glazed Stage 3 creosote: Don’t attempt this yourself. Glazed creosote resembles a shiny, hardened coating and requires rotary chain equipment and chemical treatment that a certified technician applies under controlled conditions. Brushing over it can flake pieces loose without actually removing the flammable coating underneath.
Blockages from animal nests or debris: If your brush suddenly meets resistance partway down the flue, stop rather than forcing it. Nests, dead animals, or fallen debris can hide sharp materials or block airflow in ways that create backdraft risk. This is a call-a-pro situation, not a push-harder situation.
Chemical cleaners: Some products marketed as creosote removers claim to reduce buildup between sweeps, but they don’t replace mechanical brushing or a professional cleaning, and homeowners should understand what these products can and can’t actually do before relying on them.
How Should You Dispose of Chimney Soot and Creosote Safely?
Removed soot and creosote aren’t ordinary household trash, and treating them that way creates a real fire hazard in your garbage can. Both materials can retain enough heat or combustible residue to smolder if bagged while warm or packed against other flammable debris.
Let all collected ash and soot cool completely, ideally overnight, before bagging it. Use a metal container with a lid for the initial cooling period rather than a plastic bucket or paper bag, since even cooled ash can sometimes reignite from a hidden ember. Once fully cool, seal the debris in a heavy-duty bag and check with your local municipality, since many towns in New York, New Jersey, and Connecticut have specific guidance on ash disposal separate from regular curbside trash.

Small amounts of wood ash, once fully cooled, can be spread thinly in a garden as a soil amendment since it contains potassium and trace minerals. Creosote itself should never go into a garden or compost. It carries polycyclic aromatic compounds from combustion that don’t belong in soil meant for growing food. Bag it separately from plain wood ash and dispose of it with regular household waste once fully cooled, or ask your sweep whether they haul it off as part of the service, which many professional appointments include by default.
What Should Homeowners Actually Take Away From This?
Most homeowners overestimate how hard cleaning is and underestimate how easy it is to misread creosote stage. Stage 1 soot brushes off in minutes with the right tool. The mistake I see most often isn’t laziness, it’s homeowners pushing through Stage 2 buildup with a wire brush because it looks similar enough to Stage 1, when it actually needs heat and chemical treatment a brush can’t deliver. My rule is simple: if the brush bounces off the deposit instead of scraping it loose, stop and call a certified technician rather than switching to a stiffer brush.
— Victor
Book a Professional Sweep and Inspection
If reading through creosote stages and inspection levels has you leaning toward professional help, that’s a reasonable call, and it’s exactly what Amazonairpro does every day. Professional chimney sweep services offer certified technicians with camera equipment, informed processes, and years of experience for appointments across New York, New Jersey, and Connecticut.

A standard appointment includes a full mechanical sweep, a Level 1 visual inspection, a Level 2 camera scan when the flue history calls for it, and a written estimate before any repair work starts, so you know the cost before you commit to anything. There’s no guessing whether your liner has hairline cracks or joint separation hiding past what a flashlight can reach. To get on the schedule, visit the chimney cleaning services page and request an appointment for your address in NY, NJ, or CT.
Where Can You Verify These Standards Yourself?
These sources back the inspection and material guidance covered above, and they’re worth bookmarking for future reference.
- NFPA 211 inspection frequency guidance sets the annual baseline and Level 1/2/3 definitions cited throughout this guide.
- The Chimney Safety Institute of America certifies technicians and publishes homeowner-facing safety resources.
- University of Missouri Extension offers independent, non-commercial guidance on brush selection and cleaning technique.
- Chimney liner material comparisons explain the tradeoffs between clay, stainless, and cast-in-place in more depth.
Sources
- How Often Should I Have My Chimney Pipe Inspected?
- Chimney Liner Types Compared: Clay, Stainless, and Cast-in-Place
- How Often Should a Chimney Be Cleaned
- Chimney Liner: Materials, Cost, Install Guide | FCS
- Cleaning Stovepipes and Chimneys
FAQ
Does a chimney liner need to be cleaned?
Yes. Combustion byproducts deposit creosote on every liner regardless of material, and NFPA 211 requires at least one annual inspection to catch buildup before it becomes a fire hazard.
What are the common problems with chimney liners?
The most frequent issues are cracked or separated clay tile joints, corrosion pitting on stainless steel, moisture staining from a failed cap, and creosote glazing that narrows airflow. A Level 2 camera scan catches most of these before they cause a chimney fire.
What is the average lifespan of a chimney liner?
Clay tile tends to last around two decades under normal conditions, stainless steel commonly lasts one to two and a half decades depending on alloy and fuel, and cast-in-place liners generally have a lifespan exceeding two decades as they bond directly to the masonry.
What is the average cost of a new chimney liner?
Installed reline costs vary widely by method and complexity, commonly ranging from the low thousands up to $4,000 to $7,000 for jobs involving insulation wrap, offsets, or masonry repair.
Recommended
- Professional Chimney Sweep & Repair in NY & NJ | Book Today!
- Fireplace Cleaning Workflow: What to Expect in NY/NJ/CT
- Chemical Chimney Cleaners: What Homeowners Need to Know
- Top Reasons to Schedule Chimney Sweeps for Homeowners