Essential residential vent cleaning steps for healthier air
Dust settling on your furniture hours after cleaning, unexplained allergy flares, and uneven temperatures throughout your home all point to one hidden culprit: dirty residential vents. When vents accumulate debris, they circulate contaminated air through every room, compromising your family’s health and comfort. Dirty air vents significantly reduce indoor air quality and create conditions for respiratory problems. This guide walks you through practical, proven steps to clean your vents effectively, restore fresh airflow, and protect your home’s indoor environment.
Table of Contents
- Key takeaways
- Why you need to clean your residential vents
- Preparing for vent cleaning: tools and safety tips
- Step-by-step residential vent cleaning process
- Common mistakes and troubleshooting tips
- Professional vent cleaning services for NY, NJ, and CT homeowners
- FAQ
Key Takeaways
| Point | Details |
|---|---|
| Vent cleaning benefits | Regular cleaning delivers measurable improvements in air quality, system efficiency, and home safety. |
| Essential preparation tools | Successful vent cleaning starts with gathering and organizing the right tools before you touch a vent cover. |
| Safety and shutdown steps | Turn off the HVAC system at the thermostat and circuit breaker to prevent spreading dust during cleaning. |
| Dryer vent safety reminder | Cleaning dryer vents reduces fire risk and helps prevent longer drying cycles that waste energy. |
Why you need to clean your residential vents
Your home’s ventilation system operates quietly behind walls and beneath floors, but neglecting it creates serious consequences. Clogged vents harbor dust, allergens, and mold that recirculate with every heating or cooling cycle. Each time your HVAC system runs, it pulls contaminated air through dirty ducts and pushes it into living spaces where your family breathes it continuously.
The health impacts extend beyond minor discomfort. Accumulated debris triggers asthma attacks, worsens seasonal allergies, and causes persistent respiratory irritation. Children and elderly family members face heightened vulnerability to these airborne contaminants. Your HVAC system also works harder when ducts are clogged, consuming more energy and wearing out components faster than necessary.
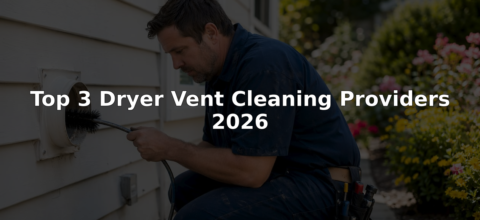
Dryer vents present an entirely different danger. Unclean dryer vents increase fire hazard risks significantly, with lint buildup creating highly flammable conditions. Thousands of residential fires start annually from clogged dryer vents, causing property damage and endangering lives. Beyond fire risk, restricted airflow forces dryers to run longer cycles, driving up utility bills and shortening appliance lifespan.
Recognizing signs your air ducts need cleaning helps you act before problems escalate:
- Visible dust clouds when your HVAC system starts
- Musty or stale odors coming from vents
- Uneven heating or cooling across different rooms
- Excessive dust accumulation on surfaces shortly after cleaning
- Unexplained increases in energy bills
Understanding the importance of dryer vent cleaning protects both your investment and your safety. A clean ventilation system supports comfortable indoor temperatures year round while maintaining the air quality your family deserves.
Clean vents are not a luxury. They are a fundamental requirement for maintaining a healthy home environment and protecting your family from preventable health risks.
Preparing for vent cleaning: tools and safety tips
Successful vent cleaning starts long before you touch a single vent cover. Proper preparation ensures safe and efficient cleaning by organizing tools, protecting your space, and establishing safety protocols. Skipping preparation leads to incomplete cleaning, potential equipment damage, and unnecessary mess.
Gather these essential tools before starting:
- Vacuum cleaner with hose and brush attachments
- Screwdriver set for removing vent covers
- Stiff bristle brush for loosening stuck debris
- Microfiber cloths for wiping surfaces
- Bucket with warm soapy water
- Flashlight for inspecting dark duct interiors
- Safety mask rated for dust particles
- Work gloves to protect hands from sharp edges
Turn off your HVAC system completely at the thermostat and circuit breaker. Running the system during cleaning spreads dust throughout your home and creates hazardous working conditions. Verify the system is off by checking that no air flows from vents. This simple step prevents contamination and protects both you and your equipment.

Protect your living space by covering furniture near vents with drop cloths or old sheets. Place towels or plastic sheeting on floors directly beneath work areas to catch falling debris. Remove or cover electronics to prevent dust from settling into sensitive components. These precautions save hours of post-cleaning work and prevent damage to belongings.
Pro Tip: Mark each vent cover with painter’s tape showing its location before removal. This simple system ensures covers return to their original positions, maintaining proper airflow balance throughout your home.
Wear appropriate safety gear throughout the entire process. A quality dust mask prevents inhalation of allergens, mold spores, and particulates disturbed during cleaning. Work gloves protect against sharp duct edges and dirty surfaces. Safety glasses shield eyes from falling debris when working overhead.
Follow these steps to prepare for air duct cleaning effectively:
| Preparation step | Purpose | Time required |
|---|---|---|
| Gather all tools | Prevents interruptions during cleaning | 15 minutes |
| Turn off HVAC system | Stops dust circulation and ensures safety | 5 minutes |
| Cover furniture and floors | Protects belongings from debris | 20 minutes |
| Put on safety gear | Prevents exposure to contaminants | 5 minutes |
Clear the area around each vent of furniture, decorations, and obstacles. You need easy access and room to maneuver tools without restriction. Remove items stored near floor vents and ensure step ladders can be positioned safely beneath ceiling vents. This workspace preparation makes the actual cleaning process faster and more thorough.
Step-by-step residential vent cleaning process
With preparation complete, you are ready to execute the actual cleaning. Following a systematic cleaning process ensures thorough vent cleaning and prevents missed spots that compromise results. Work methodically through each vent in your home, maintaining consistent technique for uniform outcomes.
-
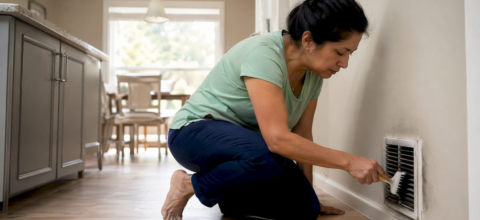
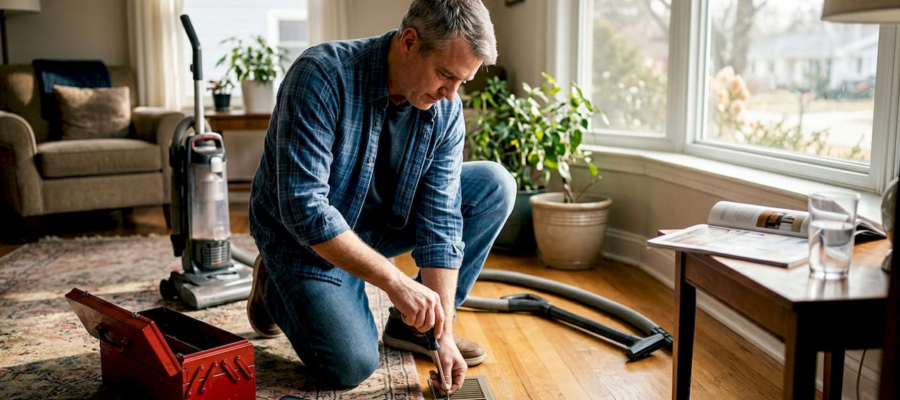
Remove vent covers by unscrewing fasteners or releasing clips. Place screws in a labeled container to prevent loss. Inspect covers for damage or warping that might affect reinstallation.
-
Clean vent covers separately using warm soapy water and a soft brush. Scrub both sides thoroughly, paying attention to louvers where dust accumulates heavily. Rinse completely and set aside to dry on towels.
-
Vacuum inside ducts using your vacuum’s hose attachment. Insert the hose as far as it reaches comfortably, moving it around to capture debris from all surfaces. Work slowly to allow suction time to pull loosened particles.
-
Brush duct surfaces gently using your stiff bristle brush. Focus on visible buildup and corners where debris collects. Avoid excessive force that might damage ductwork or dislodge connections. Follow brushing immediately with vacuuming to capture disturbed particles.
-
Inspect deeper into ducts using your flashlight. Look for signs of mold growth, pest activity, or structural damage. Note any concerning conditions that require professional attention rather than DIY intervention.
-
Clean or replace HVAC filters after completing vent cleaning. Dirty filters immediately recontaminate your freshly cleaned system. Check filter condition and upgrade to higher MERV ratings if current filters seem inadequate.
-
For dryer vents, disconnect the dryer from the wall outlet and pull it away from the wall. Detach the flexible duct from both the dryer and wall connection. Remove accumulated lint by hand, then vacuum thoroughly.
-
Clean the external dryer vent opening from outside your home. Remove the exterior cover and clear any lint, bird nests, or debris blocking the opening. Verify the flapper moves freely to allow proper exhaust.
-
Reattach all vent covers securely, ensuring proper alignment and tight seals. Loose covers allow air leakage that reduces system efficiency. Double check that screws are snug but not overtightened.
-
Restore power to your HVAC system and run it for several minutes. Listen for unusual sounds and verify proper airflow from all vents. Check that the system cycles normally and distributes air evenly.
Pro Tip: Take photos inside ducts before and after cleaning. These images document your work, help identify recurring problem areas, and provide valuable reference for future maintenance scheduling.
Understanding the air duct cleaning process helps you recognize when professional equipment might deliver better results. While DIY cleaning handles surface debris effectively, professional services access deeper duct sections and employ specialized tools for comprehensive cleaning.

| Cleaning method | Best for | Limitations |
|---|---|---|
| DIY vacuuming | Accessible vent registers and visible debris | Cannot reach deep into ductwork |
| Brush and vacuum | Stubborn surface buildup | May miss hidden contaminants |
| Professional service | Complete system cleaning and sanitization | Higher cost but more thorough |
Common mistakes and troubleshooting tips
Even well-intentioned homeowners make errors that undermine cleaning effectiveness or damage ventilation systems. Incorrect cleaning methods can damage vents or leave contaminants that continue affecting air quality. Recognizing these pitfalls helps you avoid costly mistakes and achieve better outcomes.
Never introduce water or liquid cleaners inside ductwork. Moisture creates ideal conditions for mold growth that spreads rapidly through your entire system. Even small amounts of water can saturate insulation around ducts, creating persistent dampness that supports microbial growth. Restrict water use to removable vent covers that can dry completely before reinstallation.
Avoid aggressive scrubbing with metal brushes or abrasive tools. Ductwork is typically thin metal or flexible material that damages easily under excessive force. Scratches and tears compromise system integrity, create air leaks, and provide new surfaces for debris accumulation. Use appropriate tools with gentle pressure to preserve duct condition.
Do not attempt partial cleaning that leaves some vents untouched. Contaminants in uncleaned sections continue circulating through your entire system, negating benefits from cleaned areas. Budget sufficient time to address every accessible vent in one comprehensive session rather than spreading work across multiple incomplete attempts.
Replace filters on the recommended schedule regardless of appearance. Filters trap microscopic particles invisible to the naked eye. A filter that looks relatively clean may be completely saturated with fine particulates that restrict airflow and reduce filtration effectiveness. Follow manufacturer guidelines rather than visual assessment.
Recognize situations requiring professional intervention:
- Visible mold growth inside ducts or on vent surfaces
- Evidence of rodent or insect infestation
- Ducts located in inaccessible areas like between floors
- Unusual odors persisting after cleaning
- Significant visible damage to ductwork
- Systems that have never been professionally cleaned
Pro Tip: If you encounter resistance when vacuuming or brushing, stop immediately rather than forcing tools deeper. Obstructions might indicate structural issues, disconnected ductwork, or problems requiring professional diagnosis.
Understanding when to clean air ducts prevents both premature and delayed maintenance. Clean too frequently and you waste time on unnecessary work. Wait too long and contaminants become harder to remove while causing ongoing health impacts.
Document your cleaning efforts with notes about conditions found, areas cleaned, and any concerns identified. This record helps you track maintenance intervals, notice patterns in debris accumulation, and communicate effectively with professionals when expert service becomes necessary. Simple notes on your phone or calendar provide valuable reference for future decisions.
Professional vent cleaning services for NY, NJ, and CT homeowners
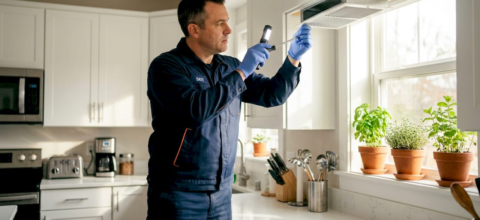
While DIY cleaning handles routine maintenance effectively, professional services deliver deeper results that protect your investment and health. Amazon Air Duct Cleaning brings over 10 years of specialized experience to residential vent cleaning throughout New York, New Jersey, and Connecticut. Our team uses commercial-grade equipment that reaches areas inaccessible to homeowners and removes contaminants beyond the capability of household vacuums.

Professional cleaning becomes essential when you know if you need air duct cleaning for mold remediation, pest removal, or complete system sanitization. Our courteous technicians assess your specific situation, explain findings clearly, and execute thorough cleaning that restores optimal air quality. We handle both air ducts and dryer vents with the same meticulous attention to safety and effectiveness.
Scheduling is straightforward and convenient. Learn how to prepare for air duct cleaning with our guidance, then book service at your convenience. Our dryer vent cleaning services in NY and NJ complement air duct work for comprehensive home ventilation maintenance. Contact us today to breathe easier tomorrow.
FAQ
How often should I clean my residential vents?
Most homeowners should clean vents every 3 to 5 years under normal conditions. This interval prevents significant buildup while avoiding unnecessary maintenance. Homes with pets, smokers, or family members with allergies benefit from more frequent cleaning every 2 to 3 years. Recent renovations that generate construction dust also warrant earlier cleaning regardless of your regular schedule.
What are the signs that my vents need cleaning?
Signs include visible dust, mold growth, unusual odors, and inconsistent airflow from your ventilation system. You might notice dust accumulating on furniture faster than normal or experience allergy symptoms that worsen indoors. Uneven temperatures between rooms and increased energy bills without explanation also indicate restricted airflow from dirty vents. Any musty smell when your HVAC system runs suggests moisture and potential mold requiring immediate attention.
Can I clean residential vents myself safely?
DIY cleaning is effective for surface vents but professionals are needed for deep or hazardous conditions. Homeowners can safely clean accessible vent registers, replace filters, and maintain dryer vents with basic tools. However, mold growth, pest infestations, or damage to ductwork require professional expertise and specialized equipment. Attempting complex cleaning without proper training risks spreading contaminants or damaging your system.
What tools do I need for basic vent cleaning?
Basic vent cleaning requires a vacuum with hose attachments, screwdrivers for cover removal, a stiff brush, and cleaning cloths. Safety equipment including a dust mask and work gloves protects you during the process. A flashlight helps inspect duct interiors, while a bucket of soapy water cleans removable covers. These common household items handle routine maintenance effectively without expensive specialty purchases.
Why is dryer vent cleaning so important?
Dryer vent cleaning prevents fire hazards caused by lint accumulation and improves appliance efficiency. Lint is highly flammable and builds up quickly in dryer exhaust systems. Restricted vents force dryers to work harder, increasing energy consumption and shortening appliance lifespan. Regular cleaning eliminates fire risk while reducing drying time and utility costs. This simple maintenance protects both your safety and your wallet.
Recommended
- Don’t Skip Air Duct Cleaning After Renovation (Here’s Why)
- The Air Duct Cleaning Process – Amazon Air Duct Cleaning
- Improve Indoor Air Quality with Easy Home Maintenance Tips
- 5 Signs Your Air Ducts Need Cleaning – Amazon Air Duct Cleaning