Facility HVAC: Recover up to 18% Heat Transfer with Coil Disinfection
Coil disinfection follows a strict sequence: inspect the coil, classify it as Type 1 (dry) or Type 2 (wet) cleaning per NADCA guidance, clean it thoroughly, and only then apply an EPA-labeled HVAC&R antimicrobial or add UV-C as an ongoing adjunct. When done in this order, you get better heat transfer and lower microbial load. Skip a step, and UV-C or chemical treatment on a dirty coil wastes money without fixing the underlying problem. Record Delta T and static pressure before any work begins so you have a baseline to measure against.
TL;DR:
- Proper coil disinfection requires following a sequence of inspection, classification, cleaning, and antimicrobial application to ensure effectiveness and prevent waste.
- Wet cleaning techniques should match the soil type and signs of biological growth, with UV-C being most effective on moist, fouled coils where biofilm is present.
- UV-C installation is most beneficial in humid environments and must be properly spaced, protected from condensate, and run continuously for optimal surface hygiene.
- All chemical treatments must have explicit HVAC&R labeling from EPA, with product choice depending on soil type and avoiding routine biocide use outside manufacturer instructions.
- Regular verification through Delta T and static pressure measurements, along with visual inspection, guides appropriate cleaning frequency and prevents unnecessary service.
Table of Contents
- Coil Disinfection Methods and When to Use Each
- Step-By-Step Coil Disinfection Workflow
- UV-C for Coils: What the Evidence Shows
- Chemicals, EPA Labeling, and Safe Application
- When to Hire a Certified Contractor vs Do It In-House
- Monitoring and Verification After Coil Work
- A Field Perspective on Coil Disinfection
- Professional Coil Cleaning and UV Installation in NY, NJ, and CT
- Essential Standards and Studies to Consult Next
- Sources
- FAQ
Coil Disinfection Methods and When to Use Each
Coil hygiene work splits into two NADCA-defined categories, and picking the wrong one wastes labor or damages fins. Type 1 cleaning is dry: mechanical removal of loose dust and debris with brushes, HEPA vacuums, and fin tools. Type 2 cleaning is wet: chemical coil cleaners and pressurized rinsing for coils with bonded soil, biological growth, or condensate contamination.
Beyond that core split, several methods address different problems:
- Mechanical/dry cleaning — fast, low risk to fins, but ineffective against biofilm or grease.
- Pressure/wet cleaning with coil cleaners — removes bonded soil and microbial buildup; requires rinse water capture.
- EPA-labeled antimicrobials — reduce microbial regrowth after cleaning; never a substitute for cleaning itself.
- UV-C/UVGI — continuous adjunct that suppresses surface biofilm between service visits.
- Thermal/steam cleaning — effective on heavy grease loads but requires careful temperature control near aluminum fins.
Disinfection beyond basic cleaning is warranted when you see visible microbial growth, persistent musty odors, or a slimy condensate pan. If the coil is simply dusty with no biological signs, Type 1 cleaning alone usually solves it. Weigh the cost of extra chemical treatment or a UV retrofit against the efficiency gain and the regulatory paperwork it invites, particularly wastewater capture for wet cleaning.
Step-By-Step Coil Disinfection Workflow
A rushed coil job is how you end up doing it twice. Facility teams get consistent results by following the same sequence every time, regardless of coil size or location.
- Prework: lock out/tag out the unit, put on PPE, record baseline Delta T and static pressure, and photograph the coil face and drain pan.
- Inspect and classify: look for slime, discoloration, or musty odor. Any of these signs pushes the job from Type 1 to Type 2, per NADCA’s inspection standard.
- Type 1 mechanics: HEPA vacuum first, then soft brushes and fin combs, working with the fin direction to avoid bending them.
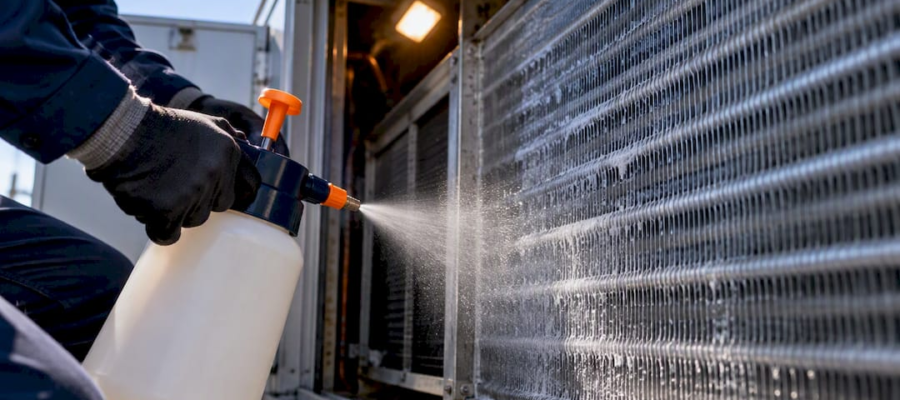
- Type 2 wet cleaning: apply a diluted coil cleaner, let it soak roughly 4 to 5 minutes to loosen bonded soil, then rinse at controlled pressure. Capture rinse water and dispose of it according to local wastewater rules.
- Antimicrobial application: check the product label for explicit HVAC&R authorization before use, choose ULV fogging or hand spraying based on coil accessibility, and observe the labeled contact time and reentry interval.
Pro Tip: Never spray coil cleaner from top to bottom on a running unit. Working bottom to top lets you see runoff as it happens, and it keeps the product from drying on the fins before the soak time is up.
UV-C for Coils: What the Evidence Shows
UV-C lamps at roughly 254 nanometers damage the DNA of microorganisms living in surface biofilm, which is why they’re installed to shine directly across the coil face rather than into the airstream generally. The technology works best where moisture accumulates, since biofilm needs a wet surface to establish itself.
Lab and field research on UV-C coil irradiation, cited in a University of Colorado study, found heat-transfer improvements averaging 3.0% to 6.4% under controlled lab conditions, with field measurements reaching 14% to 18% UA improvement on heavily fouled coils. That same research found little or no measurable benefit on dry coils, since there’s no standing biofilm layer for the light to act on. If your climate runs dry most of the year, a UV retrofit will underdeliver on energy savings even if it still helps with surface hygiene.
Field data on coils in condensing, high-humidity conditions consistently outperforms results measured on dry coils, according to the same Colorado study.
Installation details that matter:
- Mount lamps roughly 3 feet from the coil face for even irradiance coverage.
- Downstream placement protects the lamp from direct condensate but reduces dose to the upstream fin surface.
- Space lamps according to manufacturer irradiance charts. Guessing at spacing undercuts the dose.
- Keep filters intact upstream. A bypassed or torn filter lets particulates shadow the coil from UV exposure, per ASHRAE’s UVGI guidance.
- Run lamps continuously rather than intermittently for consistent biofilm suppression, and track lamp hours since output degrades before the lamp visibly fails.
Compare fixture types before you buy, since output varies significantly across different UV light designs.
Chemicals, EPA Labeling, and Safe Application
The EPA’s supplemental guidance states plainly that antimicrobial and disinfectant products need explicit HVAC&R label authorization. A product on EPA’s List N for surface disinfection is not automatically cleared for use inside a duct or on a coil. Read the label every time, not just the first time you buy a product.
Cleaner selection depends on the soil type:
- Acid-based cleaners — effective on outdoor condenser coils with mineral scale, but can corrode certain metals if left too long.
- Alkaline cleaners — cut through grease and organic buildup common on kitchen exhaust coils.
- Detergent/no-rinse formulas — gentler option for coils where full rinse capture is impractical.
NADCA’s white paper on chemical applications recommends pH-neutral products where possible and specifically cautions against routine biocide or sealant use outside manufacturer directions.
Pro Tip: Keep the safety data sheet for whatever product you’re using on-site during application, not filed back at the shop. If a technician needs reentry timing or first-aid steps, they need it in the moment.
When to Hire a Certified Contractor vs Do It In-House
Some jobs are straightforward for an in-house tech with the right tools. Others aren’t. Bring in a NADCA-aligned contractor when the coil is behind ductwork that requires disassembly, when you see visible mold rather than ordinary dust, when static pressure keeps climbing despite filter changes, when coils are icing over, or when your team lacks a manometer and thermometer to establish Delta T.
A qualified contractor should perform a documented inspection before touching the coil, set up negative air containment for Type 1 dry work to control dust migration, execute wet cleaning with proper rinse capture, and hand you before/after photos and readings. Ask any contractor what cleaning classification they’ll use and why, which products they’re applying and whether those products are HVAC&R labeled, and how they’ll verify the job worked.

Red flags include a contractor skipping inspection, applying an unlabeled disinfectant, or promising permanent mold elimination. No product or service eliminates recontamination risk permanently, since biofilm returns wherever moisture and organic material meet.
Monitoring and Verification After Coil Work
Delta T and static pressure are the two numbers that tell you whether cleaning actually worked, not just whether it happened. Measure Delta T by comparing return air temperature to supply air temperature with the system running steady state. Measure static pressure with a manometer at the same points before and after service. Consistent documentation of both readings, taken the same way each time, lets you compare visits meaningfully rather than guessing.
Improvement after cleaning should show up as a measurable Delta T increase and a static pressure drop, though the exact numbers vary by system and fouling severity. Keep photos, readings, product labels, and UV lamp hour logs together in one maintenance file.
- Schedule the next service based on triggers, not a fixed calendar: rising static pressure, shrinking Delta T, or visible fouling on inspection.
- Coastal and high-humidity locations tend to need more frequent attention. Coils in Norwalk, CT face different fouling rates than a dry inland system.
- Review coil cleaning frequency guidance tied to these metrics rather than a generic annual reminder.
A Field Perspective on Coil Disinfection
Experienced coil service teams in the New York, New Jersey, and Connecticut area observe that coils placed in humid, condensing zones foul faster and respond better to UV. Internal field observations suggest UV placement correctly positioned relative to the coil face can meaningfully cut surface microbial counts between service visits, though results always depend on local moisture and fouling conditions. The team schedules follow-up cleanings off Delta T and static pressure trends, not a generic calendar date, because a coil in a Connecticut coastal building fouls on a different timeline than one in a dry inland mechanical room.
— Victor
Professional Coil Cleaning and UV Installation in NY, NJ, and CT
This company offers local professional coil cleaning and UV-C installation services with trained technicians applying Delta T and static pressure measurement practices for jobs in New York, New Jersey, and Connecticut.

Our services cover the full range this article walks through: evaporator coil and blower cleaning, condenser coil cleaning, UV light installation, commercial air duct cleaning, and antimicrobial and deodorizing duct system cleaning. An on-site inspection includes coil measurement, a documented scope of work, and a transparent estimate before anything is touched. If you’re seeing rising static pressure, visible growth, or a musty smell from your ductwork, book an inspection and get a straight answer on whether you need Type 1 cleaning, Type 2 cleaning, a UV retrofit, or all three.
Essential Standards and Studies to Consult Next
For deeper reference beyond this guide, these are the primary documents that govern coil hygiene work:
- NADCA’s general specifications for Type 1/Type 2 classification and inspection procedure.
- EPA’s supplemental guidance on disinfectant and sanitizer labeling for HVAC&R systems.
- ASHRAE’s UVGI guidance on lamp sizing, placement, and safety shielding.
- The University of Colorado UVG-CC study on coil heat-transfer performance under wet and dry conditions.
Sources
- NADCA general specifications (inferred)
- Supplemental Guidance – Use of Disinfectants and Sanitizers in HVAC&R Systems | US EPA
- UVG-CC lab study (University study)
- ASHRAE: reducing infectious disease transmission with UVGI
FAQ
Is HVAC Coil Cleaning Worth It?
Yes. A clean coil transfers heat more efficiently, which lowers energy costs and reduces the microbial load that affects indoor air quality. The Colorado UVG-CC study found heat-transfer gains up to around eighteen percent on heavily fouled coils after treatment.
What Chemicals Are Used to Clean HVAC Coils?
Technicians use acid-based cleaners for mineral scale on outdoor condensers, alkaline cleaners for grease buildup, and pH-neutral or no-rinse formulas where full rinse capture isn’t practical. Any antimicrobial added afterward must carry explicit HVAC&R label authorization from the EPA, not just a general surface-disinfectant listing.
How Often Do HVAC Coils Need to Be Cleaned?
Frequency depends on fouling triggers rather than a fixed calendar: rising static pressure, shrinking Delta T, or visible growth on inspection all signal it’s time. Coils in humid or coastal locations, like those in Norwalk, CT, typically need attention more often than dry inland systems.
How Much Does It Cost to Have an HVAC Coil Cleaned?
Cost depends on coil accessibility, whether Type 1 or Type 2 cleaning is required, and whether a UV retrofit is added. Amazon Air Duct Cleaning provides pricing after an on-site inspection through its evaporator coil and condenser coil service pages.
Does UV Light Replace the Need for Coil Cleaning?
No. UV-C is an adjunct that suppresses biofilm regrowth between service visits, not a substitute for physical cleaning. ASHRAE guidance treats UVGI as a supplement to filtration and mechanical cleaning, and studies show it delivers little benefit on a coil that’s already dry and free of biofilm.
Recommended
- Homeowners: 55% Fewer Coil Microbes When HVAC UV Is Placed Right
- Norwalk CT Evaporator Coil Cleaning | Older Homes, Coastal Humidity
- NY/NJ/CT Homeowners: Clean Coils When Delta T Falls or Pressure Rises
- Expert Condenser Coil Cleaning in NY & NJ | Book Today!