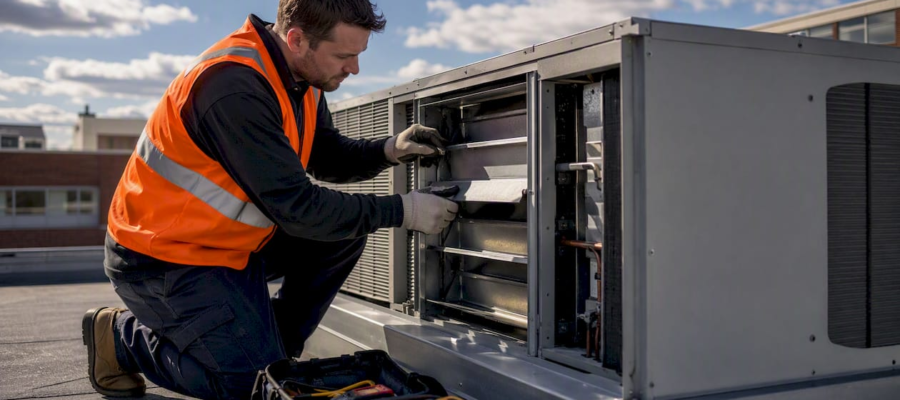
School HVAC Health Audit Steps for Facility Managers
Run this 8-step school HVAC health audit to verify ventilation, filtration, controls, and moisture management so you can hand the district a prioritized, photo-verified corrective action plan. The eight steps are: (1) pre-audit preparation, (2) record review, (3) zone mapping, (4) on-site inspection, (5) measurements and testing, (6) controls verification, (7) scoring and reporting, and (8) follow-up scheduling.
A complete audit of a typical K–12 building takes roughly two to three days of field time plus one day of report writing. The outcome is concrete: ventilation rates confirmed against design, filtration verified by MERV rating and differential pressure, moisture and mold risk documented, and every corrective action ranked by safety, IAQ impact, energy cost, and budget priority.
Printable one-page checklist:
- Step 1 (2–4 hrs): Gather O&M manuals, as-built drawings, maintenance logs, utility bills, and prior IAQ complaints
- Step 2 (1–2 hrs): Review records for gaps, deferred work orders, and recurring complaints
- Step 3 (1 hr): Map zones, AHU service areas, and classroom assignments to a floor plan
- Step 4 (4–8 hrs): Walk every AHU, rooftop unit, unit ventilator, duct access, and classroom
- Step 5 (2–4 hrs): Measure airflow (CFM), CO2, relative humidity, and differential pressure across filters
- Step 6 (1–2 hrs): Test controls, time clocks, damper travel, and DCV sensor calibration
- Step 7 (4–6 hrs): Score findings, build the risk matrix, write the report with photo appendix
- Step 8 (1 hr): Enter CMMS work orders, assign owners, and set verification deadlines
Key Takeaways
A complete school HVAC health audit requires pre-audit document review, field measurements against ASHRAE 62.1 minimums, photo-verified inspection records, and a risk-scored corrective action plan the district can fund and track.
| Point | Details |
|---|---|
| Start with documents | Gather O&M manuals, maintenance logs, utility bills, and prior IAQ complaints before the first site visit. |
| Measure, don’t assume | Use a flow hood, Pitot tube, or CO2 surrogate to confirm outdoor air CFM per person against ASHRAE 62.1 design values. |
| CO2 above 1,000 ppm is a trigger | Persistent readings above 1,000 ppm during occupied hours indicate outdoor air delivery is below the ASHRAE 62.1 minimum. |
| Use DP to drive filter changes | Replace filters when differential pressure exceeds the manufacturer’s clean baseline by 0.1 in. w.c., not on a fixed calendar. |
| Amazonairpro for remediation | For coil cleaning, duct cleaning, and antimicrobial treatments in NY, NJ, and CT schools, Amazonairpro provides photo-documented commercial services. |
Table of Contents
- What do you need before the school HVAC health audit starts?
- How do you conduct the on-site HVAC inspection checklist?
- How do you measure outdoor air supply and CO2 in a school?
- How do you verify that HVAC controls are actually working?
- What are the IAQ red flags that require immediate action?
- How do you write a school HVAC audit report the district will act on?
- Which standards and commissioning references should you cite?
- How do you turn audit findings into an ongoing maintenance program?
- What does a field-tested photo verification protocol look like?
- What field pitfalls do facility teams run into most often?
- Amazonairpro handles the remediation your audit uncovers
- What I keep seeing in the field
- Sources
- FAQ
What do you need before the school HVAC health audit starts?
Showing up on-site without the right documents is the single most common reason a school air quality assessment takes twice as long as it should. Gather these before you schedule the first walkthrough.
Documents to collect
Pull every piece of paper that describes how the system was designed and how it has been maintained:
- Original O&M manuals and as-built mechanical drawings (confirm duct routing and equipment schedules)
- BAS/controls sequences of operation for each AHU and rooftop unit
- Maintenance logs for the past two years, including filter change dates and work orders
- Utility bills for the past 12 months (electricity and gas, for ENERGY STAR Portfolio Manager benchmarking)
- Any prior IAQ complaints, health referrals, or parent/staff correspondence about odors or comfort
- Previous audit or commissioning reports, if they exist
If as-built drawings are missing, note it in the audit scope. You will need to sketch zone boundaries manually during the walkthrough.
Who to involve
The audit works best when you have a small, defined team. The maintenance lead owns the physical inspection. A controls technician handles BAS access and damper commands. An energy manager or IAQ coordinator reviews utility data and sets the benchmarking baseline in ENERGY STAR Portfolio Manager. The principal or building administrator signs off on scheduling and communicates any temporary space restrictions to staff and parents.
Tools and calibration
Bring every instrument you plan to use, and verify calibration before you leave the shop:
- Flow hood (balometer) or anemometer: confirm the calibration certificate is current; zero the instrument per the manufacturer’s procedure
- CO2 meter: check against a known outdoor reading (approximately 420 ppm ambient); a reading more than 50 ppm off requires recalibration or replacement
- Relative humidity meter: cross-check two units against each other; discard any unit showing more than 3% RH deviation
- Differential pressure gauge (magnehelic or digital): zero before each filter bank measurement
- Smoke pencil or tissue on a stick: quick airflow direction confirmation at diffusers and returns
- Camera or phone with GPS metadata enabled: every photo needs a timestamp
- PPE: N95 or P100 respirator, safety glasses, gloves, and hard hat for rooftop and attic work
Pro Tip: Zero your CO2 meter outdoors for at least five minutes before entering the building. A meter that has been stored in a closed case often reads 50–100 ppm high until it equilibrates.
Scheduling note: CO2 measurements are only meaningful during peak occupancy. Schedule your occupied-mode checks for mid-morning on a full school day, typically 9:30–11:00 AM, when classrooms are at or near design capacity. Avoid testing on half-days, testing days, or days with unusual schedules. Coordinate with the principal at least one week in advance so no rooms are unexpectedly empty.
How do you conduct the on-site HVAC inspection checklist?
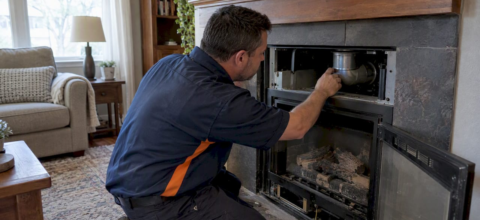
Work through the building in a logical sequence: mechanical rooms first, then rooftop equipment, then classroom units, then exhaust fans and intake locations. Assign each piece of equipment a unique tag that matches your zone map before you start photographing.
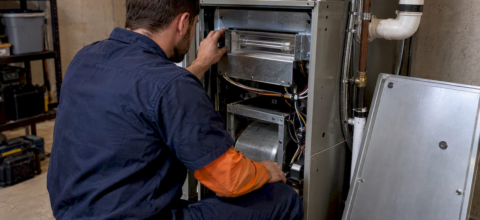
AHU and mechanical room checks
For each air handling unit, record the unit tag, manufacturer, model, and approximate age. Then check:
- Filter condition: pull the filter and read the MERV label. A MERV 8 is the minimum for most school applications; MERV 13 is preferred for classrooms. Note any missing filters, torn media, or bypass gaps around the frame.
- Filter housing seals: run a gloved finger around the filter frame perimeter. Any gap large enough to feel airflow means unfiltered air is reaching the coil.
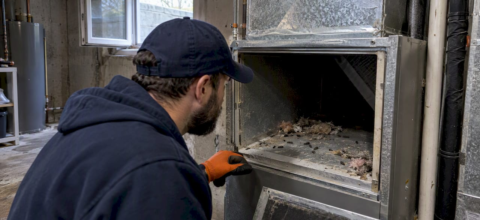
- Coil cleanliness: inspect the evaporator and heating coils with a flashlight. Blocked fins, visible debris, or biological growth (dark streaking) all require cleaning before the system can deliver design airflow.
- Condensate pan: check for standing water, slime, or scale. A pan that holds water between cycles is a mold risk. Per the EPA’s preventive maintenance guidance, regular inspection of drain lines prevents microbial growth that costs far more to remediate than to prevent.
- Blower belts and bearings: look for glazing, cracking, or fraying on belts; listen for bearing noise at startup.
- Damper linkage: confirm the OA damper linkage is labeled, moves freely, and is not disconnected or seized.
Rooftop and attic work
Rooftop units require fall protection compliance. Do not proceed without a buddy, proper anchor points, and a signed rooftop access permit. Check intake and exhaust locations relative to contaminant sources: loading docks, dumpsters, kitchen exhausts, and idling bus lanes should be at least 25 feet from any OA intake. Document any obstruction with a wide-angle photo and a close-up detail shot.

Pro Tip: Photograph every unit’s nameplate before you photograph anything else. The nameplate shot becomes the anchor image for that unit’s folder, and it saves significant time when you are writing the report.
Classroom unit ventilators and exhaust fans
In each representative classroom, check the unit ventilator face: is the OA louver open or blocked? Is the filter accessible and labeled? Test airflow direction at the supply diffuser with a tissue. Note any visible mold on ceiling tiles near supply or return grilles, which often indicates condensation from an oversized or poorly controlled cooling system.

The EPA’s Recommended Action Checklists include ventilation controls, filtration, and intake/exhaust location as primary inspection tasks, and they recommend regular inspection as the baseline expectation for every school.
Photo documentation protocol
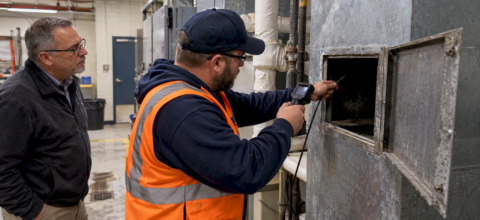
For each finding, capture three images: (1) an overview shot showing the unit in context, (2) a close-up of the specific condition, and (3) a calibrated instrument screenshot if a measurement is involved. Use a consistent file naming convention: BldgA_AHU3_Filter_2026-08-01_JohnD_1200.jpg (building, unit tag, component, date, inspector initials, time). Store photos in a folder structure that mirrors your zone map.
How do you measure outdoor air supply and CO2 in a school?
Measurement is where most school HVAC evaluations fall short. Facility teams often skip airflow measurement because they lack a flow hood, or they take a single CO2 reading and call it done. Neither approach produces defensible data.
Airflow measurement step by step
- Set up the flow hood at each supply register in the sample zone. Hold it flush against the diffuser face for a stable reading (typically 15–30 seconds). Record CFM per register.
- Sum register CFM for the zone and compare to the design CFM on the as-built schedule.
- For large supply or return ducts where a flow hood cannot reach, use a Pitot tube traverse: divide the duct cross-section into a grid, measure velocity pressure at each point, average the readings, and convert to velocity using the equation V = 4005 × √VP (where VP is velocity pressure in inches of water column). Multiply by duct area to get CFM.
- Calculate outdoor air percentage from BAS mixed-air and return-air temperature sensors if available, or use CO2 as a surrogate.
Outdoor air percentage (from temperatures):
OA% = (Return Air Temp − Mixed Air Temp) / (Return Air Temp − Outdoor Air Temp) × 100
Outdoor air CFM:
OA CFM = Total Supply CFM × (OA% / 100)
OA CFM per person:
OA CFM/person = OA CFM / Design Occupancy
ASHRAE Standard 62.1, the national consensus reference for outside air ventilation, specifies minimum outdoor air rates for classrooms, gymnasiums, and special-use spaces. It is commonly incorporated into New York, New Jersey, and Connecticut state building codes, so your measured OA CFM/person needs to meet or exceed the 62.1 table value for the space type.
CO2 measurement and sampling strategy
CO2 is a reliable surrogate for outdoor air delivery when measured correctly. The EPA commissioning checklist instructs auditors to measure outdoor air per person, use flow hoods or Pitot tubes, and document whether measured intake CFM meets the calculated required minimum, with CO2 as a cross-check.
Take spot readings at breathing zone height (3–4 feet) during peak occupancy. For trending, deploy a data-logging CO2 meter for a full school day in any room where the spot reading exceeds 900 ppm.
Health threshold reference: Elevated CO2 readings during occupied hours indicate that outdoor air delivery may be below the ASHRAE 62.1 minimum for that space and warrant corrective action to maintain adequate ventilation.
Humidity and differential pressure
Record relative humidity at the same time as CO2. Measure differential pressure across each filter bank with a magnehelic gauge or digital manometer. Record the clean-filter baseline DP from the manufacturer’s spec sheet and flag any reading more than 0.1 inches of water column above that baseline as a filter change trigger.
How do you verify that HVAC controls are actually working?
A controls check is not the same as a BAS screenshot. You need to command the system and watch what happens physically.
BAS verification sequence
- Log into the BAS and confirm the AHU is in occupied mode (or force it to occupied mode for the test).
- Command the OA damper to 100% open. Walk to the unit and confirm physical travel with your eyes. Re-read the BAS position feedback and confirm it matches.
- Command the OA damper to minimum position. Confirm physical travel again. Measure OA CFM at minimum position and compare to the design minimum.
- Check the economizer: on a day when outdoor conditions qualify (typically below 55°F dry-bulb in the Northeast), confirm the economizer opens fully and supply air temperature drops.
- Verify time schedules: confirm the BAS clock matches actual time, and that occupied/unoccupied transitions happen at the scheduled times.
Pro Tip: The most common control failure in schools is an OA damper that is commanded open in the BAS but physically stuck closed. The BAS shows “open” because the actuator is energized, but the linkage is seized. Always verify with your eyes, not just the screen.
Demand control ventilation (DCV) checks
If the building uses DCV, locate the CO2 sensors and confirm they are in the return air stream or occupied zone, not in the supply duct. A sensor in the supply duct reads diluted air and will never trigger increased ventilation. Calibrate each DCV sensor against your portable CO2 meter. A deviation greater than 75 ppm between the BAS sensor and your calibrated portable meter means the sensor needs recalibration or replacement.
Common failure mode: Seasonal switches left in “summer” mode during the school year reduce or eliminate outdoor air delivery in many older pneumatic systems. Check every seasonal switch at the start of each semester and document the position in the maintenance log.
Pneumatic systems
For older pneumatic controls, verify main air pressure (typically 15–20 psi). Low main air pressure causes damper actuators to fail in their spring-return position, which is often closed for OA dampers. A pressure drop below 12 psi is a red flag requiring immediate compressor service.
What are the IAQ red flags that require immediate action?
Some findings cannot wait for the written report. These conditions require you to stop, document, and act the same day.
Escalate immediately if you find:
- Visible mold on coil surfaces, duct liner, or drain pans. Do not run the system until the affected section is isolated. Mold spores distributed through the duct system can affect every occupied space the unit serves.
- Strong musty or chemical odors at supply registers. Shut down the affected AHU and identify the source before resuming operation.
- Standing water in a condensate pan or on a mechanical room floor. Overflow indicates a blocked drain line; the pan is a direct mold incubator.
- CO2 readings persistently above 1,000 ppm in occupied classrooms. Increase outdoor air immediately by opening OA dampers manually or opening windows if outdoor conditions allow.
- RH above 60% in any occupied space. High humidity accelerates mold growth on building materials and HVAC components.
- RH below 30% during the heating season. Dry air increases respiratory irritation and the transmission risk of airborne pathogens.
- Any OA intake located within 25 feet of a loading dock, dumpster, or idling vehicle zone.
For suspected microbial growth in coils or duct liner, the appropriate response is professional remediation, not a DIY cleaning attempt. Disturbing biological growth without proper containment spreads contamination. Document the finding with photos, note the location and extent in the report, and flag it as a Priority 1 corrective action. For HVAC mold remediation in NY, NJ, and CT school buildings, engage a qualified contractor with documented containment and clearance protocols.
How do you write a school HVAC audit report the district will act on?
A report that sits in a drawer helps no one. Structure it so the superintendent can read the executive summary in five minutes and the facilities team can pull individual work orders from the appendix.
Report structure
- Executive summary (1 page): State the audit scope, number of units inspected, number of classrooms sampled, and the top three findings by risk score.
- Scope and sampling method: List buildings, zones, units inspected, and the percentage of classrooms sampled. Note any areas not accessed and why.
- Per-unit findings: One section per AHU or rooftop unit, with unit tag, inspection date, inspector name, photo references, and a findings summary.
- Measurement appendix: A table of all recorded measurements (see below).
- Corrective action plan: Ranked list of actions with risk score, estimated cost range, responsible party, and target completion date.
- CMMS work orders: Pre-populated work order templates for each Priority 1 and Priority 2 finding, with photo attachments and technician ID fields.
Risk prioritization matrix
Score each finding on four axes: Safety (1–3), IAQ Impact (1–3), Energy Cost (1–3), and Repair Cost (1–3, where 1 = low cost). Sum the scores. A total of 10–12 is Priority 1 (act within 30 days). A total of 7–9 is Priority 2 (act within 90 days). A total of 4–6 is Priority 3 (schedule in the next annual cycle).

Per ASHRAE’s Design Guidance for Education Facilities, professional audits should use documented, date-stamped, photo-verified task completion records for accountability, and prioritization should follow ASHRAE-aligned frameworks.
Measurements table
Which standards and commissioning references should you cite?
Citing the right authorities turns your recommendations from opinions into defensible requirements the district can include in procurement language.
ENERGY STAR Portfolio Manager
Enter your 12 months of utility data into ENERGY STAR Portfolio Manager to establish a baseline Energy Use Intensity (EUI) for the building. After corrective actions are complete, re-enter updated utility data to quantify the energy savings. This gives the district a dollar figure to attach to HVAC improvements, which strengthens the case for capital budget requests.
How do you turn audit findings into an ongoing maintenance program?
A one-time audit is useful. A maintenance program built from audit findings is what actually protects students and staff year after year.
Preventive maintenance schedule
- Monthly: Visually inspect condensate pans and drain lines in all AHUs. Check blower belt condition. Log findings in the CMMS with a date stamp and technician ID.
- Quarterly: Measure differential pressure across all filter banks. Replace any filter reading more than 0.1 in. w.c. above the manufacturer’s clean baseline, regardless of calendar date. Spot-check CO2 in three to five representative classrooms during peak occupancy. Verify OA damper physical position against BAS command.
- Semi-annually (start of each semester): Inspect coil surfaces for biological growth and debris. Flush condensate drain lines. Verify seasonal switches are in the correct position. Check pneumatic main air pressure if applicable.
- Annually: Full repeat of the HVAC system evaluation, including airflow measurements in all sampled zones, CO2 logging in high-occupancy rooms, and a full controls verification sequence.
Using differential pressure as the filter replacement trigger rather than a fixed calendar interval is the most reliable method. OxMaint’s school HVAC maintenance guidance recommends documenting DP values in the asset record so you can track filter loading trends over time and anticipate replacement needs before airflow is significantly reduced.
Pro Tip: Set up a simple spreadsheet or CMMS dashboard that plots DP readings over time for each AHU. A filter that reaches its change threshold in six weeks instead of the usual twelve is telling you something: either occupancy has increased, the upstream duct is dirty, or the MERV rating is too high for the fan’s static pressure capacity.
Per the IAQ Tools for Schools preventive maintenance guidance, regular walkthroughs and scheduled maintenance plans reduce costly repairs and build a sustainable IAQ program.
For district-level coordination, the USGBC’s School IAQ Management Toolkit recommends aligning IAQ targets, including a 30–50% relative humidity goal, with district energy goals to avoid conflicting objectives between the facilities and energy management teams.
What does a field-tested photo verification protocol look like?
Photo documentation is the difference between an audit that produces change and one that gets filed away. A consistent protocol makes your records defensible to school boards, parents, and state regulators.
Printable template fields
Every inspection record should capture: unit tag, building and room number, inspector name, date and time, photo types (overview, close-up, problem detail), measurement snapshot values, and a corrective action code (P1/P2/P3 from your risk matrix).
File naming and folder structure
Use this convention: [Building]_[UnitTag]_[Component]_[YYYY-MM-DD]_[InspectorInitials]_[HHMM].jpg
Example: LincolnES_AHU2_CondensatePan_2026-09-15_MR_0945.jpg
Organize folders by building, then by unit tag, then by inspection date. Keep a master index spreadsheet that maps each file name to its finding code and corrective action status.
Minimum evidence per finding
Capture at least three images for any finding that generates a work order: one overview shot showing the unit in context, one close-up of the specific defect or condition, and one calibrated instrument screenshot showing the measurement value with the date/time stamp visible. For property management documentation best practices, this three-image standard is the minimum that satisfies most district compliance requirements.
Pro Tip: Enable GPS metadata on your phone camera before the walkthrough. The GPS coordinates embedded in the photo file confirm the photo was taken at the building, not at a desk, which matters when a board member questions whether the inspection actually happened.
What field pitfalls do facility teams run into most often?
The most expensive HVAC problems in schools are not the dramatic failures. They are the quiet ones that go unnoticed for months.
Missing filters are the most common. A filter that fell out of its frame six months ago looks fine from the hallway, but the coil behind it is now packed with debris. Incorporate a filter frame seal check and a DP reading into every AHU inspection, not just the annual audit. The EPA’s preventive maintenance guidance specifically flags missing filters as a leading cause of plugged coils and emergency repairs.
OA dampers stuck closed are among the most common findings. The BAS may report the damper as open while the damper is physically closed, leading to elevated CO2 levels indicating insufficient outdoor air. The fix is often a $15 linkage pin or a seized actuator shaft, but it requires someone to physically look at the damper, not just read the BAS screen.
Clogged condensate drains are third. A drain that overflows once creates standing water, which creates mold, which requires remediation. Flushing condensate lines quarterly with a wet-dry vacuum and a cup of diluted bleach solution takes less than ten minutes per unit and prevents a problem that can cost thousands to remediate.
Mislocated CO2 sensors are a subtler issue. A sensor mounted in the supply duct reads diluted air and will never trigger DCV. A sensor mounted near a door or window reads outdoor air and will never trigger DCV either. Both scenarios give the BAS false confidence that ventilation is adequate.
Quick fixes your team can do safely between vendor visits:
- Seal filter frame gaps with foam weatherstripping tape (available at any hardware store)
- Clear intake screens of leaves, debris, and bird nests
- Flush condensate drain lines with a wet-dry vacuum
- Replace worn or glazed blower belts (match the belt number from the nameplate)
- Reattach disconnected OA damper linkage pins if the actuator and shaft are accessible
When a quick fix is not enough, escalate. Suspected mold in coils or duct liner, refrigerant issues, structural duct damage, and any electrical work require a licensed contractor. For a tissue test when a flow hood is unavailable, tape a strip of tissue to a pencil and hold it near a supply diffuser. If it deflects toward the room, supply air is flowing. If it deflects toward the grille, you may have a return/supply reversal worth investigating.
Amazonairpro handles the remediation your audit uncovers

When your audit flags dirty coils, contaminated duct liner, clogged condensate lines, or suspected microbial growth, the corrective work belongs with a contractor who documents everything the same way your audit does. Amazonairpro provides commercial air duct cleaning, coil cleaning, condensate line clearing, and antimicrobial duct treatments for schools and institutional buildings across New York, New Jersey, and Connecticut.
Every job includes before-and-after photos, measurement documentation, and a written clearance sign-off you can attach directly to your audit report. When you request a scope, bring your audit’s measurement table, your Priority 1 photo evidence, and the unit tags you flagged. That package lets the team quote accurately and start work without a second site visit. Contact Amazonairpro to request a school quote and get a scope matched to your specific audit findings.
What I keep seeing in the field
Most school HVAC audits fail not because the team lacks knowledge, but because they lack a consistent protocol. The checklist exists. The standards exist. What is missing is the discipline to photograph every finding the same way, record every measurement against a design value, and score every corrective action against the same four-axis matrix before writing a single recommendation.
The teams that produce reports the district actually funds are the ones who walk in with a printed zone map, a calibrated CO2 meter, and a folder structure already set up on their phone. The superintendent does not need to understand ASHRAE 62.1 to approve a Priority 1 work order. They need a photo of standing water in a condensate pan, a CO2 reading of 1,080 ppm next to a classroom of 28 students, and a dollar figure. Your job as the facility manager is to translate what the equipment is telling you into language that moves a budget line.
The other thing worth sitting with: a single audit is not an IAQ program. It is a starting point. The districts that consistently protect student health are the ones that treat the audit findings as the seed of a CMMS-based preventive schedule, not as a one-time report. Build the quarterly DP checks, the semester-start damper verifications, and the annual CO2 logging into the maintenance calendar before you close the audit report. That is the difference between a building that passes its next inspection and one that generates the same findings two years in a row.
Sources
- Indoor Air Quality Tools for Schools: Preventive Maintenance Guidance Documents | US EPA
- Design Guidance for Education Facilities, Version 2.0 | ASHRAE
Commissioning contract language to include: “Contractor shall verify sequence of operations for all AHUs and rooftop units, conduct functional performance testing of OA dampers and DCV controls, measure and document supply airflow at a minimum of 10% of diffusers per zone, and deliver a commissioning report with date-stamped, photo-verified results within 30 days of substantial completion.”
FAQ
What are the main steps in a school HVAC health audit?
A school HVAC health audit follows eight steps: pre-audit preparation, record review, zone mapping, on-site inspection, airflow and CO2 measurements, controls verification, risk-scored reporting, and follow-up scheduling. A typical K–12 building requires two to three days of field time plus one day of report writing.
What CO2 level indicates a ventilation problem in a classroom?
A CO2 reading persistently above 1,000 ppm during occupied hours indicates that outdoor air delivery is below the ASHRAE 62.1 minimum for that space. Readings above 1,100 ppm warrant corrective action before the next school day.
How do you measure outdoor air supply in a school HVAC system?
Use a flow hood at supply registers to measure CFM, then calculate OA% from mixed-air and return-air temperatures or use CO2 as a surrogate. The EPA commissioning checklist provides step-by-step instructions for measuring OA CFM per person and comparing it to the ASHRAE 62.1 required minimum.
How often should school HVAC filters be replaced?
Replace filters when differential pressure across the filter bank exceeds the manufacturer’s clean baseline by 0.1 inches of water column, regardless of calendar date. Calendar-only schedules miss early loading caused by increased occupancy or upstream duct contamination.
What should a school HVAC audit report include?
The report should contain an executive summary, scope and sampling method, per-unit findings with photos and timestamps, a measurements table, a risk-scored corrective action plan, and CMMS-ready work orders. Per ASHRAE’s Design Guidance for Education Facilities, all task completion records should be date-stamped and photo-verified for accountability.
Recommended
- Step-by-Step HVAC Cleaning for Businesses in 2026 – Amazon Air Duct Cleaning
- Commercial Ductwork Troubleshooting Steps for Facility Managers – Amazon Air Duct Cleaning
- Property Manager HVAC Essentials: Your 2026 Field Guide – Amazon Air Duct Cleaning
- HVAC Maintenance Guide: Boost Air Quality & Efficiency – Amazon Air Duct Cleaning