Commercial Ductwork Troubleshooting Steps for Facility Managers
TL;DR:
- Proper troubleshooting begins with simple checks of thermostats, circuit breakers, and filters, which resolve most issues quickly. Measuring static pressure and inspecting ductwork for leaks or restrictions are essential steps to identify airflow problems and energy inefficiencies. Regular preventive maintenance and professional inspections help ensure long-term system performance and reduce future troubleshooting costs.
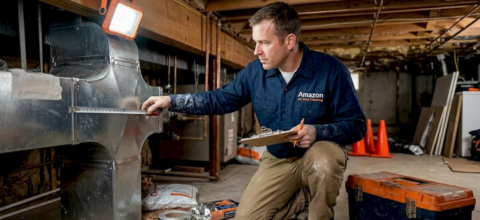
When airflow complaints start rolling in from tenants or staff, the pressure to fix problems fast is real. Systematic commercial ductwork troubleshooting steps, what HVAC professionals call HVAC duct system diagnostics, can cut that pressure significantly. The right sequence matters more than speed. Whether you are dealing with uneven temperatures, weak airflow, or unexplained energy spikes in your New York, New Jersey, or Connecticut building, this guide walks you through every practical step, from the quickest checks to the more involved repairs, so you stop guessing and start fixing.
Key Takeaways
| Point | Details |
|---|---|
| Start with simple checks | Basic power and thermostat verifications resolve 30-40% of service calls before any component testing begins. |
| Measure static pressure first | Above-design static pressure confirms an airflow restriction, pointing you toward filters, dampers, or collapsed ducts. |
| Use mastic, not tape | Duct mastic outlasts adhesive tapes and is the preferred material for sealing leaks in commercial systems. |
| Sensor issues outpace damper failures | In VAV systems, pressure sensor faults cause most airflow complaints and should be verified before replacing mechanical parts. |
| Schedule preventive inspections | Routine duct inspections and filter changes reduce troubleshooting frequency and protect long-term system efficiency. |
1. Start with the commercial ductwork troubleshooting steps everyone skips
Before you pull out any test equipment, do the simple verification round. It sounds obvious, but basic verifications resolve 30-40% of HVAC service calls without any component testing at all. Skipping this step wastes your time on component diagnostics for problems that a fresh battery or a tripped breaker would have fixed in two minutes.
Here is what to check first:
- Thermostat settings: Confirm the mode is set correctly (cooling vs. heating), the setpoint is appropriate, and the schedule is not overriding the zone. Replace batteries if the display is dim or unresponsive.
- Circuit breakers and disconnects: Check the main electrical panel and any local disconnect switches near the air handler. A tripped breaker is silent but decisive.
- Air filters: Pull and inspect every filter in the system. A clogged filter does not just reduce airflow. It creates enough static pressure to trigger cascading problems across the entire duct network.
- Supply and return registers: Walk the zones and confirm every register is open and unobstructed. Furniture, storage, or recently installed partitions are common culprits.
Pro Tip: Set a calendar reminder for filter replacements tied to your building’s occupancy level, not just a fixed calendar date. High-traffic commercial spaces in NYC or Newark may need changes every 30 days rather than every 90.
2. Diagnosing airflow restrictions and duct leakage

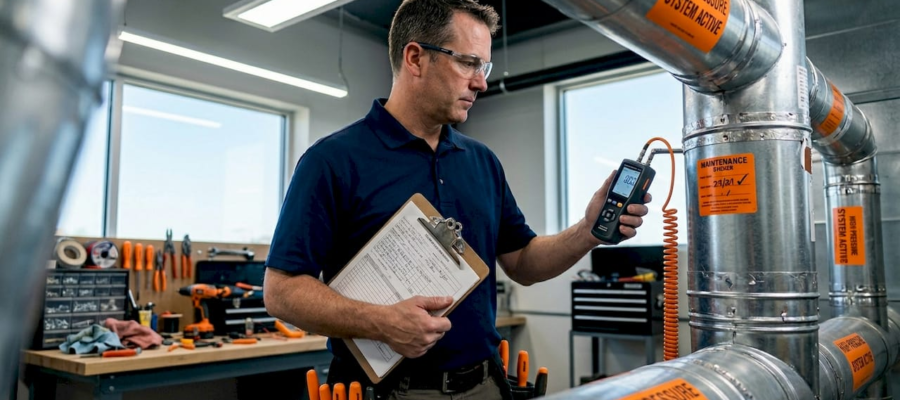
Once the basics check out clean, the next step is measuring what the system is actually doing. Static pressure measurement across the air handler is your primary diagnostic tool here. Above-design static pressure confirms a restriction somewhere in the airflow path, whether that is a clogged filter bank, a collapsed flex duct, or a stuck damper.
Walk the duct runs physically. Flex ducts in drop ceilings are a frequent problem point. They get compressed by ceiling tiles, kinked at turns, or partially disconnected at collar connections. Sheet metal runs can develop failed joint seams, especially in older commercial buildings where original installation was done in haste.
Commercial ducts commonly leak over 20% of conditioned air, which translates directly into higher utility bills and comfort complaints. You can often detect significant leakage without specialized equipment by checking for these signs:
- Rooms or zones that never reach setpoint despite the system running continuously
- Visible gaps or separations at duct joints, especially where flex connects to sheet metal
- Dusty streaks around registers or on ceiling tiles near duct paths
- Noticeable air movement in ceiling plenum spaces where there should be none
- Utility costs that have increased without a clear change in building use or occupancy
For a more systematic look, the signs of leaking air ducts guide from Amazonairpro walks through the physical indicators that matter most in commercial settings.
| Issue | Observable sign | Recommended action |
|---|---|---|
| Clogged filter | High static pressure, reduced airflow at all registers | Replace filter, check MERV rating compatibility |
| Collapsed flex duct | One zone has near-zero airflow | Access ceiling, replace or reattach flex section |
| Duct joint separation | Air movement in plenum, dusty streaks near joints | Seal with mastic or UL-listed tape |
| Stuck closed damper | Single zone has no airflow despite system running | Inspect damper manually, test actuator |
| Duct leakage (general) | Uneven temperatures building-wide, energy spikes | Perform duct leakage test, seal all accessible joints |
3. How to check damper positions and zone controls
Dampers are the unsung failure point in commercial systems. Manual balancing dampers can shift over time or get accidentally repositioned during maintenance. Check the position indicators on every accessible damper in the problem zone. A damper that is visually marked “open” but is mechanically stuck partially closed will fool anyone who does not physically push on the blade.
For motorized dampers tied to a building automation system (BAS), pull up the last 24 to 48 hours of trend logs. BAS alarms miss hidden damper faults that only appear over time in trend data. Look for a damper that commands open but shows no corresponding change in zone airflow or temperature. That gap between command and result is your red flag.
If the damper responds visually but the actuator moves slowly, time it. Damper stroke time for VAV boxes is expected to reach full travel in 90 to 120 seconds. Anything slower suggests binding or actuator trouble worth investigating further.
4. Troubleshooting VAV box pressure sensors
This step gets skipped more than any other in commercial HVAC troubleshooting, and it costs building teams real money in unnecessary part replacements. Many airflow complaints in VAV systems stem from pressure sensor problems rather than mechanical damper failures. The sensor tells the controller what the airflow is. If the sensor is wrong, the entire control loop produces incorrect results.
Pressure sensor failure modes include zero shift (the sensor reads a value when flow is actually zero), clogged sensor ports from dust buildup, a sensor installed with the wrong pressure range for that box size, and electrical noise from nearby variable frequency drives (VFDs). Each of these produces different symptoms but all result in the VAV box behaving erratically.
To verify, shut down the fan and check the sensor reading at zero flow. It should read zero or very close to it. If it does not, try zeroing the sensor per the manufacturer’s procedure before ordering a replacement. Cleaning the pressure ports with compressed air takes about five minutes and fixes clogged port issues immediately.
Pro Tip: Before replacing any VAV actuator or damper assembly, verify sensor output at both zero flow and design flow conditions. A $15 sensor calibration check prevents a $400 actuator replacement on a problem the hardware does not actually have.
5. Selecting the right materials for duct sealing and repair
Once you have located the leaks, the repair material you choose determines whether the fix lasts one season or a decade. Duct mastic is the preferred sealing material for commercial applications. It is paintable, flexible after curing, and bonds to sheet metal, flex duct, and fiberboard. Cloth-backed and rubber adhesive tapes, sold widely at hardware stores, degrade with temperature cycling and fail within a few years.
There is one important size limitation to understand. Mastic will not bridge gaps larger than about 1/4 inch on its own. For larger gaps or separations at duct joints, temperature cycling degrades unsupported mastic over time. Use fiberglass mesh tape or a metal sleeve first to bridge the gap, then apply mastic over it. That combination is what professionals use and what holds up in a commercial building.
For flex duct connections specifically:
- Secure the inner liner to the collar using a UL 181B-C rated draw band
- Apply mastic over the draw band and onto both the flex duct and the collar
- Pull the outer insulation layer back, seal the inner connection, then wrap the outer layer and secure it with a draw band too
- For boot-to-floor joints, seal with mastic or spray foam before the floor finish goes down
Pro Tip: If your building is undergoing any renovation where duct sections are exposed before drywall or flooring goes in, that is the time to seal and test. Performing duct leakage testing at 25 pascals with a duct blaster while ducts are accessible saves you from paying for ceiling demolition later.
6. Preventive maintenance practices that reduce future troubleshooting
The goal of any good troubleshooting workflow is to reduce how often you need to troubleshoot. A ductwork maintenance guide built around consistent inspection intervals cuts reactive calls significantly over a 12-month period.
Here is a practical maintenance schedule for commercial facilities:
- Monthly: Check and replace air filters based on visual condition, not just calendar date. Inspect accessible registers for blockages.
- Quarterly: Walk accessible duct runs visually. Check flex duct connections at collars. Verify VAV box damper positions via BAS trend logs.
- Annually: Schedule a professional duct inspection and cleaning, particularly in high-occupancy buildings or those with food service, manufacturing, or medical uses. Test for duct leakage after any major renovation.
- As needed: After any construction activity near ductwork, inspect for disconnected flex sections, debris in supply ducts, or disturbed insulation.
Partnering with certified duct professionals for annual cleaning and leakage testing means you catch problems before tenants notice them. The hidden costs of neglected duct systems add up quietly through energy waste, occupant complaints, and equipment stress.
Pro Tip: Digital preventive maintenance platforms like computerized maintenance management systems (CMMS) let you track filter changes, inspection results, and repair history by zone. That data becomes genuinely useful when a persistent problem appears and you need to trace its history.
My honest take after years of seeing this go wrong
I have watched building maintenance teams spend two hours diagnosing a VAV box that turned out to have a tripped breaker at the disconnect. I have also seen facilities spend thousands on duct replacement when targeted mastic sealing would have solved the problem in an afternoon. Both situations came from the same root cause: skipping the sequence.
The most common troubleshooting error I see is jumping to component replacement before verifying the basics. It feels productive to order a new actuator or a replacement sensor. It rarely fixes the actual problem when you have not verified the power supply, the control signal, or the sensor calibration first.
The second most common mistake is using the wrong sealing material and calling the job done. Duct tape, no matter what the name suggests, is not a lasting solution for commercial duct leaks. Mastic applied correctly is. The difference in labor time is minimal. The difference in how long the repair holds is years.
What I would tell any facility manager in New York, New Jersey, or Connecticut: run through the simple checks every single time, even when the problem looks complicated. And schedule at least one professional inspection annually. You will catch things that are genuinely hard to see from a ladder in a ceiling space.
— Victor
Get your commercial ducts inspected by certified professionals

When your ductwork troubleshooting steps reveal leaks, blockages, or contamination that goes beyond a straightforward repair, professional cleaning and inspection are the logical next move. Amazonairpro serves commercial clients throughout New York, New Jersey, and Connecticut with over 10 years of experience in commercial air duct cleaning and inspection services. The team uses specialized equipment to locate and address airflow restrictions, seal leaks effectively, and leave your system operating at the efficiency it was designed for. If you are not sure whether your system needs service, the duct cleaning needs assessment guide from Amazonairpro helps you make that call with confidence. Scheduling is straightforward, and the team is available for both planned maintenance visits and urgent commercial calls.
FAQ
What are the first steps in commercial ductwork troubleshooting?
Start with thermostat settings, circuit breakers, and air filter condition before moving to any mechanical or sensor diagnostics. Simple verification checks resolve 30-40% of service calls without further testing.
How do I know if my commercial ducts are leaking?
Look for zones that never reach setpoint, visible gaps at duct joints, dusty streaks near registers, and unexplained increases in energy costs. Commercial duct systems frequently lose more than 20% of conditioned air through leaks at joints and flex connections.
What is the best material to seal commercial duct leaks?
Duct mastic is the recommended choice for durability and flexibility in commercial settings. Avoid cloth-backed adhesive tapes, which degrade with temperature cycling and fail within a few years of application.
How do I troubleshoot a VAV box that is not responding?
Check the pressure sensor for zero shift and clogged ports before replacing any mechanical components. Sensor faults cause most VAV airflow issues and can often be corrected by cleaning the ports or recalibrating the sensor.
How often should commercial ductwork be professionally inspected?
Most commercial facilities benefit from annual professional inspection and cleaning, with more frequent service for high-occupancy buildings, food service operations, or spaces undergoing active renovation.
Recommended
- HVAC Problems That Quietly Drain Your Commercial Building Budget
- Complete duct cleaning checklist: boost air quality 41% – Amazon Air Duct Cleaning
- Step-by-Step HVAC Cleaning for Businesses in 2026 – Amazon Air Duct Cleaning
- What Equipment do You Use to Clean Air Ducts? – Amazon Air Duct Cleaning