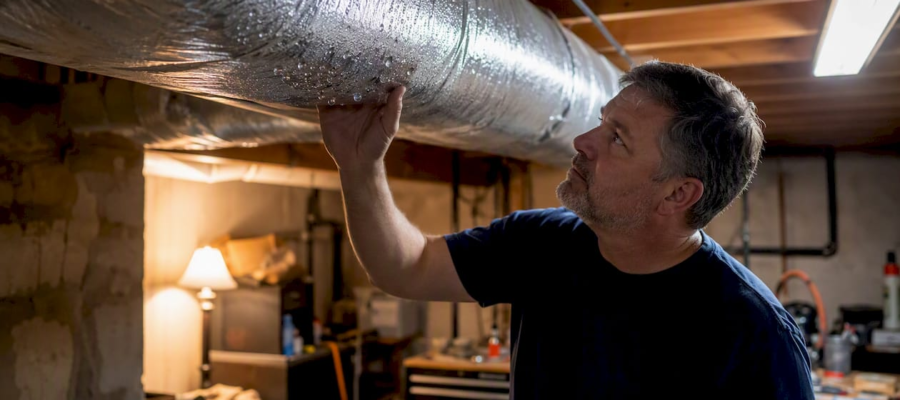
How to Manage Duct Condensation: A Homeowner’s Guide
Duct condensation stops fastest when you do three things at once: control indoor humidity to a low relative humidity during summer, seal any leaks drawing warm humid air onto cold duct surfaces, and upgrade insulation to the R-value your climate demands. If you see visible mold, corroded metal, or water that keeps coming back no matter what you try, stop DIY work and call a licensed HVAC technician.
Immediate triage steps:
- Blot or towel up any standing water under drip points and move belongings out from underneath.
- Check the condensate drain line for clogs and flush it with a diluted bleach solution if water is backing up.
- Raise the system fan runtime slightly to improve airflow across duct surfaces.
- Set your thermostat or dehumidifier to hold indoor RH at or below 45%.
Call a pro immediately if: you find visible mold colonies, ducts are corroding or rusting through, the drain pan has overflowed more than once, or you cannot identify where the water is coming from.
Key Takeaways
| Point | Details |
|---|---|
| Control humidity first | Hold indoor RH at 45% or below during summer to reduce the dew-point gap at duct surfaces. |
| Match insulation to climate | Hot-humid attics need higher R-value insulation with airtight ducts and a low-perm wrap; other unconditioned spaces need moderate R-value insulation. |
| Maintain the condensate drain | Flush the drain line each spring and install a float switch on attic air handlers to prevent overflow. |
| Document before calling a pro | Timestamped photos of wet areas help contractors scope work accurately and reduce change orders. |
| Amazonairpro for local service | Serves NY, NJ, and CT with duct inspection, sealing, insulation upgrades, coil cleaning, and antimicrobial treatment. |
Table of Contents
- Why ducts sweat: the physics and common causes
- How to spot condensation problems and where to inspect first
- Why duct condensation is a real problem for your home
- Prioritized fixes: insulation, sealing, humidity control, and condensate care
- A 7-step inspection you can do right now
- What fixes cost and how long they take
- Red flags that mean you should call a professional
- What we see most often in NY, NJ, and CT homes
- Professional duct inspection and cleaning in NY, NJ, and CT
- Sources
- FAQ
Why ducts sweat: the physics and common causes
Condensation forms when a duct surface is colder than the surrounding air’s dew point. The dew point is simply the temperature at which the moisture already in the air begins to condense into liquid water. It is not the same as air temperature. On a humid New York or New Jersey summer day, outdoor air at 85°F can carry enough moisture that its dew point sits around 70°F. A supply duct running through an unconditioned attic may be delivering 55°F air, so its outer surface stays well below that dew point. Water appears.
Common mechanical and installation causes include:
- Missing or degraded insulation on supply ducts in hot, humid attics or crawlspaces.
- Leaky return ducts that pull unconditioned humid air into the system before it reaches the coil.
- Oversized or undersized AC equipment that short-cycles, leaving duct surfaces cold longer than normal.
- Restricted airflow from dirty filters, blocked registers, or sagging flex duct low spots.
- Clogged condensate drains that allow water to back up and overflow onto surrounding materials.
- Coil blow-off, where water droplets from the evaporator coil travel downstream into supply ducts.
An engineering review from Trane confirms that bypass air, rapid control-valve cycling, and stratified airstreams can all cause condensation downstream of coils, which means diagnosing airflow and control sequencing is just as important as adding insulation.
In NY, NJ, and CT, the highest-risk window runs from late May through September, when outdoor dew points regularly exceed 65°F and attics can reach 130°F or more. That combination makes duct insulation improvement and humidity control the two highest-priority fixes in this region.
How to spot condensation problems and where to inspect first
The fastest signs are visible droplets on duct surfaces, wet or discolored insulation wrap, water stains on ceilings below attic runs, musty odors near supply registers, and rust lines along duct seams. According to InspectApedia’s guidance on wet and corroded ducts, missing insulation, leaky ducts, and sagging flex runs are among the most common causes of this kind of damage.
What to look for:
- Droplets or wet patches on the outside of flex duct or sheet metal runs.
- Insulation wrap that feels damp, sags, or has dark staining.
- Rust lines or orange streaks along duct seams and joints.
- Water stains or soft spots on drywall ceilings directly below attic duct runs.
- Musty or earthy odors coming from supply registers while the system runs.
- Puddles or mineral deposits under the air handler or near the drain pan.
Where to look first: attic runs are the most common problem location in this region, followed by unconditioned crawlspaces, plenum and boot connections at the ceiling, and the area immediately around the air handler. Check signs of leaking air ducts for a visual reference on what duct leaks look like.
Pro Tip: Turn the system off for 30 minutes, then turn it back on and check registers within the first 5 minutes of runtime. Droplets that appear quickly on a register face point to convection-driven condensation from cold supply air meeting warm room air, not a leak. Droplets that appear on the duct body itself, away from the register, usually mean the insulation has failed or is missing.

Simple airflow fixes, such as unblocking registers and spacing flex runs so air circulates around them, can stop sweating caused by restricted flow before any other repair is needed.
Why duct condensation is a real problem for your home
Recurring duct condensation raises mold and corrosion risk, lowers system efficiency, and can damage building materials over time. The EPA’s mold guidance is direct: sustained moisture in HVAC systems increases the risk of mold growth, with the frequency and duration of wetting determining how urgent remediation becomes. Episodic droplets that dry within hours are far less serious than insulation that stays wet for days.
Metal ducts corrode when moisture sits on seams. Fiberglass duct liner that gets wet loses its insulating value and can harbor mold colonies inside the duct, meaning contaminated air blows directly into living spaces. Review the educational list of duct cleaning risks for a fuller picture of what prolonged moisture does to a duct system.
Severity guide:
- Isolated droplets, dry within hours, no odor: monitor and address humidity; check insulation.
- Repeated wetting, stained insulation, mild musty smell: repair and re-insulate within days.
- Visible mold, saturated insulation, rust-through, foul odor: stop DIY work; call a professional for cleaning or replacement.
Prioritized fixes: insulation, sealing, humidity control, and condensate care
The most reliable path to stopping duct condensation follows four steps in order: stop active leaks or overflow first, eliminate humid air reaching cold duct surfaces by sealing and insulating, restore proper airflow and dehumidification, then correct drainage and coil issues.
Immediate fixes (same day):
- Flush the condensate drain line; condensate drain clogs are a leading cause of overflow and water damage.
- Increase fan runtime to reduce the temperature differential between duct surfaces and room air.
- Temporarily wrap exposed wet sections with dry towels and document with photos.
Medium-term fixes (days to weeks):
- Seal all duct leaks with mastic sealant (not standard duct tape). For joints and seams, UL-181-rated foil-faced tape is acceptable on rigid ducts, but mastic is more durable on flex connections.
- Add insulation to supply runs in unconditioned spaces. Trane’s residential guidance recommends sealing leaks, upgrading insulation, and maintaining condensate drains as the core defense against exterior duct sweating.
- Install a vapor barrier around insulated duct sections in crawlspaces, lapping seams and taping boots.
Insulation guidance by location:
| Location | Recommended R-value | Key condition |
|---|---|---|
| Hot-humid attics (NY/NJ/CT summer) | R-13 | Airtight duct + low-perm exterior wrap required |
| Other unconditioned spaces (crawlspaces, garages) | R-13 | Vapor barrier at seams and boots |
Building Science research confirms that insulating to R-13 in hot-humid climates, combined with airtight ducts and a low-perm exterior layer, allows ducts to be buried under attic insulation without persistent sweating. Airtightness and the low-perm wrap are non-optional conditions for that approach to work.

Pro Tip: If you bury ducts under attic insulation, seal every joint with mastic first and wrap the entire run with a low-perm jacket before covering. A single unsealed joint under 12 inches of blown cellulose is nearly impossible to find later and will sweat all summer.
Long-term fixes:
- Replace oversized equipment that short-cycles and leaves duct surfaces cold too long.
- Add a whole-house dehumidifier to hold indoor RH at 45% or below during humid months.
- Relocate exposed attic runs into conditioned space where possible.
Routine maintenance tasks that reduce condensation risk:
- Clean evaporator and condenser coils annually.
- Clear the condensate drain line every spring; Advanced DRI’s guidance recommends installing a float safety switch on attic-mounted air handlers to shut the system down before a pan overflows.
- Replace air filters every 1–3 months to maintain airflow.
- Inspect duct supports and correct any low spots in flex runs where water can pool.
- Check refrigerant charge; low refrigerant causes coil temperatures to drop further and worsens condensation.
A 7-step inspection you can do right now
Do this inspection while the AC is running, then document everything before calling a contractor.
- Inspect visible duct runs in the attic or crawlspace while the system is on. Look for droplets, wet insulation, and rust.
- Feel the duct surface temperature with your hand or an inexpensive IR thermometer. A surface more than 10°F below room temperature in a humid space will likely sweat.
- Check the condensate drain discharge. Water should be dripping steadily from the drain line outlet. No flow during a long run cycle means a clog.
- Examine the secondary drain pan under the air handler. Any water in it means the primary drain is already blocked.
- Inspect seams and boots for gaps, separated tape, or mastic cracks. Air leaking out of a supply duct in a hot attic is a direct condensation trigger.
- Look for sagging flex duct sections. Low spots trap condensate and restrict airflow, compounding the problem.
- Photograph and timestamp every wet area. Contractors use this evidence to scope work and write accurate proposals.
Tools you need: IR thermometer or contact probe, flashlight, moisture meter (optional but useful), phone camera, gloves. Wear an N95 respirator if you suspect mold.
Safety note: If you see heavy mold colonies, experience respiratory symptoms, or find water with no clear source, stop and call a professional. Disturbing mold without containment spreads spores through the duct system. Review how to prevent mold in ducts for guidance on what to do before a technician arrives.
What fixes cost and how long they take
Small DIY triage, including flushing the condensate drain and drying wet surfaces, typically takes under an hour and costs little beyond supplies. Basic sealing and insulation on an accessible attic run is usually a same-day job for a contractor.
Timeline and cost overview:
- DIY drain flush and surface dry: under 1 hour; minimal cost (bleach, towels, basic tools).
- Professional duct sealing and insulation on attic runs: a few hours to a full day; moderate cost depending on linear footage and access difficulty.
- Partial duct replacement or plenum rework: 1–3 days; higher cost, especially if asbestos testing is required in older homes.
- Whole-house dehumidifier installation: half a day to a full day for a licensed HVAC technician; cost varies by unit capacity and existing drain routing.
- Mold remediation: days to weeks depending on scope and whether duct replacement is needed.
Always get at least two written quotes. Bring your timestamped photos to every estimate appointment; contractors who can see the evidence scope work more accurately and are less likely to underbid and then add change orders.
Red flags that mean you should call a professional
Call a licensed HVAC technician or duct specialist when DIY steps are not enough. Direct answer: visible mold, repeated wetting after you have already repaired the obvious causes, corroded or rusted-through ducts, an overflowed or cracked drain pan, and any water intrusion you cannot trace to a specific source all require professional assessment.
Red flags:
- Active dripping from duct surfaces or the air handler during normal operation.
- Visible mold on duct wrap, inside registers, or on ceiling tiles near supply boots.
- Ceiling stains that reappear within days of drying.
- Drain pan overflow more than once in a season.
- Foul or musty odors that persist after cleaning registers.
- Insulation that is saturated and will not dry out.
- Rust lines that have progressed to holes or flaking metal.
What a technician will do: full duct inspection with pressure testing, mastic sealing and insulation upgrade, condensate drain replacement or float switch installation, evaporator coil cleaning and refrigerant charge verification, and targeted mold remediation or duct replacement where contamination is confirmed. See the complete duct cleaning checklist for a detailed breakdown of what a professional service covers.
Questions to ask before hiring:
- Are you licensed and insured in NY, NJ, or CT?
- What sealing method do you use, and do you pressure-test after?
- What warranty do you offer on sealing and insulation work?
- Can you show photos of similar jobs in this region?
What we see most often in NY, NJ, and CT homes
The single most common cause our team finds in this region is a condensate path that was never quite right: a drain line with marginal slope, algae buildup from the summer humidity, or a long horizontal run that traps water before it can exit. Combine that with an attic duct wrapped in original builder-grade insulation from 15 years ago, and you have a system that sweats every July without fail.
One habit that prevents most repeat calls: photograph your air handler and condensate drain outlet at the start of each cooling season. If the drain is flowing and the insulation looks intact, you are in good shape. If either looks off, address it before the first heat wave. Homeowners who document their system this way also have the evidence contractors need to give accurate quotes, which saves money and avoids surprises.
Professional duct inspection and cleaning in NY, NJ, and CT
A professional inspection combined with targeted cleaning and sealing prevents repeat condensation and protects your indoor air quality far more reliably than DIY triage alone.

Amazonairpro serves residential and commercial properties across New York, New Jersey, and Connecticut with a full range of services directly tied to the condensation triggers covered in this article: full duct inspection and pressure testing, targeted air duct cleaning and sealing with mastic, insulation upgrades, condensate drain maintenance and float switch installation, evaporator coil cleaning, and antimicrobial duct treatment where mold is present. The team has over 10 years of experience working in the specific climate conditions of this region, where humid summers make duct moisture a recurring problem rather than a one-time fix.
When you schedule an inspection, bring your timestamped photos and the notes from your DIY checklist. That documentation helps the team scope the work accurately and prioritize the fixes with the highest impact for your specific system. Book your inspection at Amazonairpro.
Sources
The sources below cover EPA mold guidance, HVAC engineering best practices, and building-science field research on duct insulation and condensation prevention.
- EPA — Mold Course Chapter 2
- Trane Engineers Newsletter — airside design (admapn064_1217.pdf)
- BuildingScience — No sweat: Sweat condensation on ductwork and boots (bsi-094_no_sweat_c_rev.pdf)
- InspectApedia — Wet Rusty Air Duct Hazards & Repair
- Advanced DRI — HVAC condensation water damage causes & solutions
FAQ
Is condensation on HVAC ductwork normal?
Brief condensation on supply registers during the first few minutes of a cooling cycle is common and usually harmless. Persistent dripping, wet insulation, or water stains are not normal and signal a problem that needs attention.
How do I stop my ductwork from sweating?
Clearing the condensate drain line each spring removes one of the most common triggers.
Will a dehumidifier stop condensation on ductwork?
A whole-house dehumidifier helps significantly by lowering the indoor dew point, which reduces the temperature gap between cold duct surfaces and surrounding air. It works best as part of a complete fix that also includes sealing and insulation; a dehumidifier alone cannot compensate for missing insulation or leaky ducts.
What is the 2-foot rule for ducts?
The 2-foot rule refers to the general guidance that flex duct runs should be supported at intervals no greater than every 4 feet, with no more than 2 inches of sag between supports. Excessive sag creates low spots where condensate pools and restricts airflow, both of which worsen sweating.
When should I call a professional about duct condensation?
Call a licensed technician if you find visible mold, corroded or rusted-through ducts, a drain pan that has overflowed more than once, or water with no identifiable source. Amazonairpro serves NY, NJ, and CT homeowners and property managers with full duct inspection, sealing, and cleaning services.
Recommended
- Improving Airflow in Air Ducts: A Homeowner’s Guide – Amazon Air Duct Cleaning
- How to Plan Preventive Duct Maintenance at Home – Amazon Air Duct Cleaning
- The Ultimate Guide to NJ Humidity and Your HVAC System
- Duct cleaning terminology explained: a homeowner’s guide – Amazon Air Duct Cleaning