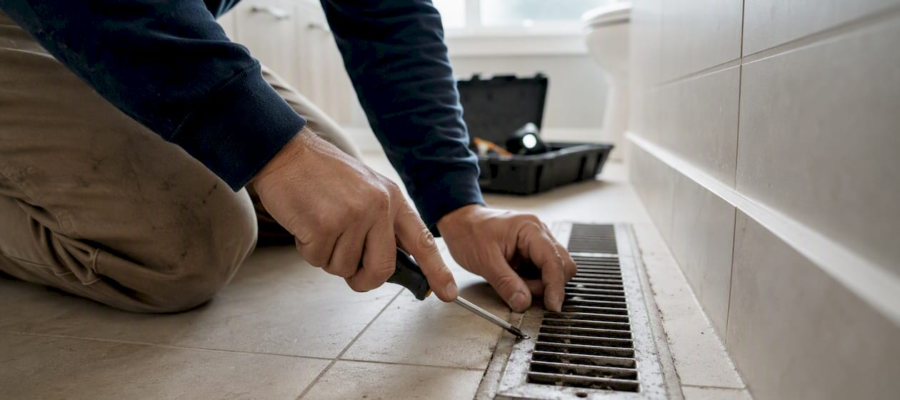
Move-Out Vent Sanitation Steps: Your Complete Guide
TL;DR:
- Cleaning move-out vents requires source removal with proper tools and PPE to prevent debris spread. Professionals use high-capacity vacuums, brushes, and document every step, especially when mold or pests are present. Proper prep, documentation, and timely professional assistance ensure thorough cleaning and safeguard your deposit.
Before you hand back the keys, complete these move-out vent sanitation steps: clear 2–3 feet around every register, shut off the HVAC, remove and wash register covers, vacuum and brush inside each duct opening, wipe all trim, replace the air filter, then photograph everything and keep your receipt.
-
Clear space around every supply and return vent
-
Turn off the HVAC system at the thermostat and breaker
-
Remove register covers and soak or scrub them clean
-
Vacuum and brush inside each duct opening as far as your tools reach
-
Wipe register trim and surrounding walls
-
Replace or inspect the HVAC filter
-
Run the system briefly and check for unusual odors or noise
-
Photograph every vent (cover off and on), the air handler, and the filter
-
Keep your receipt or written scope of work for the landlord
Vents and ducts are among the most overlooked items on a move-out checklist, yet they are exactly what a thorough property manager will notice. Getting them right protects your deposit and leaves the next occupant with cleaner air.
Pro Tip: Take a “before” photo the moment you remove each register cover. That single image does more to protect your deposit than any verbal explanation.
Table of Contents
- What tools and materials do you need for move-out vent cleaning?
- How do you sanitize vents and ducts step by step before moving out?
- How do you keep dust contained and stay safe during vent cleaning?
- When should you hire a pro for move-out duct sanitation?
- How do you document vent cleaning for your landlord or property manager?
- Common DIY mistakes during vent cleaning and how to avoid them
- Key Takeaways
- What technicians actually see on move-out jobs
- Amazonairpro handles move-out vent and duct cleaning in NY, NJ, and CT
- Useful sources
- FAQ
What tools and materials do you need for move-out vent cleaning?
Having the right gear before you start separates a thorough job from one that just moves dust around.

| Tool / Material | Purpose |
|---|---|
| Shop vac (6+ gallon, strong suction) | Primary debris removal from duct openings |
| Flexible duct brush or dryer-vent brush | Dislodges stuck-on dust and debris inside ducts |
| Microfiber cloths | Wipes register covers, trim, and surrounding surfaces |
| Flathead and Phillips screwdrivers | Removes register screws |
| Flashlight or headlamp | Inspects inside duct openings for debris or mold |
| Step ladder | Reaches ceiling and high-wall registers safely |
| Painter’s tape and plastic sheeting | Seals off open duct runs during cleaning |
| N95 or P100 respirator | Protects lungs from dislodged dust and allergens |
| Safety glasses | Shields eyes from falling debris |
| Nitrile gloves | Protects hands from grime and cleaning solutions |
| Replacement HVAC filter | Swapped in after cleaning is complete |
The PPE column matters more than most renters realize. Disturbing duct debris releases fine particulate matter that lingers in the air long after you finish. An N95 respirator filters out the particles that a standard dust mask misses entirely.
When the tool list points to a pro: If your home has a multi-zone system, flex duct runs longer than 10 feet, or you spot visible mold or pest droppings inside a register, a shop vac and brush are not enough. A legitimate professional brings a truck-mounted or high-capacity HEPA-filtered vacuum that creates negative pressure throughout the system, pulling debris toward the vacuum rather than into your living space. That setup is not replicable with consumer equipment.
Pro Tip: Check the equipment your pro uses before booking. Truck-mounted vacuums and HEPA filtration are the standard for a documented, move-out-grade service.
How do you sanitize vents and ducts step by step before moving out?
The industry term for what you are doing is “source removal,” the mechanical extraction of debris before any chemical treatment is applied. Follow this sequence and you will meet the standard a property manager expects.
-
Prep the space (30–45 minutes). Clear space around every supply and return vent and make the air handler fully accessible. Move furniture, box up stored items, and lay drop cloths on floors near registers. Turn off the HVAC at the thermostat, then cut power at the breaker for the air handler.
-
Remove and clean register covers (15–20 minutes). Unscrew each cover and take it to a utility sink. Soak in warm, soapy water, scrub with a stiff brush, rinse, and let dry completely before reinstalling. Wet covers trap dust faster than dry ones.
-
Vacuum and brush each duct opening (2–3 minutes per vent). Insert your flexible duct brush and work it back and forth to dislodge debris. Follow immediately with the shop vac nozzle to capture what you loosened. Work room by room so you do not lose track of which vents are done.
-
Seal open runs while you work. Use painter’s tape and plastic sheeting to cover any duct opening you are not actively cleaning. This prevents dislodged debris from migrating to finished areas.
-
Wipe register trim and surrounding walls. A damp microfiber cloth picks up the fine dust that settles around the opening during vacuuming.
-
Replace the HVAC filter. A clogged filter undoes everything you just cleaned. Install a fresh filter rated MERV 8 or higher and note the date on the frame.
-
Run the system and verify (5 minutes). Restore power, set the thermostat to fan-only, and let it run for five minutes. No unusual odors, no rattling, no visible dust puffing from registers means the job is done.
Timeline for a 2–3 bedroom home: Expect 2–5 hours total when access is clear, based on typical job estimates for homes of that size. Heavy contamination or blocked access extends that range.
Pro Tip: Sanitization, meaning a chemical antimicrobial application, is only effective after source removal is complete. Spraying a product into dirty ducts does not allow the chemical to contact duct surfaces properly. Clean first, sanitize second, and only if genuinely needed.

How do you keep dust contained and stay safe during vent cleaning?
Dust containment is not optional. Disturbing duct debris without containment can spread particulates through rooms you already cleaned, and in older homes, that debris may include lead dust or mold spores.
“Engineering controls shall be used to prevent cross-contamination. Engineering controls may include but are not limited to: source control; isolation barriers; pressure differentials; dust suppression methods; HEPA vacuuming and filtration; detailed cleaning; temperature and humidity control; and a sanitary approach.” — NADCA ACR Standard 2021
For a DIY job, translate that standard into these practical steps:
- Wear your N95 or P100 respirator from the moment you remove the first register cover.
- Close interior doors to rooms you are not actively cleaning.
- Cover upholstered furniture and bedding with plastic sheeting before you start.
- Place drop cloths on floors directly below ceiling registers.
- Never use compressed air to blow debris into a duct unless a vacuum is simultaneously capturing at the other end.
Gas and electrical safety deserve a direct note. Always cut power to the air handler before working near it. If your home has a gas furnace, do not attempt to open or clean around the heat exchanger yourself. That work belongs to a licensed HVAC technician.
After you finish, open windows and run exhaust fans for at least 30 minutes. If anyone in the home has asthma, allergies, or a respiratory condition, have them stay elsewhere during cleaning and for a few hours after.
Pro Tip: Professionals create negative pressure at the air handler so dislodged debris travels toward the vacuum, not into the room. You can approximate this by keeping the shop vac running continuously at the register you are brushing.
When should you hire a pro for move-out duct sanitation?
DIY cleaning handles surface-level dust and loose debris well. Several situations call for professional equipment and documented methods instead.
- Visible mold inside any duct or on the air handler housing
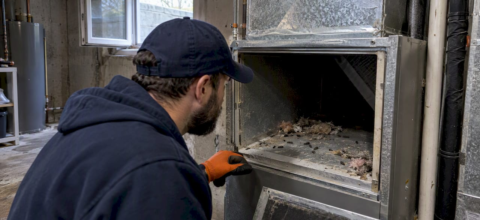
- Pest droppings or nesting material in registers or duct runs
- Heavy debris accumulation that a shop vac cannot reach or clear
- Flex duct runs longer than 10 feet where a brush cannot reach the full length
- Multi-zone or commercial HVAC systems with complex layouts
- No access to the right tools (truck-mounted vacuum, HEPA filtration, agitation devices)
- Landlord or property manager requires documented professional service
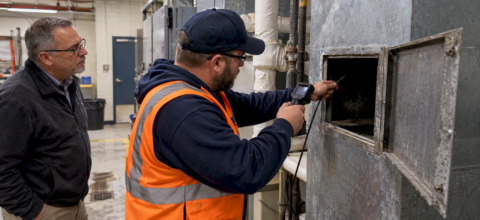
When you book a professional, ask for a written scope of work and a pre-service inspection before any work begins. That document should name the equipment being used, the method (source removal is the correct answer), and what the technician will do if they find mold or pests.
The NADCA source-removal standard is your benchmark. A legitimate technician uses a truck-mounted or high-capacity HEPA vacuum to create negative pressure, then agitates debris with brushes or air whips so it is pulled into the vacuum rather than redistributed. Duct cleaning and duct sanitization are distinct steps: cleaning removes physical debris; sanitization reduces microbial counts but cannot remove mold colonies or their food source.
Questions to ask on-site: Can I see the vacuum equipment? What is your source-removal method? Will you provide before/after photos and a signed invoice?
Pro Tip: A company that leads with “sanitizing” or “fogging” before confirming source removal is a red flag. Mechanical debris removal always comes first.
How do you document vent cleaning for your landlord or property manager?
Good documentation turns a completed cleaning into proof of a completed cleaning. Capture these specific shots and keep the paperwork.
| Documentation Item | What to Capture or Include |
|---|---|
| Register cover removed | Photo showing inside the duct opening before cleaning |
| Register cover cleaned | Photo of the cover after washing, laid flat to dry |
| HVAC access panel | Photo of the air handler area, filter slot visible |
| New filter installed | Photo showing filter brand, MERV rating, and installation date written on the frame |
| Receipt or invoice | Date, technician name, equipment used, services performed, signed statement of completion |
| Written scope of work | Pre-service document listing every duct run, return, and register addressed |
Sample email template for your landlord:
Keep digital copies of every photo and document. Cloud storage with a timestamp is better than a folder on your phone that could be lost.
Common DIY mistakes during vent cleaning and how to avoid them
Even well-intentioned cleaning can go wrong. These are the errors that show up most often, and what to do about each.
-
Spraying chemicals into dirty ducts. Antimicrobials cannot contact duct surfaces when debris is in the way. Clean mechanically first. If you still want to apply a product, use one registered with the EPA for HVAC use, and only after the duct is visibly clear.
-
Using only a household vacuum. Standard household vacuums lack the suction to pull debris from more than a few inches inside a duct. A 6-gallon or larger shop vac is the minimum for DIY work. Anything less just redistributes dust.
-
Skipping access clearance. A blocked air handler means you cannot inspect or clean the most critical part of the system. Clearing the utility closet or mechanical room before you start prevents wasted time and incomplete work.
-
Over-tightening register screws. Drywall and plaster strip easily. Snug is enough. A stripped screw hole is a repair cost that comes out of your deposit.
-
Ignoring the HVAC filter. A dirty filter recirculates everything you just removed. Always swap it last, after all cleaning is done.
Red flags that mean “call a pro now”: Persistent musty odor after cleaning, visible black or green growth inside a duct, insect nests or rodent droppings, or registers that rattle or vibrate when the system runs. These are not DIY fixes. A room-by-room duct cleaning checklist can help you track which areas you have covered and flag anything that needs professional attention.
For hard-to-reach vents, such as ceiling registers in two-story homes or ducts behind built-in cabinetry, a flexible extension rod for your shop vac and a longer duct brush are your first options. If the run is longer than your tools can reach, that is a professional job.
Key Takeaways
Thorough move-out vent sanitation requires source removal first, proper PPE, documented before/after photos, and a fresh HVAC filter, with professional service booked whenever mold, pests, or inaccessible ducts are present.
| Point | Details |
|---|---|
| Source removal comes first | Mechanical debris removal must happen before any chemical sanitization is applied. |
| Clear access before you start | Remove items within 2–3 ft of every register and fully clear the air handler area. |
| Document every step | Photograph registers open and closed, the filter, and the air handler; keep a signed receipt. |
| Know when to call a pro | Visible mold, pest droppings, or ducts longer than your tools can reach all require professional equipment. |
| Amazonairpro for documented service | Amazonairpro serves NY, NJ, and CT with NADCA-aligned source-removal methods and written scopes of work for move-out jobs. |
What technicians actually see on move-out jobs
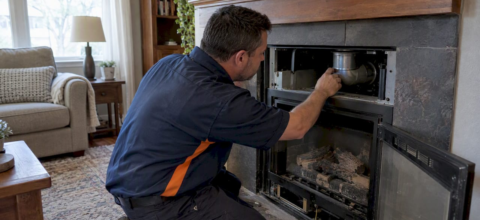
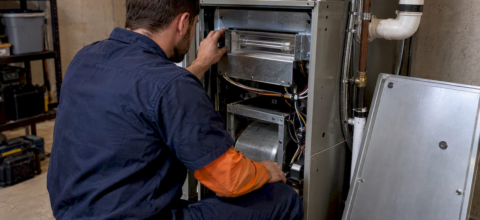
The single most common problem on move-out jobs is a blocked air handler. A utility closet packed with boxes, a water heater surrounded by stored furniture, or a mechanical room that was never cleared during the tenancy, these situations prevent a technician from connecting the primary vacuum to the system. Without that connection, negative-pressure source removal is not possible, and the job either gets delayed or completed at a reduced standard.
When that happens, the technician has two options: wait while the occupant clears the space, which adds time and sometimes cost, or document the obstruction and return. Neither outcome is what anyone wants on move-out day. The fix is straightforward: treat the air handler area as the first thing you clear, not the last.
A second pattern that comes up regularly is incomplete prep around ceiling registers in older New York and New Jersey homes. Plaster ceilings and original ductwork from the 1950s and 1960s can be fragile. Forcing a brush into a tight register opening without first inspecting it risks cracking the surrounding plaster, which then becomes a separate repair. Slow down at those registers, use a flashlight before inserting any tool, and if the duct lining looks deteriorated, flag it for the property manager before cleaning rather than after.
Amazonairpro handles move-out vent and duct cleaning in NY, NJ, and CT

When the move-out timeline is tight and the documentation needs to hold up to a property manager’s inspection, a professional service with a written scope is the cleaner solution. Amazonairpro provides residential air duct cleaning for homeowners and renters across New York, New Jersey, and Connecticut, using source-removal methods aligned with NADCA guidance and truck-mounted or HEPA-filtered vacuums that create the negative pressure a shop vac cannot replicate.
Every job includes a pre-service inspection, a written scope of work, and before/after documentation you can hand directly to your landlord or property manager. Same-day and urgent booking slots are available for move-out situations where timing is critical. If you are also dealing with a dryer vent or need a chimney sweep before vacating, those services are available in the same appointment.
Check availability and book your move-out cleaning with Amazonairpro today.
Useful sources
- NADCA: The Truth About Disinfection — NADCA’s guidance on why source removal precedes sanitization and when chemical application is appropriate.
- NADCA: Proper Cleaning Methods — Explains negative-pressure source removal as the industry standard for duct cleaning.
- The Cooling Company: How to Prepare for Air Duct Cleaning — Homeowner prep checklist including clearance requirements and typical job duration.
When you book any service, ask for the items listed in the “when to hire a pro” section above: written scope, equipment confirmation, and before/after photos. Those three items are the baseline for a documented, dispute-proof move-out.
FAQ
What is the correct process for sanitizing air ducts?
Source removal comes first: a technician uses a high-capacity vacuum and agitation tools to mechanically remove debris, then applies a registered antimicrobial only after the duct surfaces are physically clean. Applying chemicals to dirty ducts does not allow the product to contact surfaces effectively.
What does a step-by-step vent cleaning plan look like?
Clear 2–3 feet around registers, shut off the HVAC, remove and wash covers, vacuum and brush each duct opening, wipe trim, replace the filter, run the system briefly to verify, then photograph and document. A full vent cleaning plan for a 2–3 bedroom home typically takes 2–5 hours when access is clear.
Can you sanitize your own air ducts?
You can perform source-removal cleaning yourself using a shop vac and duct brush, which handles loose debris in accessible registers. Visible mold, pest contamination, or duct runs longer than your tools can reach require professional equipment, specifically a truck-mounted or HEPA-filtered vacuum with negative-pressure capability.
What is the 2-foot rule for ductwork?
The standard prep recommendation is to clear 2–3 feet of open space around every supply and return register before cleaning begins. This gives technicians room to work safely and allows the vacuum hose to reach the duct opening without obstruction.
Recommended
- Step-by-step guide to building a vent cleaning plan – Amazon Air Duct Cleaning
- Essential residential vent cleaning steps for healthier air – Amazon Air Duct Cleaning
- Safe vent cleaning practices to protect your home’s air – Amazon Air Duct Cleaning
- Lease Turnover Vent Cleaning: A Property Manager’s Guide – Amazon Air Duct Cleaning