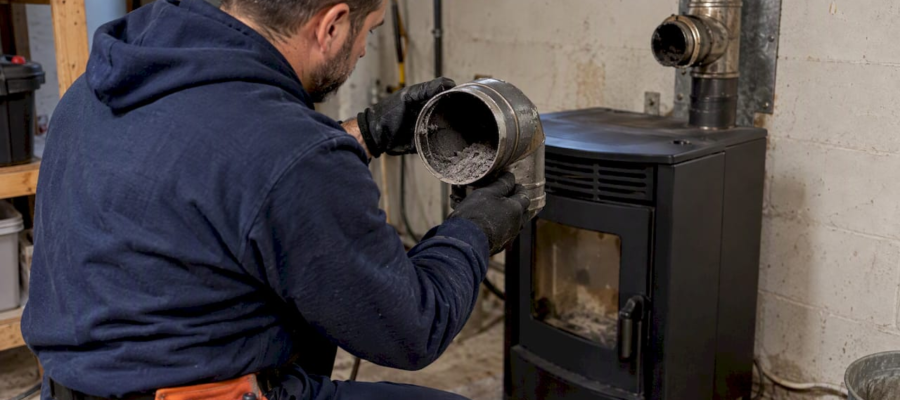
Prevent CO Leaks: Pellet Stove Chimney Cleaning for NY/NJ/CT Homeowners
Check and empty the ash pan weekly, spot-check the vent pipe mid-season if you burn lower-grade pellets, and have a certified sweep perform a mechanical inspection and cleaning at least once a year. The main dangers are ash blocking normal airflow and exhaust leaks that let carbon monoxide back into your home, which is why EPA guidance and CSIA inspection standards both point toward routine DIY checks paired with professional oversight.
TL;DR:
- Regular weekly cleaning involves emptying the ash pan and checking the burn pot for blockages or clinkers to ensure efficient operation.
- Inspection of vent caps and connector pipes should be done monthly, with more thorough cleaning mid-season if using softwood pellets or noticing draft issues.
- Proper sealing of joints with high-temperature sealant is crucial, especially in areas with offsets or bends, to prevent dangerous exhaust leaks and carbon monoxide risks.
- Professional annual inspection and mechanical sweeping are recommended, especially if deposit buildup exceeds an eighth of an inch or if visual signs of dense ash or soot are evident.
- Owners should monitor for signs like odorous smoke, shiny deposits, or damage to the liner or cap, and call a certified technician if issues arise beyond routine maintenance.
Table of Contents
- How often should you clean and inspect a pellet stove chimney?
- What builds up inside a pellet stove vent: ash, soot, and creosote
- Tools, safety gear, and prep for safe DIY cleaning
- Step-by-step chimney and vent cleaning procedure for pellet stoves
- When to call a certified professional and what the service includes
- Seals, joints, and safety risks: preventing CO and exhaust leaks
- Printable maintenance checklist and seasonal timeline
- What technicians actually find inside pellet vent systems
- What matters most when you clean a pellet stove chimney
- How Amazon Air Duct Cleaning supports pellet stove owners in NY, NJ, and CT
- FAQ
- Sources
How often should you clean and inspect a pellet stove chimney?
The right schedule depends on how much you burn, the pellet quality, and how your venting is laid out. A stove running daily all winter needs more attention than one used only on weekends, and pellets with a higher ash content leave more residue in the pipe regardless of how often you run the stove.
A workable rhythm looks like this for most households:
- Weekly: empty the ash pan and glance at the burn pot for clinkers or blockage.
- Monthly: check the exterior vent cap and connector pipe for visible soot or ash buildup.
- Mid-season: do a spot-clean of the vent run if you burn softwood pellets or notice slower draft.
- Annually: schedule a certified inspection and mechanical sweep regularly before heating season starts.
Pellet quality matters more than most owners expect. Premium hardwood pellets with low ash content burn cleaner and stretch out your cleaning interval, while budget or softwood blends can double the ash volume moving through the vent. Watch for three triggers that mean it’s time to move from routine upkeep to professional service: a persistent smoky smell near the stove, ash bridging that keeps clogging the burn pot faster than normal, or visible dark deposits creeping out of the pipe joints. Any of those signs means the system needs more than a weekly dump of the ash tray, and our guide on how often chimney sweeping is needed walks through scheduling in more detail.
What builds up inside a pellet stove vent: ash, soot, and creosote
Pellet stoves burn compressed wood at a high, controlled temperature, so they produce mostly fine, powdery fly ash rather than the thick, tar-like creosote associated with traditional wood stoves. That distinction matters for how you approach cleaning, but it does not mean the vent can be ignored.
Pellet stoves produce relatively little creosote compared with wood stoves, though routine maintenance is still required and the EPA recommends a professional inspection at least once a year. Fine ash behaves differently in a narrow metal vent than it does in a wide masonry flue: it settles in elbows, tees, and horizontal runs where airflow slows down, gradually narrowing the passage until the stove struggles to exhaust properly.
Visual signs that call for faster action include a layer of soot forming inside your home near the stove, a dull or glazed appearance on vent joints, or ash that looks shiny and compacted rather than loose and powdery. The last one can indicate the kind of dense deposit more typical of a creosote problem, and our breakdown of creosote buildup signs covers what to document before calling for service. Left unaddressed, restricted exhaust leads to poor combustion, visible soot drifting into living spaces, and a rising risk of carbon monoxide if the blockage is severe enough to push exhaust gases back toward the room instead of out the vent.
Tools, safety gear, and prep for safe DIY cleaning
Before you touch the stove, gather the right equipment. Pellet vent systems use smaller-diameter pipe than wood stoves, so standard chimney brushes often will not fit, and the wrong tool can scratch or dent the liner.
- A sized brush kit matched to your vent’s exact diameter, usually 3 or 4 inches for pellet stoves.
- An ash-rated or HEPA vacuum built to handle fine particulate without clogging or blowing dust back into the room.
- A flexible inspection mirror or small camera scope to check bends and joints you cannot see directly.
- Rotary cleaning attachments, if your vent run has multiple offsets that a straight brush cannot reach.
- Heat-resistant gloves, an N95 or better respirator mask, and safety glasses to protect against fine ash exposure.
Before starting, let the stove cool completely, shut off power at the outlet, and move any nearby pellet bags or combustibles out of the work area. Test your smoke and CO alarms, and lay down a drop cloth or tarp since ash finds its way into carpet fibers quickly.
Pro Tip: Use a vacuum rated for fine ash, not a standard shop vac. Ordinary shop vacs push ultra-fine particles straight through their filters and back into your air, and bagged ash should go into a metal container with a lid, never a plastic bag, since embers can smolder for days.

If your vent configuration includes multiple offsets, a chimney cap you cannot reach safely from a ladder, or any sign of structural damage, that is the point to stop and bring in a professional rather than improvise with extended brush handles.
Step-by-step chimney and vent cleaning procedure for pellet stoves
Once your tools are ready and the stove has fully cooled, work through the cleaning in order rather than skipping ahead, since each step protects the next from damage or contamination.
- Cool down completely. Wait at least 12 hours after the last burn before opening any part of the system.
- Shut off power at the stove’s electrical switch and unplug it if accessible.
- Clear the area around the stove, moving pellet bags, furniture, and rugs well out of the way.
- Detach the connector pipe from the stove following your owner’s manual, since mounting hardware varies by model.
- Clean the burn pot and ash pan thoroughly, scraping out compacted clinkers before vacuuming loose ash.
- Brush the vent pipe, working from the most accessible end, top-down if your setup allows roof access or bottom-up through the connector if it does not.
- Vacuum ash and debris from each section as you go, paying close attention to elbows and horizontal runs where deposits concentrate.
- Inspect with a mirror or camera at every joint, bend, and the cap itself, looking for cracks, gaps, or unusually dense deposits.
- Reassemble and reseal every joint using a sealant rated for at least 500 degrees Fahrenheit, matching your manufacturer’s specifications.
- Test the draft before regular use by running the stove briefly and watching for smoke backflow or unusual odors.
Offsets, elbows, and caps deserve extra care since they are where liners are most easily scratched or dented by an oversized brush. A rotary brush system handles tight bends more gently than a rigid pole, and a camera scan is worth the extra step whenever you cannot get a clear mirror view into a joint. Partner guidance on general heating-system cleaning procedures, such as this boiler cleaning walkthrough, echoes the same sequence of cooling, disassembly, and careful reassembly that applies across appliance types.
Dispose of collected ash in a covered metal container and let it sit outdoors for several days before adding it to regular trash, since even cool-looking ash can hold hidden embers. Before returning the stove to daily use, confirm the following:
- No smoke or odor escapes from any joint during a test burn.
- The draft pulls steadily with no hesitation or backflow at startup.
- All access panels and the ash pan door are seated and locked correctly.
| Cleaning stage | What to check | Action if a problem appears |
|---|---|---|
| Burn pot and ash pan | Compacted clinkers, excess ash | Scrape and vacuum before reassembly |
| Vent pipe and elbows | Dense or shiny deposits | Switch to rotary brush or camera scan |
| Joints and seals | Gaps, cracked sealant | Reseal with 500°F-rated sealant |
| Cap and termination | Blockage, corrosion | Clear debris or call a professional |
When to call a certified professional and what the service includes
Some situations are outside the scope of a weekend DIY project, and recognizing them early prevents a small problem from becoming a dangerous one.
- A persistent smoke smell inside the home or a triggered CO alarm.
- Deposits that look shiny, tar-like, or tacky rather than dry and powdery.
- Any suspicion that a chimney fire has already occurred, even a small one.
- Visible damage to the liner, flashing, or masonry around the vent termination.
- A flue with multiple offsets or an unusually long horizontal run that resists DIY tools.
Professional sweeps generally follow a tiered approach. The CSIA Level 1 inspection standard covers a routine, accessible-area inspection and recommends sweeping when deposits reach an eighth of an inch or more, while a Level 2 inspection adds a camera scan of the full flue and is called for whenever conditions have changed, such as a new appliance, a suspected chimney fire, or storm damage. Both approaches rely on mechanical sweeping, not chemical cleaners, as the primary method, since the CSIA cautions that chemical products should never substitute for an actual mechanical cleaning and inspection.
A technician will typically mechanically sweep the full vent run, inspect every joint for gaps or corrosion, and reseal connections with the correct high-temperature materials rather than general-purpose caulk. That last detail matters because a joint that looks fine visually can still leak exhaust gases if the sealant has degraded, which is exactly the kind of risk a trained eye catches that a quick DIY glance might miss.

Seals, joints, and safety risks: preventing CO and exhaust leaks
The connection points in a pellet vent system carry more risk than the straight pipe runs, since every joint is a potential leak point if the seal fails or was never rated for the heat involved.
Pellet vent systems rely on sealants rated for at least 500 degrees Fahrenheit, and using ordinary low-temperature silicone instead can break down from heat exposure within a single season, leaving a gap that lets exhaust gases escape into living space rather than exit through the vent. Loose joints create the same risk even without a sealant failure, which is why checking connector pipes, wall thimbles, clean-out doors, and the vent cap itself should be part of every seasonal check.
- Press gently on each joint by hand to feel for movement or gaps, without forcing or disassembling anything you are unsure about.
- Look for soot streaking around a joint, which often signals a slow leak even when no smell is present.
- Check the clean-out door gasket for brittleness or visible gaps around the seal.
Pro Tip: If you smell exhaust odor near a joint or your CO alarm sounds, stop using the stove immediately, ventilate the room by opening windows, and call a technician before relighting it. Testing with a CO detector rated for the task and treating any alarm as real, not a false trigger, protects against the most serious risk a faulty vent system poses.
Printable maintenance checklist and seasonal timeline
A simple written log keeps maintenance consistent, especially in a high-use household where it’s easy to lose track of the last inspection date.
- Weekly: empty ash pan, check burn pot for clinkers.
- Monthly: inspect connector pipe and exterior cap for visible buildup.
- Mid-season: spot-clean the vent if using higher-ash pellets or noticing slower draft.
- Annually: schedule a certified Level 1 inspection and mechanical sweep regularly before the heating season starts.
Homes burning daily through a full winter, or using lower-grade pellets with higher ash content, should lean toward the more frequent end of each interval rather than stretching it out.
| Field to log | Why it matters |
|---|---|
| Date of cleaning | Tracks whether you are on schedule |
| Pellet brand and type | Flags if ash buildup correlates with fuel quality |
| Visible deposit condition | Helps a technician judge inspection level needed |
| Technician notes (if serviced) | Documents repairs or sealant work for future reference |
A simple notebook or spreadsheet with these four fields gives a technician useful history at your annual visit and helps you notice patterns, like a particular pellet brand causing faster buildup, before they become a bigger problem.
What technicians actually find inside pellet vent systems
Across chimney and vent jobs in New York, New Jersey, and Connecticut, our technicians see a handful of recurring problems that line up with the warnings above: compacted ash sitting in horizontal offsets where a straight brush cannot reach, degraded sealant at connector joints that owners assumed was still intact, and vent caps partially obstructed by debris or nesting material that reduces draft long before a homeowner notices smoke. Occasionally a job reveals liner damage or masonry deterioration that needs repair before the system can be certified safe again.
If you are considering booking a visit, photographing your connector layout, the condition of the exterior cap, and any visible deposits beforehand helps a technician assess the scope before arriving, which often shortens the visit itself.
What matters most when you clean a pellet stove chimney
The advice that gets repeated most online treats pellet stoves like smaller wood stoves, as though the main worry is creosote. That framing undersells the real risk: pellet systems fail more often from fine ash compaction and degraded seals at joints than from the thick, tar-like buildup wood stove owners worry about. A pellet vent can look clean on a quick visual pass and still have a connector joint quietly leaking exhaust because the sealant was never rated for the heat it sees every burn cycle.
If there is one place to put your attention first, it’s the joints, not the straight runs of pipe. A homeowner who faithfully empties the ash pan every week but never checks a connector seal is managing the less dangerous half of the problem. The annual professional inspection exists precisely to catch what a visual check from the living room cannot, and skipping it to save the cost of a service call is the one shortcut that consistently shows up behind the serious incidents.
— Victor
How Amazon Air Duct Cleaning supports pellet stove owners in NY, NJ, and CT

We offer chimney cleaning, cap and damper inspection, vent sealing, and camera-based diagnostics for pellet stove owners across New York, New Jersey, and Connecticut. Technicians check for compacted ash, degraded sealant, and obstructed caps, and repair needs are flagged clearly rather than leaving you to interpret a vague inspection report.
When you book a visit, it helps to have a few details ready:
- Your pellet brand and roughly how often you run the stove each week.
- Any symptoms you’ve noticed, like smoke smell, slower draft, or visible soot near joints.
- Photos of your vent cap and any accessible connector sections, if you have them.
If you would rather have a certified technician handle the annual inspection than tackle the full teardown yourself, our chimney cleaning services page outlines what a visit covers, and our NY and NJ booking page is the fastest way to get a visit scheduled before heating season gets busy.
FAQ
Why are people getting rid of pellet stoves?
Some owners find the regular ash removal and the need for electricity to run the feed auger and blower more demanding than they expected compared with other heating options. Maintenance concerns, including keeping up with vent cleaning and annual inspections, are a common factor in that decision rather than any single defect in the appliance itself.
How do you clean a pellet stove chimney without removing it?
You can clean sections of the vent in place using a sized brush and rotary attachments fed through access points and the connector pipe, combined with a vacuum rated for fine ash. Full removal of the connector pipe is still recommended at least once a year so a technician or careful DIYer can inspect and clean sections that are not reachable from outside.
Do pellet stoves build up creosote?
Pellet stoves produce relatively little creosote compared with wood stoves, according to EPA guidance, since the pellets burn at a more controlled, efficient rate. They still produce fine ash that can restrict airflow in the narrow vent pipe, which is why annual professional inspection is recommended regardless.
How do you clean the pipes on a pellet stove?
Detach the connector pipe following your owner’s manual, then run a correctly sized brush through each section while vacuuming loosened ash with an ash-rated vacuum. Reseal every joint afterward with a sealant rated for at least 500 degrees Fahrenheit before reassembling and testing the draft.
How often should a pellet stove chimney be professionally inspected?
At least once a year, according to both the EPA and USFA fire safety guidance. Heavier use or lower-quality pellets may call for more frequent spot-checks between annual professional visits.
Sources
- Pellet stoves | US EPA
- Put a Freeze on Winter Fires — USFA
- Preventing chimney fires — CSIA
- CSIA Level 1 inspection guidance (PDF)
Recommended
- Prevent Chimney Fires: Fireplace Damper Cleaning for NY/NJ/CT Homes
- Top 7 benefits of chimney cleaning for NY, NJ & CT homes
- Avoid Chimney Fire: NFPA Backed Wood Stove Chimney Cleaning for Homeowners
- Chemical Chimney Cleaners: What Homeowners Need to Know