How to Restore Vents After a Home Renovation
Restoring vents after renovation starts with one immediate action: inspect every supply and return register before you run the HVAC system again. If you see a white or gray film inside the register boot, or if filters loaded up unusually fast during the project, construction dust has entered your ductwork. The EPA recommends cleaning ducts only when inspection confirms actual contamination — so your first job is to look, not assume.
Here is what to do right now:
- Turn the HVAC system off and keep it off until you have inspected every register.
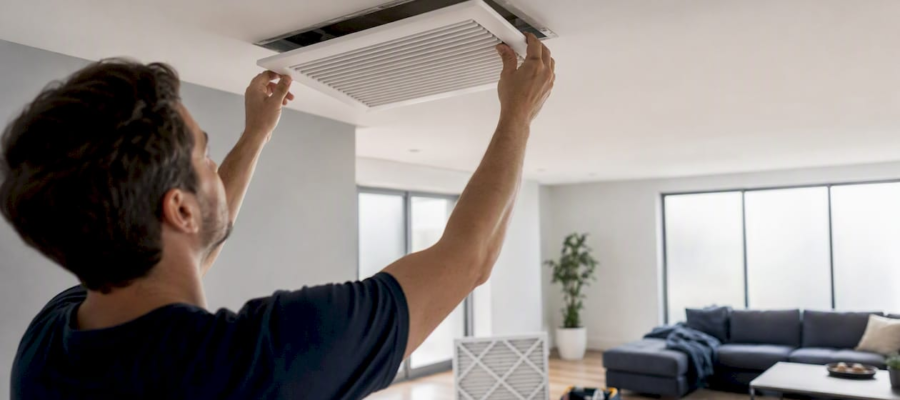
- Remove each grille and shine a flashlight into the boot — look for drywall film, sawdust, or debris.
- Replace the HVAC filter immediately, even if it looks clean.
- Vacuum register covers and visible boot interiors with a brush attachment.
- Schedule a professional cleaning if you find visible debris inside ducts, if the system ran during dusty trades, or if occupants have respiratory sensitivities.
A typical post-renovation duct cleaning in a residential home runs $450–$1,000 depending on home size and system complexity — budget accordingly before you book.
Key Takeaways
Restoring vents after renovation requires inspection before running the HVAC, immediate filter replacement, and professional cleaning whenever construction dust has reached inside duct boots or the air handler.
| Point | Details |
|---|---|
| Inspect before running the system | Check every register boot with a flashlight before turning the HVAC back on after renovation. |
| DIY vs. professional cleaning | DIY works for surface dust on covers; hire a pro when debris is visible inside ducts or the system ran during dusty work. |
| Professional cost range | Residential post-renovation duct cleaning typically costs $450–$1,000 depending on home size. |
| Verify the job | Request before/after photos, a written scope referencing NADCA ACR, and confirm at least 10% of components were inspected. |
| Amazonairpro | Serves NY, NJ, and CT homeowners and property managers with full-system post-renovation cleaning and photographic verification. |
Table of Contents
- Why does renovation dust end up inside your vents?
- When should you inspect vents and the air handler after renovation?
- DIY steps to restore vent covers, grilles, and accessible registers
- When is professional duct cleaning necessary after a remodel?
- How do you verify the cleaning was done correctly?
- How to prevent duct contamination during future renovations
- A local technician’s perspective on post-renovation cleanups
- Amazonairpro handles post-renovation vent restoration in NY, NJ, and CT
- Sources
- FAQ
Why does renovation dust end up inside your vents?
Your HVAC system is designed to move air continuously, and that same pressure differential that delivers conditioned air also pulls fine particles toward every open register. Drywall dust is the biggest culprit: its particles are extremely fine and stay airborne for hours after cutting or sanding, traveling far beyond the immediate work zone. Sawdust from trim work and silica from tile cutting behave similarly. Unlike visible debris that settles on floors within minutes, these fine particles can drift through an entire floor plan before landing inside a register boot or the return plenum.
Running the system during dusty trades makes this dramatically worse. Standard 1-inch fiberglass filters are not rated to capture fine construction particulates, so the dust bypasses the filter and coats the interior of supply ducts, the air handler cabinet, and the evaporator coil. You can learn more about how dust accumulates in ducts and why it compounds over time.
- Fine drywall and sanding dust (under 10 microns) stays airborne for 1–4 hours.
- Return registers pull harder than supply registers, concentrating debris near the air handler.
- Open register boots during framing or drywall phases act as direct entry points.
- Flexible duct sections trap debris in low spots and corrugated folds.
Pro Tip: If your contractor is doing any dust-producing work, ask them to cover every register with plastic sheeting and painter’s tape before they start — and to keep the HVAC off. A low-dust approach during door or trim installation, similar to what some contractors use for low-dust door replacement, can meaningfully reduce what ends up in your ductwork.
When should you inspect vents and the air handler after renovation?
Wait until every dusty trade is completely finished and the space has been vacuumed at least once. Fine particles need a few days to fully settle onto surfaces before you do a meaningful inspection — inspecting the day after drywall sanding will give you an incomplete picture. Aim to inspect before major furniture move-in, so you still have clear access to every register.
Signs that cleaning is genuinely needed:
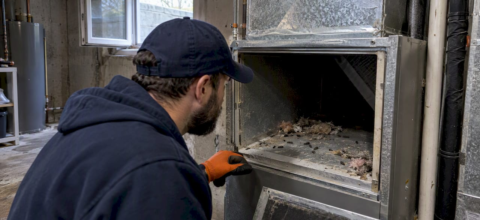
- A visible white or gray film coating the inside of register boots.
- Puffs of dust from supply vents when the system first starts.
- Filters that clog within days of replacement rather than weeks.
- Musty or chemical odors coming from registers.
- Occupants reporting worsened allergy or asthma symptoms.
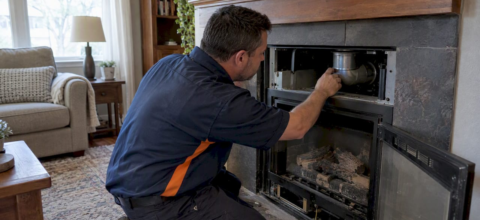
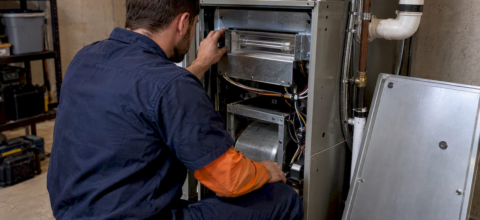
To inspect, remove the grille from each supply and return register and shine a flashlight at a low angle into the boot. Check the return grille especially carefully — it handles the highest volume of recirculated air. If your air handler has a visual access panel, open it and look at the blower wheel and coil face for dust accumulation. You can cross-reference what you find against the 5 signs your air ducts need cleaning to decide whether to act.
Mid-project spot-cleaning is rarely worth the cost unless a phase is fully complete and sealed off from remaining work. Cleaning between drywall and painting, for example, almost guarantees re-contamination.
DIY steps to restore vent covers, grilles, and accessible registers
DIY restoration is appropriate when dust is limited to register covers and the visible interior of boots, with no evidence of debris deeper in the duct system or on the return side. If the system ran during heavy dusty work, skip ahead to the professional cleaning section.
- Turn the HVAC system completely off at the thermostat and the breaker if you plan to open the air handler cabinet.
- Remove each vent cover by unscrewing or unclipping it from the wall, floor, or ceiling.
- Vacuum the register boot using a brush attachment, reaching as far as the hose allows without forcing it into flexible duct sections.
- Wash metal or plastic grilles with warm soapy water, rinse thoroughly, and let them dry completely before reinstalling — moisture inside a duct boot creates a mold risk.
- Inspect and restore decorative registers — cast iron or painted registers may need a light repaint after deep cleaning if the finish was damaged by construction grime.
- Replace the HVAC filter with a MERV 11 or MERV 13 filter for the first 4–6 weeks post-renovation to capture residual fine dust, then return to your system’s recommended rating. Check your air handler manual first — some systems are not designed for filters above MERV 8, and forcing a denser filter can restrict airflow and strain the blower motor.
- Reinstall covers only after boots and grilles are fully dry.
Before scheduling any professional duct cleaning, run the system for 30–60 minutes with a fresh filter after completing surface cleaning. This flushes suspended particles still in the air column through the filter rather than leaving them to settle back into cleaned ducts. Building America guidance recommends cleaning the air handling unit at the same time as ductwork to prevent re-contamination from internal components.
Safety note: Never open the air handler cabinet while the system is energized. Sheet metal edges inside the cabinet are sharp — wear gloves. If you see standing water, visible mold, or smell a burning odor from any register, stop and call a professional immediately.
Pro Tip: Sequence matters. Do surface cleaning first, then run the system briefly with a fresh filter, then schedule professional cleaning if needed. Reversing this order means the pro cleans ducts that will be re-coated by dust still floating in the space.
When is professional duct cleaning necessary after a remodel?
Some post-renovation situations go beyond what a vacuum and a fresh filter can address. Hire a professional when:
- You find visible drywall film or debris inside duct boots beyond the first 12 inches.
- The HVAC system ran continuously during drywall, sanding, or demo work.
- There is any evidence of water intrusion or mold near registers or the air handler.
- Persistent odors remain after filter replacement and surface cleaning.
- Occupants have asthma, COPD, or severe allergies.
- You lack safe physical access to the air handler or return plenum.
A reputable provider should follow the NADCA ACR Standard, which sets minimum procedural requirements for assessment, cleaning, and restoration of HVAC systems after construction or renovation. Per the NADCA General Specification, the scope should include:
- Containment setup to prevent cross-contamination to cleaned areas.
- Negative-pressure vacuuming of the full duct system using truck-mounted or portable equipment.
- Mechanical agitation of duct walls (brushing or air whipping) to dislodge adhered dust.
- Creation of service openings when necessary to access sealed duct sections.
- Air handling unit cleaning — blower wheel, coil, drain pan, and cabinet interior.
- Before-and-after photographs of representative duct sections and components.
- Filter replacement at job completion.
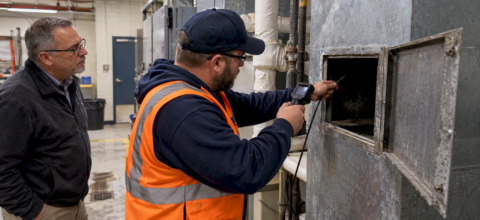
Ask providers whether they use surface comparison or vacuum tests to confirm cleaning need before starting work. NADCA’s inspection guidance supports insisting on an objective inspection rather than accepting a pre-packaged flat-rate cleaning without any assessment. A provider who quotes a price without inspecting first is a red flag.
| Item | Typical Range |
|---|---|
| Residential post-renovation duct cleaning | $450–$1,000 |
| Timeline to complete | 3–8 hours (single visit) |
| Minimum verification | Before/after photos, written scope referencing NADCA ACR |
How do you verify the cleaning was done correctly?
Use this checklist before the technician leaves:
- Before/after photos of register boots, duct interiors, and the air handler — request these in writing as part of the job scope.
- Visible debris removal confirmed by shining a flashlight into at least several register boots yourself.
- AHU and coil inspection — the blower wheel and coil face should be visibly clean, not just wiped.
- Access openings re-sealed with foil tape or sheet metal patches, not left open.
- New filter installed and the old filter shown to you so you can see what was captured.
- Written scope-of-work referencing the NADCA ACR standard and listing every component cleaned.
NADCA recommends that a proper inspection cover at least 10% of HVAC system components to verify cleanliness — ask your provider to document which components were inspected and what the findings were. Keep all photos, receipts, and the written report in your property file; property managers especially will want this for maintenance records and warranty documentation.
How to prevent duct contamination during future renovations
Prevention costs far less than cleaning. Before any future project begins, build these steps into your contractor agreement:
- Seal every supply and return register with plastic sheeting and painter’s tape before dusty work starts.
- Cover the air handler unit completely with a fitted plastic cover or heavy drop cloth.
- Keep the HVAC system off during all dust-producing trades — drywall, sanding, demo, and tile cutting.
- Place HEPA air scrubbers in the work zone to capture airborne particles before they migrate.
- Inspect register covers at the end of each workday and replace any that have come loose.
- Include an indoor air quality (IAQ) management plan in the project QA/QC documentation, as Building America guidance recommends.
For new duct sections or equipment being stored on-site before installation, keep them sealed in their original packaging until the moment of installation. Duct interiors left open on a job site collect dust and debris before they are ever connected to the system.
Pro Tip: Put register cover verification in writing as a daily contractor checklist item. A cover that slips off overnight during a multi-week project can undo a week’s worth of prevention.
A local technician’s perspective on post-renovation cleanups
After more than a decade of post-renovation cleanups across New York, New Jersey, and Connecticut, the single most common scenario is a homeowner who ran the HVAC during a kitchen or bathroom remodel because it was hot and they wanted the house comfortable. By the time we arrive, the evaporator coil is coated in drywall dust, the blower wheel is caked, and every supply register in the house has a gray film. The fix is straightforward — full-system negative-pressure cleaning, coil cleaning, and a new filter — but it takes a full day and costs what it costs. The homeowners who call us before the project starts, or at least before they turn the system back on, almost always have a faster, less expensive job. If you take one thing from this guide, let it be this: inspect first, run nothing until you do, and call a pro the moment you see film inside a boot.

Amazonairpro handles post-renovation vent restoration in NY, NJ, and CT
Post-renovation duct cleaning is one of the most time-sensitive services a homeowner or property manager can book — and it is exactly what Amazonairpro specializes in across New York, New Jersey, and Connecticut.

Amazonairpro’s post-renovation service covers the full scope: initial inspection, negative-pressure duct cleaning aligned with NADCA ACR practices, air handling unit and coil cleaning, photographic documentation before and after, and filter replacement at job completion. Most residential post-renovation jobs are completed in a single visit. Property managers handling multi-unit buildings can also access commercial air duct cleaning services under the same roof. To book or get a quote for your home or property in NY, NJ, or CT, visit the air duct cleaning service page and schedule your appointment before you move furniture back in.
Sources
- ACR, The NADCA Standard for Assessment, Cleaning & Restoration of HVAC Systems
- Should You Have the Air Ducts in Your Home Cleaned? | US EPA
- Removing Construction Debris from Ducts | Building America Solution Center
- Home Air Duct Cleaning: Fact vs. Fiction
FAQ
Should you get ducts cleaned after a renovation?
Yes, if inspection reveals visible construction dust, drywall film, or debris inside register boots or the air handler. The EPA does not recommend routine cleaning but does advise it when contamination from construction is confirmed.
How long does it take for dust to settle after renovation?
Fine drywall and sanding particles can stay airborne for several hours and may take 2–4 days to fully settle onto surfaces. Wait until all dusty trades are complete and the space has been vacuumed before doing your final inspection.
What should a post-renovation duct cleaning include?
A proper service should cover negative-pressure vacuuming of the full duct system, mechanical agitation, air handling unit and coil cleaning, before/after photos, and filter replacement — all documented in a written scope referencing the NADCA ACR Standard.
Should you replace 20-year-old ductwork during a renovation?
Age alone is not a trigger, but if ducts show significant deterioration, disconnected sections, or persistent mold after cleaning, replacement may be more cost-effective than repeated cleaning. Have a qualified HVAC technician assess condition before deciding.
Recommended
- Don’t Skip Air Duct Cleaning After Renovation (Here’s Why)
- Air Duct Cleaning After Renovation | Breathe Cleaner Air
- How to Clean Baseboard Vents for Better Air Quality – Amazon Air Duct Cleaning
- How to Inspect Return Vents for Better HVAC Performance – Amazon Air Duct Cleaning