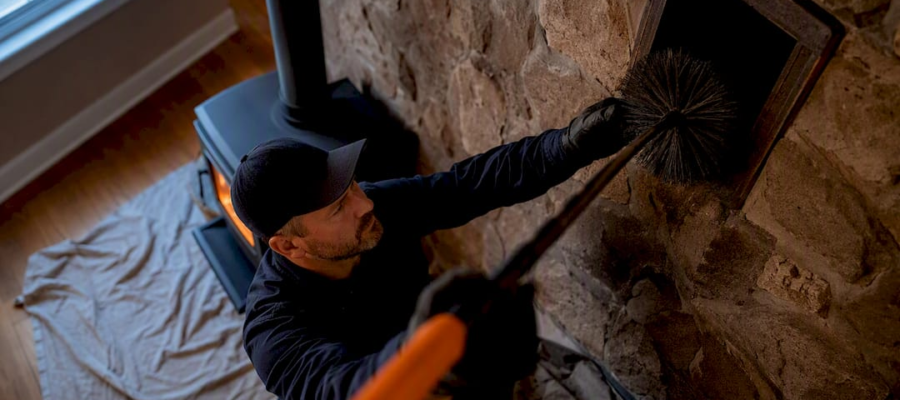
Avoid Chimney Fire: NFPA Backed Wood Stove Chimney Cleaning for Homeowners
DIY wood stove chimney cleaning is realistic for many homeowners when creosote is light and flaky, tools are correct, and access is safe from the ground or a stable roof point. Stop burning immediately and call a certified sweep if you see shiny, hardened glaze, smell smoke inside the house, or suspect a chimney fire has already occurred. NFPA 211 sets the working standard: sweep once buildup reaches one eighth of an inch, and get at least an annual inspection regardless of how the chimney looks.
TL;DR:
- DIY cleaning is feasible only for light, flaky creosote and safe roof or ground access, but glazed creosote and signs of fire require professional help.
- Inspection should occur yearly regardless of soot buildup, but sweeping is only necessary when creosote exceeds one eighth inch or appears as glaze.
- Using the correct brush size and quality tools prevents damage, with professional inspections recommended after chimney fires, structural damage, or home transitions.
- Proper fuel with low moisture content and hot burns significantly reduce creosote buildup, while a stove-top thermometer is a cost-effective tool for maintaining optimal burn conditions.
- Professional cleaning, including camera inspections and detailed reports, is essential for addressing heavy buildup, glazed creosote, or structural issues beyond DIY reach.
Table of Contents
- Signs Your Wood Stove Chimney Needs Cleaning
- How Often to Inspect and Sweep Your Chimney
- Tools and Supplies for DIY Chimney Cleaning
- Step-by-Step Chimney Cleaning Process for Wood Stoves
- When to Call a Professional Instead
- How to Reduce Creosote Buildup Between Cleanings
- What a Professional Chimney Cleaning Actually Looks Like
- Potential Damage From Improper Chimney Cleaning
- Disposing of Chimney Debris Responsibly
- Victor’s Field-Tested Take on Homeowner Chimney Habits
- Professional Chimney Cleaning and Inspection From Amazonairpro
- Sources
- FAQ
Signs Your Wood Stove Chimney Needs Cleaning
Not all creosote looks the same, and that difference determines whether you grab a brush or grab your phone to call a sweep. Flaky, black, powdery soot is the first stage of creosote formation. It brushes out with reasonable effort and poses a manageable fire risk. Glazed creosote is a different animal entirely: it looks shiny, almost like dried tar or hardened candle wax, and it forms when a chimney runs cooler than it should, letting smoke condense repeatedly on the flue walls. Glazed creosote is the most dangerous type because it ignites violently and burns hot enough to crack flue tile.
A handful of warning signs tell you it’s time to look closer, and some of them mean you need to act today, not next weekend.
- Smoke backing up into the room when you open the stove door, especially on cold starts
- A persistent campfire or acrid odor in the house, particularly on damp days when the flue draws poorly
- Dark, sooty film building up faster than usual on the stove glass between cleanings
- Visibly thicker ash with black flecks or tarry residue clinging to the pipe joints
- A dull roaring or rumbling sound from the chimney, which can indicate an active chimney fire in progress
Doing your own quick check takes ten minutes. Open the stovepipe cleanout or access door, shine a flashlight up into the flue, and look at what’s coating the walls. If you can see more than a thin dusting, measure it against a ruler and snap a photo for reference. This kind of documentation, noting the exact depth and location above the stove, gives you or a contractor something concrete to act on rather than a vague impression. If you smell smoke indoors or hear that rumbling sound, shut the stove down, open a window, and don’t relight it until a professional has inspected the flue.
How Often to Inspect and Sweep Your Chimney
Inspection and sweeping are two different jobs on two different schedules, and mixing them up is where a lot of homeowners waste money or, worse, skip something critical. NFPA 211 recommends an annual inspection for any chimney in regular use, full stop, regardless of how clean it looked last time. Sweeping, on the other hand, is condition based. You sweep when creosote hits that one eighth inch mark or when any glaze is present, not on a fixed calendar.
That distinction matters because it cuts through a common sales tactic. NFPA 211 does not mandate a sweep every single year on a fixed schedule. It mandates the inspection every year and the sweep based on measured buildup. If a contractor tells you an annual sweep is required by code regardless of condition, ask them to point to the specific NFPA section, because the standard itself doesn’t say that.
Usage intensity still drives how often you’ll actually need a sweep, even without a hard calendar rule attached to it.
| Usage pattern | Typical sweep frequency | Notes |
|---|---|---|
| Light (occasional weekend fires) | Once per season | Inspect annually regardless |
| Moderate (several fires weekly) | Once per season, check mid-season | Watch for glaze forming faster in tight, poorly insulated flues |
| Heavy (daily burning, shoulder seasons) | Once, sometimes twice per season | Mid-season check strongly recommended |
| Primary heat source (all-day, all-winter burning) | Two to three times per season | Monthly visual checks recommended |
A handful of events should trigger a deeper Level 2 or Level 3 inspection outside the normal schedule: buying or selling a home with a wood stove, any known or suspected chimney fire, storm or structural damage near the chimney, or swapping out the stove or connector pipe for a different model. Our internal guidance on chimney sweeping frequency walks through these triggers in more detail if you want a second reference point.
Tools and Supplies for DIY Chimney Cleaning
Doing this job right means having the correct gear staged before you start, not improvising halfway through with whatever’s in the garage. Wood stove flues typically run 6 to 8 inches in diameter, so brush sizing matters more than people expect. A brush that’s too small won’t contact the flue walls; too large and you’ll fight it the entire way up.
Brushes and rods:
- A round wire or poly brush sized to match your flue diameter exactly (measure before you buy)
- Fiberglass or steel extension rods, enough to cover your total flue height plus a few extra feet
- A rotary-style brush head if your flue has an offset or elbow that a straight brush can’t navigate
Containment gear:
- Heavy tarps or drop cloths to cover the stove, hearth, and surrounding floor
- Removable stove sealer or painter’s tape to seal the stove door and any gaps during the sweep
- A soot-rated or HEPA shop vacuum built specifically for fine ash and creosote dust
Personal protective equipment:
- An N95 or half-mask respirator rated for fine particulates, not a basic dust mask
- Sealed safety goggles, since creosote dust irritates eyes fast
- Work gloves and disposable coveralls you don’t mind getting dirty
Powered vacuums and inspection cameras are reasonable additions for a motivated homeowner tackling a ground-accessible, straightforward flue. Roof-level work, any glaze removal, and chimney fire aftermath are different territory entirely. Those tasks call for professional equipment, harnesses, and training that go beyond what a homeowner setup covers.
Pro Tip: Never use a household or shop vacuum that isn’t rated for fine ash. Standard vacuum filters let creosote dust pass straight through and blow it back into your air, which defeats the entire purpose of the cleanup.
Step-by-Step Chimney Cleaning Process for Wood Stoves
Once you’ve confirmed the stove is completely cold, ideally after 24 hours without a fire, work through the process in order rather than skipping around.
- Stage everything first. Lay out your brushes, rods, vacuum, tarps, and PPE within reach before you open anything. Cover the hearth and surrounding floor completely.
- Seal the stove opening. Tape plastic sheeting or a fitted cover over the stove’s loading door and any air intake to keep soot from drifting into the room while you work the flue from above or below.
- Set up your vacuum. Position the soot-rated vacuum near the cleanout or ash door so you can capture debris as it falls, rather than letting it pile up and get disturbed later.
- Choose your brushing direction. Top-down access, from the roof, lets gravity help pull debris toward the stove for easier collection, but it requires safe roof access and fall protection. Bottom-up access, working through the stovepipe and up into the flue, is the safer option for most homeowners since it keeps you on solid ground.
- Brush in overlapping passes. Push the brush up and down the full length of the flue in sections, overlapping each pass by a few inches so you don’t leave streaks of untouched creosote.
- Check your progress against the standard. NFPA 211 sets the sweep threshold at one eighth of an inch of accumulation. If you’re still seeing that much debris coming down after a full pass, keep working the same section before moving on.
- Disconnect and clean the stovepipe. Detach the stovepipe sections connecting the stove to the flue, and brush or vacuum out the interior separately. This is often where the heaviest, stickiest buildup collects, since it’s the coolest part of the system.
- Clean the smoke chamber and damper area. Use a smaller brush or vacuum attachment to reach into the smoke shelf and damper mechanism, where debris tends to pile up unnoticed.
- Reassemble the stovepipe securely. Reconnect every section, checking that seams are fully seated and any locking bands or screws are tight before you consider the job finished.
- Vacuum the cleanout and surrounding area. Clear all loose debris from the ash door, cleanout, and hearth before removing your containment tarps.
- Document what you found. Photograph the flue interior with a ruler in frame to record creosote depth and note the exact height above the stove where any heavy buildup occurred.
- Inspect for cracks or damage. Look closely at the flue liner, stovepipe seams, and connector joints for cracking, warping, or gaps that weren’t there before.
That documentation step in item 11 isn’t just busywork. It’s the same habit our field teams use when photographing a flue for a written report, and it gives any future contractor a specific starting point instead of a guess.
When to Call a Professional Instead
DIY cleaning has real limits, and knowing where they sit protects both your chimney and your safety. NFPA 211 breaks inspections into three levels, and understanding which one applies to your situation tells you how far a homeowner can reasonably go alone.
Level 1 is a basic visual check of accessible parts of the chimney and connections, appropriate for a chimney in continued, unchanged service. Level 2 adds a camera scan of the flue interior and is required after a chimney fire, a property sale, or any change to the appliance or connector. Level 3 involves removing chimney or hearth components to access concealed areas, typically reserved for suspected serious hazards.
A handful of red flags mean this is no longer a DIY job, regardless of how confident you feel with a brush:
- Glazed, shiny creosote coating any section of the flue
- Any evidence of a past or active chimney fire, including scorched paint or warped connector pipe
- Cracked, spalled, or shifted flue tiles or masonry
- A chimney that’s tall, steep, or otherwise unsafe to access without fall protection
- Signs of animal nests or blockages you can’t clear with a standard brush
Professionals bring tools and training that go well past a homeowner kit: chimney relining equipment, dedicated inspection cameras for Level 2 and 3 work, and the certification to make structural repair calls. CSIA-certified sweeps train specifically on chimney fire risk and safety standards, which is worth checking for before you hire anyone.
On cost, professional chimney sweeping for wood stoves typically runs between $150 and $300, with the broader national range spanning roughly $129 to $381 depending on chimney type and condition. Camera inspections, difficult roof access, and minor repairs on the spot commonly add to that base price, so a rooftop chimney with a suspected crack could run toward the higher end. Our chimney cleaning cost breakdown covers typical surcharges in more detail if you’re budgeting ahead of a booking.
How to Reduce Creosote Buildup Between Cleanings
The single biggest lever you have over creosote formation is wood moisture. Properly seasoned firewood sits at 20% moisture content or below, and burning anything wetter than that sends more smoke up the flue, which condenses into creosote faster. A cheap moisture meter from a hardware store settles the question in seconds rather than guessing based on how the wood looks or sounds when you knock two pieces together.

Running the stove hot and clean matters just as much as fuel quality. Long, slow smolders with the air control choked down produce far more creosote than shorter, hotter burns with adequate airflow. Load the stove with the right amount of wood for the burn you want, open the air control enough to get flames actively licking the wood, and avoid damping down so far that the fire just smokes rather than burns.
A few habits keep the whole system running cleaner over the season:
- Empty ash regularly, but leave a thin base layer, which helps insulate the firebox floor
- Check door and flue gaskets each season for gaps that let uncontrolled air in and throw off your burn
- Keep a stove-top thermometer in view so you can track flue temperature and stay in the efficient burn range rather than guessing
- Confirm your chimney cap and spark arrestor are intact and unobstructed, since a blocked cap changes draft and can worsen creosote formation
Pro Tip: A stove-top thermometer costs very little and does more for creosote prevention than almost any other single habit. It keeps your burns in the range hot enough to reduce buildup without pushing the stove past safe operating temperatures.
What a Professional Chimney Cleaning Actually Looks Like
A properly run onsite visit follows a predictable sequence: initial visual inspection, containment setup, the sweep itself, then a camera pass if buildup or damage warrants a closer look. What separates a strong service from a rushed one is the paperwork afterward. A good written report references specific NFPA 211 sections rather than vague language, states a measured creosote depth rather than a general impression, and notes exactly where on the flue any concerns were found.
For homeowners across New York, New Jersey, and Connecticut, booking ahead of the heating season avoids the scramble that hits every October. Before hiring anyone, ask three questions: are you CSIA certified, are you insured, and does the quote include a camera inspection if buildup looks heavier than expected. Our chimney cleaning workflow overview shows what a documented visit looks like from start to finish.
Potential Damage From Improper Chimney Cleaning
A rushed or poorly executed cleaning can cause more harm than the creosote it was meant to remove. Using a brush sized wrong for your flue, particularly one too stiff or too large, can scratch or crack clay flue tiles, creating gaps where heat and combustion gases reach combustible material behind the liner. That’s a serious structural problem, not a cosmetic one.

Attempting to scrape off glazed creosote with metal tools or improvised scrapers instead of proper rotary equipment risks gouging the liner rather than removing the glaze cleanly. Glaze often needs chemical treatment or professional mechanical removal, not brute force. Forcing a brush through an offset or elbow section without the right flexible connector can also jam the rod or damage the joint where sections meet.
Skipping the post-clean inspection step compounds all of this. A cracked tile or gapped joint left unnoticed after a DIY sweep can go undetected for another full heating season, during which the risk of heat transfer to nearby framing quietly increases. Improper reassembly of stovepipe sections, loose seams or misaligned locking bands, is another overlooked hazard, since it allows smoke and carbon monoxide to leak into living space rather than exiting through the flue.
None of this means DIY cleaning is inherently risky when done with the right tools and process. It does mean rushing the job, using mismatched equipment, or skipping the final inspection step turns a routine maintenance task into a structural or safety problem you won’t notice until it’s already caused damage.
Disposing of Chimney Debris Responsibly
Creosote and soot aren’t ordinary household trash, and treating them that way creates its own set of problems. Creosote is combustible even after removal from the flue, and a bag of warm ash or soot tossed straight into a plastic trash bin has caused more than a few garage and shed fires. Let all collected debris cool completely, ideally for a full 24 to 48 hours, before bagging it for disposal.
Once cooled, double-bag creosote and ash in sturdy, sealed bags rather than loose containers, since fine soot dust escapes easily and settles on anything nearby. Many municipalities in New York, New Jersey, and Connecticut have specific guidance on ash disposal through regular waste collection, though some communities restrict wood ash from curbside pickup during dry, high-fire-risk periods. Check with your local public works department before your first cleanup of the season rather than assuming standard trash rules apply.
Cooled wood ash, as opposed to creosote scraped from the flue itself, has legitimate reuse value. It works as a mild soil amendment in gardens with acidic soil, since it raises pH slightly, though it should never be used near acid-loving plants. Creosote residue itself has no safe reuse; it belongs in sealed waste disposal only, never spread outdoors or added to compost, since it carries concentrated combustion byproducts that don’t belong in soil or groundwater.
Victor’s Field-Tested Take on Homeowner Chimney Habits
The mistakes I see repeated most often aren’t dramatic. They’re small oversights that compound over a season. Skipping the annual inspection because “it looked fine last year” tops the list, followed by burning whatever wood is on hand regardless of moisture content, and using shop vacuums that push soot dust right back into the room instead of containing it.
The habit that actually moves the needle, more than any brush or tool, is a five-dollar stove-top thermometer. Homeowners who watch their burn temperature consistently report less buildup and fewer surprises at inspection time. It’s the single cheapest investment in this entire process.
If your flue shows glaze, or you’re just not confident measuring depth yourself, get a second set of eyes on it before the season gets underway.
— Victor
Professional Chimney Cleaning and Inspection From Amazonairpro
If glazed creosote, roof access, or a suspected chimney fire took DIY off the table for you, Professional services handle the parts of this job that genuinely call for training and equipment, not a weekend project. Specialized teams serve homeowners with chimney cleaning, camera inspection, and written photo-backed reports that cite specific findings rather than vague recommendations.

A typical visit starts with a walkthrough of your stove and flue, moves into full containment of your hearth and floors, then the sweep itself, followed by a camera pass if we spot anything that warrants a closer look. Before the appointment, clear access to your stove and let us know about any recent chimney fires, appliance changes, or property transfers, since those trigger a deeper Level 2 inspection under NFPA 211. You’ll walk away with a documented report showing measured creosote depth and any repair recommendations in plain language.
Ready to get your flue checked before the next cold stretch? Book a chimney cleaning appointment and get a straightforward assessment of exactly where your system stands.
Sources
For readers who want to verify any of this directly against the source material, these are the standards and guides worth bookmarking.
- NFPA 211 standard (NFPA)
- Chimney Safety Institute of America (CSIA)
- How to Clean Your Chimney (This Old House)
- How Much Does a Chimney Sweep Cost? 2026 Data | Angi
FAQ
What Is the 3-2-10 Rule for Chimneys?
The 3-2-10 rule, set by the International Residential Code, requires a chimney to extend at least 3 feet above its roof penetration point and 2 feet higher than any part of the roof within 10 horizontal feet. Inspectors check this measurement because a chimney that’s too short for its roofline often causes poor draft and smoking problems that get mistaken for a dirty flue.
What Dissolves Chimney Creosote?
No household chemical safely dissolves hardened glazed creosote; it requires mechanical removal with proper brushes and rods, or specialized creosote-modifying products applied by a professional. Glazed creosote is hard and shiny enough that scraping or brushing is usually the only reliable removal method.
How Much Does It Cost to Have a Wood Burner Chimney Swept?
Professional sweeping for a wood stove typically costs between $150 and $300, with the full national range varies depending on access, condition, and whether a camera inspection is included. A detailed chimney cleaning cost guide breaks down common surcharges for height and repairs.
Can I Clean My Chimney Myself?
Yes, in many cases, if creosote is light and flaky, your flue is accessible from the ground or a safe roof point, and you have the correct brush size and containment gear. Stop and call a certified sweep instead if you see glazed creosote, suspect a chimney fire has occurred, or the chimney requires unsafe rooftop access.
How Often Should a Wood Stove Chimney Be Inspected?
NFPA 211 recommends an annual inspection for any chimney in regular use, separate from sweeping, which happens whenever creosote reaches the one eighth inch threshold or glaze appears.
Recommended
- Chemical Chimney Cleaners: What Homeowners Need to Know
- Top 7 Benefits of Chimney Cleaning for NY, NJ & CT Homes
- Chimney Odor Elimination Steps for Homeowners