How to Clean Baseboard Vents for Better Air Quality
TL;DR:
- Cleaning baseboard vents every 6 to 12 months improves indoor air quality and heating efficiency. Proper tools, power shutoff, gentle brushing, and minimal water use are essential for safe, effective maintenance. Professional services may be needed if fins are severely damaged or buildup persists.
Cleaning baseboard vents, the metal covers and heating fins that line the lower walls of most American homes, is one of the most overlooked maintenance tasks that directly affects your indoor air quality and heating efficiency. Dust, pet dander, and debris collect inside these units over time, restricting airflow and causing your heater to work harder. Knowing how to clean baseboard vents properly takes less than two hours and delivers real results: up to 10% better heating efficiency and no more burnt dust odors when the heat kicks on. You need a vacuum with a brush attachment, a microfiber cloth, mild dish soap, an old toothbrush, and a screwdriver to get started.
What tools do you need to clean baseboard vents safely?
The right tools make the job faster and protect your heater from damage. According to The Spruce’s vent cleaning guide, the essential tools list includes a vacuum with a soft brush attachment, microfiber cloths, mild dish soap, an old toothbrush for tight crevices, and a standard screwdriver. Each item has a specific job, and skipping one usually means leaving dust behind.

Gather everything before you start. A thorough cleaning session takes 30–90 minutes depending on the length of your baseboard units and how much dust has built up. Having all your supplies within reach means you won’t need to stop mid-task.
Essential tools checklist:
- Vacuum cleaner with a soft brush attachment
- Microfiber cloths (at least two: one damp, one dry)
- Mild dish soap and warm water in a small bowl
- Old toothbrush or soft-bristle paintbrush
- Flathead or Phillips screwdriver
- Drop cloths or old towels
- Fin comb or needle-nose pliers (for bent fins)
- Can of compressed air (optional)
Pro Tip: Buy a fin comb before you need one. They cost under $10 at most hardware stores and save you from accidentally making bent fins worse with improvised tools.

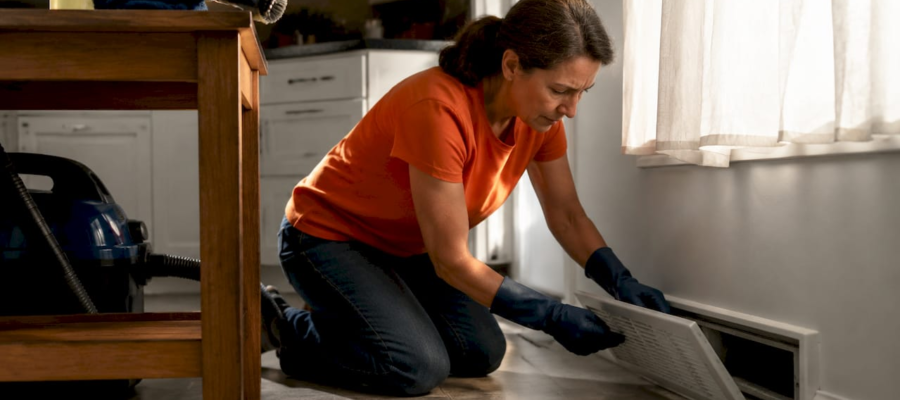
How to prepare and remove vent covers without causing damage
Safety comes before any cleaning step. Cutting power at the circuit breaker is the only reliable way to make an electric baseboard heater safe to touch. Turning the thermostat to zero is not enough. The heating element can still carry live current, and touching it risks a serious burn or electric shock.
Follow these steps in order:
- Locate your circuit breaker panel and flip the breaker labeled for the room or zone with the baseboard heater.
- Wait at least 30 minutes after shutting off power. The metal fins and housing retain heat and can cause burns even after the power is off.
- Lay drop cloths or old towels directly beneath the baseboard unit. Dust will fall when you remove the cover, and catching it now saves you from cleaning the floor twice.
- Examine the cover for fasteners. Most baseboard covers slide upward off clips, while others use small Phillips screws at each end. Remove screws and set them in a small cup so they don’t roll away.
- Lift or slide the cover gently. Pull straight out or upward depending on the design. Do not force it. If it resists, check for a hidden screw or clip you may have missed.
Pro Tip: Take a photo of the cover and its mounting position before removal. Reinstallation is much faster when you have a reference, especially on units with asymmetric clips.
What are the best methods to remove dust from vent fins and the interior?
The fins inside a baseboard heater are thin aluminum strips arranged in rows. They transfer heat from the element to the air in your room. Dust packed between those fins blocks airflow and forces the heater to run longer cycles. The goal is to remove that dust without bending the fins.
Vacuuming first is always the right call. Run the soft brush attachment along each row of fins, moving top to bottom. Work slowly. The brush lifts dust while the suction pulls it away before it resettles. Vacuum the floor beneath the unit and the inside of the housing as well.
For stubborn buildup between fins, a soft-bristle paintbrush or old toothbrush works well. Brush gently in the direction of the fins, not across them. Brushing sideways bends fins and reduces airflow. Follow each pass with the vacuum to capture loosened debris immediately.
Compressed air: useful but risky if misused. Compressed air dislodges dust from tight spaces faster than a brush. The problem is that it also blows dust into the room if you use it without a vacuum running nearby. Always hold the vacuum nozzle close to the area you are blowing out, so debris gets captured rather than redistributed.
| Method | Best for | Risk level | Paired with |
|---|---|---|---|
| Vacuum with brush attachment | General dust removal | Low | Nothing required |
| Soft-bristle paintbrush | Stubborn buildup between fins | Low | Vacuum immediately after |
| Old toothbrush | Tight corners and crevices | Low | Vacuum immediately after |
| Compressed air | Deep fin cleaning | Medium | Vacuum running simultaneously |
Straightening bent fins requires patience. Aluminum fins bend easily and aggressive handling makes it worse. Use a fin comb sized to match your fin spacing, or carefully work needle-nose pliers between fins one at a time. Move gradually from top to bottom, applying light pressure. Forcing a fin back into place quickly will snap it or damage the adjacent fins.
Pro Tip: If more than 20% of your fins are bent or broken, the heater’s airflow is already compromised. At that point, a professional assessment is worth scheduling before the next heating season.
How to clean baseboard vent covers and exterior surfaces
The cover is what most people see, and it collects its own layer of grime, fingerprints, and dust. Cleaning it separately from the heater body gives you better results and protects the electrical components inside.
Electric baseboard heating elements are damaged by excess water. Soaking the cover while it is still attached, or using a dripping wet cloth near the element, causes electrical problems and odors the next time you run the heat. Use a barely damp microfiber cloth for any wet cleaning near the unit itself.
Steps for cleaning the cover:
- Fill a small bowl with warm water and a few drops of mild dish soap.
- Dip a microfiber cloth into the solution and wring it out thoroughly. The cloth should feel damp, not wet.
- Wipe down the outside of the cover, working in long strokes to pick up dust and grime.
- Use the toothbrush dipped in the same solution to scrub painted slots or decorative grilles where dust packs in.
- Rinse the cloth with clean water, wring it out again, and wipe the cover a second time to remove soap residue.
- Dry the cover completely with a separate dry cloth before reinstalling it.
The wall area directly above and behind the baseboard unit often shows a gray or black smudge called dust ghosting. This is dust carried by air currents and deposited on the wall surface. A damp microfiber cloth removes most of it. For heavier staining, a small amount of dish soap on the cloth works without damaging paint.
How to reassemble vents and maintain them going forward
Reinstallation is straightforward when you follow the same steps in reverse. Line up the cover with its mounting clips or screw holes, press it gently into place, and tighten screws snugly. Do not overtighten. Stripped screws in thin sheet metal are difficult to fix and leave the cover loose.
Once the cover is secure, follow these steps:
- Return to the circuit breaker and flip the breaker back on.
- Set the thermostat to a normal heating temperature and wait five minutes.
- Check for proper airflow by holding your hand near the top of the unit. Warm air should rise steadily.
- Smell for burning odors. A faint smell on the first run after cleaning is normal as residual dust burns off. A strong or persistent odor signals a problem and warrants a professional inspection.
For cleaning frequency, plan on a full cleaning every 6–12 months. Homes with pets, carpet, or residents with allergies need more frequent attention. Pet dander and carpet fibers accumulate in baseboard fins faster than in hard-floor homes, and that buildup directly worsens indoor air quality. You can also learn more about duct cleaning schedules to coordinate your baseboard maintenance with your broader HVAC upkeep.
Call a professional when you notice persistent burning smells after cleaning, visible rust or corrosion on the heating element, fins that are too damaged to straighten, or any sign of electrical arcing or discoloration near the wiring.
Key takeaways
Cleaning baseboard vents every 6–12 months, with proper power shutoff and the right tools, protects your home’s air quality and keeps your heating system running at full efficiency.
| Point | Details |
|---|---|
| Power off at the breaker | Turning the thermostat off alone is not safe; always cut power at the circuit breaker and wait 30 minutes. |
| Right tools matter | A vacuum with a brush attachment, microfiber cloths, a toothbrush, and a fin comb cover every cleaning need. |
| Vacuum before brushing | Vacuum first to capture loose dust, then brush stubborn buildup, then vacuum again to finish. |
| Minimal water near elements | Use a barely damp cloth on covers; excess water damages electric heating elements and causes odors. |
| Clean every 6–12 months | Homes with pets or carpet may need cleaning more often to reduce allergens and maintain airflow. |
What I’ve learned from years of watching homeowners skip this step
The single most common mistake I see is people skipping the breaker shutoff. They turn the thermostat down, assume the heater is safe, and start cleaning. That assumption is wrong and genuinely dangerous. Only the circuit breaker guarantees the element is de-energized. I’ve seen homeowners get burns from fins that looked cool but weren’t, and I’ve seen water damage from people who wiped down a unit they thought was off. Neither outcome is worth the time saved.
The second mistake is using too much water. A soaking wet cloth on a baseboard cover feels thorough. What it actually does is push moisture into the housing, where it sits against the heating element and causes rust, electrical shorts, and that acrid smell you notice the first time you run the heat in fall. A barely damp cloth does the job without the risk.
What actually works is simple: shut the breaker, wait, vacuum methodically, brush gently, wipe with a nearly dry cloth, and dry everything before reassembling. That process, done once or twice a year, keeps your heater running cleanly and your air noticeably fresher. Homes with pets or heavy carpet traffic benefit from more frequent vent cleaning, and the difference in air quality is real. Regular upkeep also catches problems early, like corroded elements or damaged fins, before they become expensive repairs.
— Victor
When DIY cleaning isn’t enough: professional vent and duct services
Baseboard vent cleaning handles the surface layer of your home’s air quality problem. The deeper issue is what lives inside your ductwork and HVAC system, where years of dust, mold spores, and allergens accumulate beyond what a vacuum and toothbrush can reach.

Amazonairpro serves homeowners and renters across New York, New Jersey, and Connecticut with professional air duct and vent cleaning that goes well beyond what DIY methods can accomplish. The team has over 10 years of experience with both residential and commercial systems. If you’re noticing persistent odors, reduced airflow, or signs your ducts need attention, a professional cleaning is the logical next step after your baseboard maintenance is done. Book a service call and get your entire system assessed by people who do this every day.
FAQ
How often should you clean baseboard vents?
Clean baseboard vents every 6–12 months as a baseline. Homes with pets, carpeting, or allergy sufferers should clean them more frequently to control dust and allergens.
Is it safe to vacuum inside a baseboard heater?
Yes, as long as you cut power at the circuit breaker first and wait 30 minutes for the unit to cool completely. Never vacuum a heater that is still warm or electrically live.
Can you use water to clean baseboard heater covers?
Use a barely damp microfiber cloth on covers and wipe dry immediately. Excess water on electric heating elements causes damage, rust, and odors, so avoid soaking any part of the unit.
What causes a burning smell from baseboard heaters after cleaning?
A brief burning smell after cleaning is normal as residual dust burns off the element on the first heating cycle. A strong or persistent odor after several cycles signals a problem that needs professional inspection.
How do you straighten bent fins on a baseboard heater?
Use a fin comb matched to your fin spacing, or work carefully with needle-nose pliers. Straighten fins gradually, moving top to bottom, applying light pressure to avoid snapping the aluminum.
Recommended
- How to remove dust from vents for cleaner indoor air – Amazon Air Duct Cleaning
- Safe vent cleaning practices to protect your home’s air – Amazon Air Duct Cleaning
- Essential residential vent cleaning steps for healthier air – Amazon Air Duct Cleaning
- Why Vent Hygiene Matters for Healthier Homes – Amazon Air Duct Cleaning