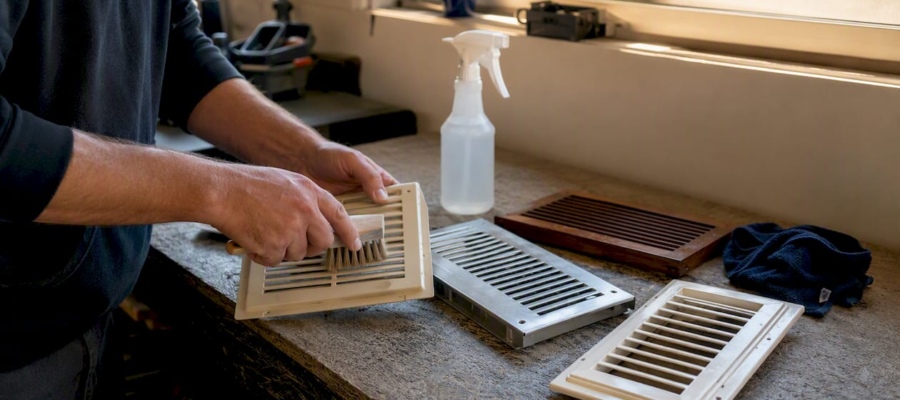
Vent Cover Cleaning Guide: Steps for Every Home
Turn off your HVAC, remove the cover if you can, vacuum loose dust, wash the cover in warm soapy water, rinse it thoroughly, let it dry completely, then reattach it. That sequence handles most vent covers in 15–30 minutes. Cleaning experts quoted by TODAY recommend wiping vent exteriors monthly and doing a deeper wash once or twice a year.
At a glance:
- Turn off the HVAC system before touching any cover
- Remove the cover (screwdriver or hand-twist, depending on type)
- Vacuum with a brush attachment, then wash or wipe based on material
- Dry fully before reinstalling — moisture inside a duct causes mold
- Call a pro if: you see visible mold inside the duct, smell persistent odors, notice pest activity, or recently completed a renovation
Key Takeaways
Consistent vent cover maintenance — monthly wipes, a deep clean once or twice a year, and timely filter changes — keeps most registers clean and supports healthy indoor air without requiring professional help every season.
| Point | Details |
|---|---|
| Clean on a schedule | Wipe covers monthly; deep wash 1–2 times per year per cleaning expert guidance. |
| Match method to material | Soak plastic and bare metal; wipe only for wood and painted decorative covers. |
| Safety first | Turn off HVAC, wear an N95 mask and gloves, and use a stable ladder for ceiling vents. |
| Know the pro triggers | Call a professional for mold inside ducts, pest activity, post-renovation debris, or persistent odors. |
| Amazonairpro for local service | Serves NY, NJ, and CT with NADCA-aligned duct, dryer vent, and chimney cleaning for homes and businesses. |
Table of Contents
- What you need for a complete vent cover cleaning guide
- Safety steps to take before you start cleaning
- How to remove and reattach vent covers safely
- Cleaning by material: plastic, metal, wood, and decorative covers
- Ceiling, wall, and floor vents each need a different approach
- How to clean vent covers when you can’t remove them
- How to handle mold, heavy grime, and disinfection safely
- How often should you clean vent covers?
- When should you hire a professional duct cleaning service?
- A technician’s honest perspective on DIY vent cleaning
- Professional vent and duct cleaning in NY, NJ, and CT
- Sources
- FAQ
What you need for a complete vent cover cleaning guide
Before you pull a single screw, gather everything. Stopping mid-job to hunt for supplies is how covers get left off and dust gets tracked through the house.
Essential tools and supplies:
- Flathead and Phillips screwdrivers (most covers use one or the other)
- Vacuum with a brush attachment or a canister vacuum with a flexible hose
- Microfiber cloths (at least two — one damp, one dry)
- Bucket with warm water and a few drops of mild dish soap
- Soft-bristle brush or old toothbrush for slats and ornate grilles
- Rubber gloves and an N95 mask
- Drop cloth or old sheet to protect flooring and furniture
Prep checklist:
- Shut off the HVAC at the thermostat or furnace switch
- Lay a drop cloth under ceiling and wall vents before removal
- Take a phone photo of each cover’s orientation before removing it
- Keep screws in a labeled zip-lock bag or a magnetic tray so nothing rolls away
Pro Tip: A magnetic parts tray costs a few dollars and keeps every screw in place. It’s one of those small habits that saves a surprising amount of frustration when you’re working overhead.
Safety steps to take before you start cleaning
Most vent cleaning injuries come from two sources: falls from ladders and respiratory irritation from disturbed dust. Both are easy to prevent.
- Power off the system. Turn off the HVAC at the thermostat, then at the furnace switch or breaker if you’re working near the air handler. A system that cycles on while you’re cleaning can pull dust deeper into the ductwork.
- Wear an N95 mask. Standard dust masks filter large particles but let fine particulates through. An N95 is the right call, especially in older homes where duct dust can contain allergens, pet dander, or mold spores.
- Add eye protection when working on ceiling vents. Dust falls straight down.
- Gloves protect your hands from sharp metal edges on older registers and from cleaning solutions.
For ceiling vents specifically, use a stable step ladder rated for your weight plus tools. Set it on a flat, non-slip surface. Never stand on the top two rungs, and always have someone nearby when working above shoulder height.
Pro Tip: Place a folded rubber mat under each ladder foot on hardwood or tile. It takes ten seconds and prevents the ladder from sliding when you shift your weight.
How to remove and reattach vent covers safely
Most covers attach with one or two screws at the corners, though some ceiling registers use spring clips or twist-lock mechanisms. Here’s the sequence that avoids damage and misalignment.
- Locate the fasteners. Check all four corners and the center. Some covers have hidden clips under a decorative edge.
- Support the cover with one hand while removing the last screw. Covers are heavier than they look, especially cast metal or decorative grilles.
- Photograph the cover’s orientation before lifting it off. Airflow louvers are directional — reinstalling a cover backward reduces airflow efficiency.
- Inspect the opening and the cover itself. Look for visible mold, pest debris, or damage to the frame. If you see mold inside the duct beyond the first inch or two, stop and call a professional.
- For painted or stuck screws, apply a small amount of penetrating oil and wait five minutes before turning. Force strips the screw head and damages the surrounding drywall or ceiling.
When reattaching, confirm the cover is fully dry before reinstalling. Even slight moisture trapped between a metal cover and a wall can cause rust staining or, worse, feed mold growth inside the duct cavity.
Pro Tip: Snap a photo of the screw holes before you remove the cover. Ceiling drywall anchors can shift, and having a reference photo saves you from guessing where the screws go back.
Cleaning by material: plastic, metal, wood, and decorative covers
The right method depends entirely on what the cover is made of. Using the wrong approach — soaking painted wood, scrubbing soft plastic with an abrasive pad — causes permanent damage.
| Material | Preferred method | Soaking allowed | Special precautions |
|---|---|---|---|
| Plastic | Warm soapy water, soft brush | Yes | Avoid abrasive pads; check for brittleness in older covers |
| Bare metal | Vacuum first, then soapy soak | Yes, if no rust | Avoid bleach on bare metal; light sanding for rust spots |
| Painted metal | Vacuum, damp wipe or brief soak | Brief only | Bleach strips paint; use mild soap only |
| Wood / painted wood | Damp microfiber wipe only | No | Dry immediately; repair flaking paint before reinstalling |
| Decorative / laser-cut | Soft brush, compressed air (low pressure) | No | Dry thoroughly to prevent corrosion or warping |
Plastic covers are the most forgiving. Submerge in warm soapy water, work a soft brush through each slat, rinse under running water, and air dry completely before reinstalling.
Metal covers need vacuuming first to remove loose debris before any water contact. For light rust, a gentle pass with fine-grit sandpaper followed by a touch-up with appliance spray paint keeps the cover functional. Avoid bleach on bare metal — it accelerates corrosion.
Wood and painted decorative covers should never be soaked. Wipe with a barely damp microfiber cloth and a mild cleaner, then dry immediately with a second cloth. If the paint is flaking, sand lightly and repaint before reinstalling — flaking paint can shed into the airflow.
Ornate or laser-cut grilles respond well to a soft toothbrush in the crevices and a short burst of compressed air at low pressure (under 30 PSI) to clear fine debris. Hold the can upright to avoid propellant residue.
Pro Tip: For oily residue — common in kitchen vents — dampen a microfiber cloth with isopropyl alcohol and wipe the affected slats. Test a small hidden spot first on painted or coated surfaces.
Ceiling, wall, and floor vents each need a different approach
Location changes the logistics more than most people expect. The cleaning method is similar, but the setup and safety steps shift depending on where the vent sits.

Ceiling vents carry the most risk. Before removing the cover, run an extendable duster or vacuum brush attachment across the face to knock loose dust down onto the drop cloth rather than into your face. Use the ladder safety steps from the earlier section. For baseboard and floor-level vents, the process is simpler but debris tends to accumulate in the floor cavity beneath the register — vacuum that opening before reinstalling the cover.
Wall vents are the easiest to remove but sit close to painted drywall and baseboards. Avoid letting water run down the wall surface when wiping near the opening. A dry microfiber pass around the frame before any wet cleaning prevents water staining.
Floor vents collect the most debris: pet hair, crumbs, and anything that falls through the slats. Remove the cover, vacuum the cavity to a depth of 12–18 inches if your hose reaches, wash the cover (plastic or metal), and dry before reinstalling.
Large intake and return grilles can be surprisingly heavy. Consider cleaning them outdoors or in a bathtub, and ask someone to help you carry and handle them. A two-person approach prevents dropped covers and bent frames.
Pro Tip: For large return grilles, lay them flat in the bathtub, let them soak for five minutes, then use a handheld showerhead to rinse through the slats. It’s faster and more thorough than scrubbing by hand.
How to clean vent covers when you can’t remove them
Some covers are painted over, sealed with caulk, or simply too awkward to remove safely. In-place cleaning still gets most of the visible dust off.
- Turn off the HVAC before starting.
- Attach a dusting-brush head to your vacuum and run it across every slat, working from top to bottom.
- Follow with a dry microfiber cloth to pick up anything the vacuum left behind.
- For stubborn grime on accessible slats, use a barely damp microfiber cloth — wring it out thoroughly so no water drips into the duct opening.
- For delicate or ornate grilles, a short burst of compressed air at low pressure clears fine debris from crevices without contact.
A few things to avoid during in-place cleaning:
- Never spray liquid cleaners directly at the duct opening — they can reach insulated duct liner and create a moisture problem
- Avoid wet cleaning on ceiling vents without a drop cloth directly below
- Don’t use a shop vac without a filter on return vents — unfiltered exhaust blows dust back into the room
For removing dust from vents without full removal, an extendable microfiber duster with a flexible head reaches ceiling registers from the floor and handles most of the visible buildup between deep cleans.
How to handle mold, heavy grime, and disinfection safely
Mold on a vent cover surface is a different problem from mold inside the duct system. The first you can often address yourself; the second requires professional inspection.

For surface mold on a removable plastic or metal cover, a diluted bleach solution (one cup of bleach per gallon of water) applied with a soft brush, left for ten minutes, then rinsed thoroughly and dried completely is generally effective. Wear gloves, an N95 mask, and work in a ventilated area. Do not use bleach on bare metal or painted surfaces.
The EPA recommends considering professional duct cleaning when there is substantial visible mold growth inside the duct system, vermin infestation, or ducts clogged with significant debris. If mold appears on the duct walls beyond the register opening, or if you notice mold on insulated duct liner, stop DIY cleaning and call a professional as explained in Should the Air Ducts in the Home Be Cleaned? – PuroClean. Wet insulated liner cannot be effectively cleaned with household tools and typically needs replacement.
On the topic of biocides and sealants: the EPA and industry groups do not recommend routine application of chemical sealants or biocides in duct systems. If a provider suggests coating your ducts as a standard step, that’s worth questioning. These products should only be used after thorough mechanical cleaning and only when specifically indicated — not as a substitute for it. For NY/NJ/CT homeowners dealing with mold near registers, the localized guidance on mold on air vents covers what to watch for and when to escalate.
Pro Tip: If you’re unsure whether what you’re seeing is mold or just dark dust, wipe the spot with a damp white cloth. Mold typically smears and leaves a greenish or black stain; dust wipes off cleanly.
How often should you clean vent covers?
The short answer: wipe monthly, deep clean one to two times per year. That schedule keeps most registers looking clean and prevents heavy buildup from becoming a bigger job.
| Task | Recommended frequency |
|---|---|
| Wipe exterior of vent covers | Monthly |
| Deep wash (remove, soak, scrub, dry) | 1–2 times per year |
| Inspect for mold, damage, or debris | After renovation or heavy dust event |
| Check or replace HVAC filter | Monthly (pets/allergies) or per manufacturer guidance |
Filter maintenance is closely tied to how fast your registers accumulate dust. A clogged filter pushes more particulates past the media and deposits them on register surfaces faster. MERV 8–11 filters balance particle capture with airflow for most residential systems; HEPA-rated filters offer finer filtration but require a system rated to handle the added resistance.
For preventing dust in vents between cleanings, a few habits help: vacuum return grilles weekly in pet-heavy homes, keep HVAC closet doors closed to reduce debris near the air handler, and control indoor humidity (ideally 30–50%) to discourage mold growth. A structured vent cleaning plan makes it easier to stay consistent without overthinking the schedule.
When should you hire a professional duct cleaning service?
DIY cleaning handles register covers and the first foot or two of duct opening well. Beyond that, trunk lines, coils, and the blower compartment require professional equipment. Attempting to scrub deep into the system with consumer tools can push contamination further in rather than out.
Signs to call a professional:
- Visible mold inside the duct beyond the register surface
- Pest or rodent activity (droppings, nesting material near registers)
- Debris actively shedding from registers when the system runs
- Persistent musty or chemical odors that don’t clear after cleaning covers
- Post-construction dust throughout the system after a renovation
- Airflow noticeably weaker at certain registers despite clean filters
What a legitimate service should do:
- Inspect the system first — camera documentation is a good sign
- Use negative-pressure vacuuming combined with agitation tools (rotary brushes, air whips) to loosen and capture contaminants simultaneously
- Address the full system — registers, trunk lines, coils, and blower — not just the accessible vents
- Provide a written post-cleaning checklist and scope of work
Questions worth asking before booking:
- Are you NADCA-certified or do you follow NADCA standards?
- What components are included in the quoted scope?
- Do you provide before-and-after documentation?
- What’s your process if mold is found during inspection?
For NY, NJ, and CT homes — which range from pre-war apartment buildings to newer suburban construction — choose a provider familiar with local building types and duct configurations. Older buildings often have flex duct or non-standard layouts that require different access strategies. You can also review signs your air ducts need cleaning to help decide whether a professional visit is warranted before you call.
A technician’s honest perspective on DIY vent cleaning
The most common mistake I see is over-soaking. Homeowners submerge a painted metal cover, leave it too long, and the paint bubbles or the frame warps. The second most common: using a stiff wire brush on plastic registers and leaving permanent scratches. Both are easy to avoid with the right tools and a little patience.
The habit that makes the biggest difference between cleanings is filter changes. A fresh filter does more for indoor air quality than any amount of register scrubbing. If you have pets or anyone in the home with allergies, check the filter every month without exception.
One practical tip that most guides skip: document your register orientation with a phone photo before every removal. Louvers that face the wrong direction after reinstallation reduce airflow noticeably, and it’s a surprisingly easy mistake to make when you’re working on multiple vents in the same session.
Professional vent and duct cleaning in NY, NJ, and CT
When DIY reaches its limits — visible mold inside ducts, persistent odors, post-renovation debris, or pest activity — a professional inspection is the right next step, not another round of scrubbing.

Amazonairpro serves residential and commercial clients across New York, New Jersey, and Connecticut with full HVAC and air duct cleaning services that go well beyond register covers: negative-pressure duct cleaning, dryer vent cleaning, coil and blower cleaning, antimicrobial duct treatment, and chimney cleaning. The team follows NADCA-aligned methods, provides inspection documentation, and delivers a written post-job checklist so you know exactly what was done. If you’re not sure whether your system needs professional attention, the diagnostic guide on air duct cleaning triggers is a good starting point. To schedule an inspection or get a quote, visit Amazonairpro’s booking page directly.
Sources
- Should You Have the Air Ducts in Your Home Cleaned? | US EPA
- Proper Cleaning Methods | National Air Duct Cleaners Association (NADCA)
- How to clean vent covers and how often to do it – TODAY
- How To Clean Dusty Vent Covers—And Why You Shouldn’t Ignore Them | Southern Living
FAQ
Can you clean air ducts without removing the vent covers?
Yes, partially. You can vacuum the cover face and wipe accessible slats in place, but removing the cover lets you clean more thoroughly and inspect the duct opening for mold or debris.
What are the signs that your air ducts need professional cleaning?
Visible mold inside the duct, pest activity near registers, debris shedding when the system runs, and persistent odors that don’t clear after cleaning covers are the main triggers the EPA identifies for professional inspection.
How do professional duct cleaners actually clean the vents?
NADCA standards require simultaneous agitation (rotary brushes or air whips) and continuous negative-pressure vacuuming to loosen and capture contaminants without redistributing them into living spaces.
How can you clean vent covers yourself at home?
Turn off the HVAC, remove the cover, vacuum loose dust, wash plastic or metal covers in warm soapy water with a soft brush, rinse thoroughly, dry completely, and reinstall. Wood and painted covers should be wiped with a damp microfiber cloth rather than soaked.
Recommended
- Step-by-step guide to building a vent cleaning plan – Amazon Air Duct Cleaning
- Safe vent cleaning practices to protect your home’s air – Amazon Air Duct Cleaning
- Essential residential vent cleaning steps for healthier air – Amazon Air Duct Cleaning
- Scheduling Seasonal Vent Cleaning: a Homeowner’s Guide – Amazon Air Duct Cleaning